Make a hand-waving vehicle
Build a small cardboard car with a paper fan or paddle so it moves when you wave your hand, learning about air and motion.


Step-by-step guide to make a hand-waving vehicle
Step 1
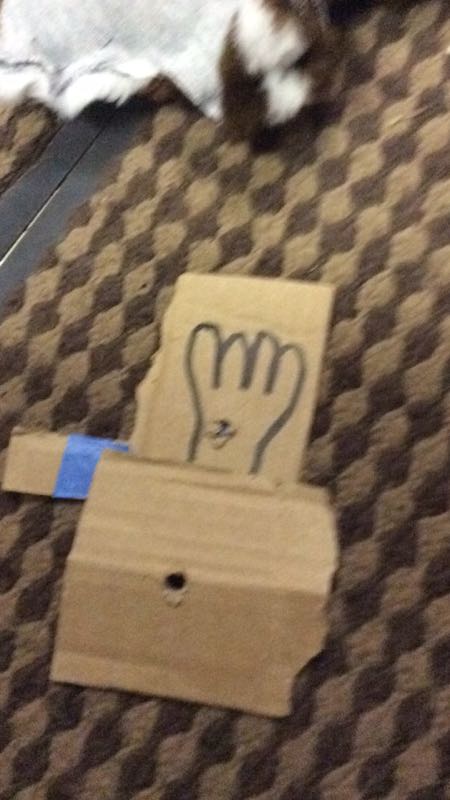
Cut a rectangle of cardboard about 15 cm by 8 cm to make the car base.
Step 2
Mark two axle hole spots about 2 cm in from each short edge along the center line.
Step 3
Carefully make small holes at the marked spots so a skewer or straw will fit through.
Step 4
Slide the two wooden skewers or straws through the holes to make the front and back axles.
Step 5
Push a bottle cap onto each end of the skewers so you have four wheels.
Step 6
Tape each wheel to the skewer end if the caps slip off.
Step 7
Trim any extra skewer or straw ends so the wheels turn freely without rubbing.
Step 8
Cut a paper rectangle about 6 cm by 8 cm to be your paddle or fan.
Step 9
Tape the paper paddle to a short piece of skewer or a straw to make a paddle handle.
Step 10
Tape the paddle handle upright to the rear center of the cardboard base so the paddle sits behind the car.
Step 11
Decorate your car with markers or crayons to make it look awesome.
Step 12
Place the car on a smooth flat floor so it can roll easily.
Step 13
Hold your hand about 20 cm behind the paddle and wave it quickly to push air and make the car move forward.
Step 14
Share your finished creation on DIY.org
Help!?
What can we use instead of wooden skewers, straws, or bottle caps if those are hard to find?
If you don't have wooden skewers or straws for axles, use trimmed wooden chopsticks or thick pencils, and replace bottle caps with jar lids, small plastic lids, or stacked punched cardboard circles taped securely as wheels.
Why won't the wheels turn freely or why do the caps slip off, and how can we fix it?
If wheels rub or slip, trim any excess skewer or straw ends, re-center the axles in the holes so the bottle caps don't touch the cardboard, and tape each wheel to the skewer end to secure it.
How can I change the project for younger kids or make it more challenging for older kids?
For preschoolers, pre-cut the 15 cm x 8 cm cardboard base and pre-poke the axle holes so they can slide in axles, attach wheels, and decorate, while older kids can design angled or larger paddles, add steering with a bendable straw, or replace tape with glue for stronger joins.
How can we improve or personalize the car to make it go faster or look cooler?
To enhance the car, decorate the cardboard base, experiment with different paddle sizes or angles (try bigger than the 6 cm x 8 cm paddle), swap bottle caps for smoother jar lids, or add low-friction straw sleeves on the axles to increase speed and performance.
Watch videos on how to make a hand-waving vehicle
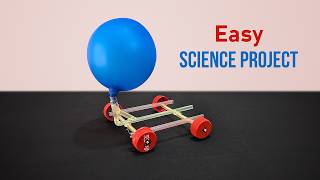
How to make a Simple Balloon Powered Car | DIY Air Powered Car | Science Project
4 Videos
How to make a Simple Balloon Powered Car | DIY Air Powered Car | Science Project
Easy Science project | DIY air powered car
Build a Self-Driving Arduino Car | Science Project
Balloon Powered Car more easy | Easy Science Project
Facts about air and motion
🌬️ Air is invisible but it has mass and pressure — moving air can push lightweight things like a paper car!
🚗 Toy cars—and your cardboard car—go farther on smooth floors because wheels and low friction help them glide.
🖐️ A quick hand wave acts like a tiny fan: it sends a pulse of air that can act as the car's engine.
📦 Corrugated cardboard (the bumpy kind) was developed in the 1800s and is light, strong, and perfect for model building.
♻️ Cardboard is recyclable and easy to decorate, so you can design bright, eco-friendly cars with markers and stickers.
How do you make a hand-waving cardboard car that moves when you wave your hand?
What materials do I need to build a hand-waving vehicle?
What ages is this hand-waving car activity suitable for?
What are the benefits, safety tips, and fun variations for the hand-waving vehicle?
