Storytelling With Origami
Fold simple origami characters and scenery, then arrange them into a short puppet-style story to develop creativity, sequencing, and storytelling skills.


Step-by-step guide to Storytelling With Origami
Step 1
Gather all materials on a clean table so you have everything ready.
Step 2
Choose up to three characters and one scenery piece you want to make like a cat a bird and a tree.
Step 3
Place one square sheet of paper in front of you for your first character.
Step 4
Fold the square diagonally in half to make a triangle and press the crease firmly.
Step 5
Fold the top two corners of the triangle down toward the center to form ears.
Step 6
Fold the bottom point of the triangle up about one third to make a chin base.
Step 7
Tape the back of the folded paper to hold the folds in place.
Step 8
Decorate the character with a face and colours using your colouring materials.
Step 9
Tape a popsicle stick to the back of the character to make a puppet handle.
Step 10
Repeat Steps 3 through 9 to make one or two more characters or a flat scenery piece.
Step 11
Decorate the inside of the shoebox or cardboard to create a background scene.
Step 12
Arrange your puppets and scenery inside the shoebox where you want them to start.
Step 13
Practice your puppet story by moving the characters through a beginning middle and end.
Step 14
Share your finished creation on DIY.org
Help!?
What can I use if I don't have square origami paper or popsicle sticks?
Cut a regular sheet of paper into a square for Step 3 and use a craft stick, straw, wooden skewer, or a small strip of cardboard taped to the back in Step 9 instead of a popsicle stick.
My triangle keeps unfolding; how can I fix it?
Press the diagonal crease firmly in Step 4, re-fold the top corners exactly toward the center (Step 5), and add extra tape or a dab of glue on the back (Step 8) before taping the popsicle stick in Step 9 so the puppet holds its shape.
How can I change this activity for younger or older kids?
For toddlers, use larger pre-cut squares and help with the diagonal and ear folds (Steps 3–5) and let them decorate with big markers, while older kids can make smaller, more detailed characters, add a flat scenery piece (Step 10), and write a scripted beginning, middle, and end for Steps 12–13.
Any ideas to make the shoebox stage or puppets more exciting?
Decorate the inside of the shoebox with layered backgrounds, add LED tea lights or cotton for clouds (Step 11), make movable mouths or extra limbs with brads and paper, and record your puppet story to share on DIY.org (Steps 12–13).
Watch videos on how to tell stories with origami
Origami For Kids | Paper Crafts | Fun Activities For Kids
4 Videos

Origami For Kids | Paper Crafts | Fun Activities For Kids

How To Fold An Origami Frog
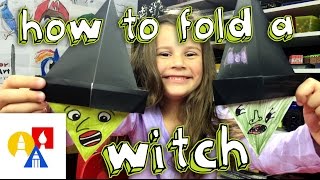
How To Fold An Origami Witch

How To Fold An Origami Dove 🕊
Facts about origami and storytelling for kids
🕊️ Folding 1,000 origami cranes (senbazuru) is a Japanese tradition for wishes and peace.
🎴 Kamishibai means "paper drama" — street storytellers used illustrated boards and narration to perform tales.
✂️ Most people can only fold a sheet of paper in half about 7–8 times by hand, so storytellers use clever tricks instead!
🎭 Making puppet-style stories with origami helps kids practice sequencing, vocabulary, and confidence on stage.
🧩 Origami can be super simple or wildly complex — some models have hundreds of tiny, precise folds and special diagrams called crease patterns.
How do you create a puppet-style story using origami?
What materials do I need for origami storytelling?
What ages is storytelling with origami suitable for?
What are the benefits of storytelling with origami?
