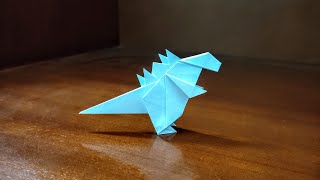
Make an Origami Godzilla!
Fold and decorate an origami Godzilla model from square paper, following step-by-step folds to learn symmetry, patience, and simple paper sculpting skills.


Step-by-step guide to make an origami Godzilla
Step 1
Place your square paper colored side down on the table so the plain side is facing up.
Step 2
Fold the paper diagonally corner to corner then open it to make a crease from one corner to the opposite corner.
Step 3
Fold the other two corners together diagonally then open it so you have an X crease across the paper.
Step 4
Fold the top edge down to meet the bottom edge then open to make a horizontal crease.
Step 5
Fold the left edge over to meet the right edge then open to make a vertical crease.
Step 6
Collapse the paper into a square base by bringing the four corners together and flattening the model into a smaller square.
Step 7
Fold the right top flap’s outer edge into the center line and crease well.
Step 8
Fold the left top flap’s outer edge into the center line and crease well.
Step 9
Fold the bottom point of the kite shape upward about two thirds of the way to form Godzilla’s tail.
Step 10
Fold the very tip of the upper point back down a little to form Godzilla’s head angle.
Step 11
Fold the left bottom corner outward a little to make Godzilla’s left leg and crease it.
Step 12
Fold the right bottom corner outward a little to make Godzilla’s right leg and crease it.
Step 13
Make small zigzag pleats along the top back from the head to the tail to form spines and press each crease flat.
Step 14
Decorate your Godzilla by drawing eyes teeth and scales and color the spines and body however you like.
Step 15
Take a photo of your finished Origami Godzilla and share your creation on DIY.org
Help!?
What can we use instead of the square colored paper if we don't have origami paper?
Cut a sheet of printer paper, wrapping paper, or a magazine page into a square and place it colored side down as the instructions require.
I'm stuck collapsing the paper into a square base—any tips to make that step work?
If the square base won't form, reopen to the X and center creases, push the diagonal creases inward, bring the four corners together and flatten the model into the smaller square while pressing each crease flat.
How can we adapt this activity for younger children or make it more challenging for older kids?
For younger kids use a larger pre-cut square and pre-crease the diagonal and center folds, and for older kids add more precise zigzag pleats for detailed spines and smaller, sharper folds for the head and legs.
What are some creative ways to personalize or enhance our finished Origami Godzilla beyond coloring?
After drawing eyes and scales, glue on googly eyes or tiny tissue-paper scales along the zigzag back pleats, mount Godzilla on a painted cardboard 'city' for a diorama, and then take a photo to share on DIY.org.
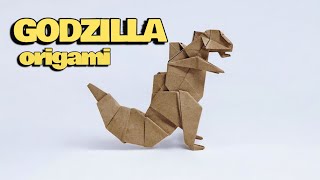
Watch videos on how to make an origami Godzilla
How to make Origami Godzilla 〜ゴジラ〜 | DIY Easy Origami Paper Folding
4 Videos

How to make Origami Godzilla 〜ゴジラ〜 | DIY Easy Origami Paper Folding
Origami Godzilla Easy Step By Step
ORIGAMI GODZILLA TUTORIAL / How to make an Origami Godzilla
Origami Easy Shin Godzilla Step By Step
Facts about origami and paper folding
🦖 Godzilla first stomped onto screens in the 1954 Japanese film as a giant monster born from nuclear fears.
📄 The word "origami" comes from Japanese ori (folding) + kami (paper) — a single square can become dozens of creatures!
📐 Traditional origami uses only folding (no cuts or glue), so your Godzilla can be sculpted from one square sheet.
🔁 Folding teaches symmetry and fractions — a center fold creates matching halves that help shape legs, tails, and spines.
🎎 Kaiju culture and papercraft overlap a lot: fans often make paper models of famous monsters like Godzilla.
How do you fold and decorate an origami Godzilla?
What materials do I need to make an origami Godzilla?
What ages is folding an origami Godzilla suitable for?
What are the benefits of making an origami Godzilla?
