Code a Robotic Vaccum Cleaner
Code a robotic vacuum cleaner using a programmable kit like micro:bit or Scratch, add sensors to avoid obstacles, and test cleaning routes.


Step-by-step guide to code a robotic vacuum cleaner
How to Make a Vacuuming Robot - DIY Roomba
Step 1
Gather all Materials Needed and place them on a clean work surface.
Step 2
Insert the batteries into the robot base battery pack.
Step 3
Attach the programmable kit to the robot base using tape or a mounting holder.
Step 4
Connect the distance sensor to the programmable board using jumper wires and clips.
Step 5
Mount the sponge or soft brush to the front of the robot using double-sided tape.
Step 6
Open the micro:bit or Scratch editor on your computer and start a new project.
Step 7
Write a program that makes the robot drive forward avoid obstacles using the sensor and follow a zigzag cleaning path.
Step 8
Upload the program from the editor to your programmable board.
Step 9
Place the robot on the floor at a clear start spot marked with cardboard.
Step 10
Turn on the robot and run your program to start the test.
Step 11
Watch the robot as it runs and notice how it handles obstacles and the cleaning pattern.
Step 12
Choose one change you want to make to improve its route or obstacle reactions.
Step 13
Edit your code to make that change and upload the new program to the board.
Step 14
Share your finished robotic vacuum cleaner project on DIY.org
Help!?
What can we use if we don't have the distance sensor or a mounting holder?
If you don't have a distance sensor or holder you can substitute a simple bumper switch made from aluminum foil and a spring or an IR sensor and connect it to the programmable board with jumper wires as instructed in step 4.
My robot drives forward but doesn't avoid obstacles—what should I check first?
If the robot drives forward without avoiding obstacles, first verify the batteries are correctly inserted in the robot base pack (step 2) and the power is on (step 10), then check that the distance sensor's jumper wires are firmly connected to the same input pins your micro:bit/Scratch program uses (steps 4 and 6) and re-upload the code (step 8).
How can I adapt this activity for younger or older children?
For younger kids (4–7) skip wiring and use a pre-built toy chassis so they can attach the sponge (step 5) and press run (step 10), while older kids (8+) should wire the distance sensor to the programmable kit (step 4) and write the zigzag and obstacle-avoidance code in the editor (steps 6–7).
What are simple ways to improve or personalize our robotic vacuum after the first test?
To enhance the project, attach a lightweight dust bin or small container to the robot base (steps 3 and 5), add an LED to signal obstacle detection, and edit your code to change the zigzag pattern or log obstacle counts before re-uploading and sharing on DIY.org (steps 11–13).
Watch videos on how to code a robotic vacuum cleaner
How to Make Arduino based Smart Vacuum Cleaner Robot Best for Science Project
4 Videos
How to Make Arduino based Smart Vacuum Cleaner Robot Best for Science Project
How to Make Arduino based WiFi-Controlled Smart Vacuum Cleaner Robot Best for Science Project V2 DIY

How to make a simple smart robot vacuum cleaner version 2
Smart Vacuum Cleaner Robot Using Arduino With Remote Control + VoiceControl + Ultrasonic Sensor
Facts about robotics and coding for kids
🤖 The Roomba, introduced in 2002, helped make robot vacuums a household favorite.
🧹 By 2020, robot vacuum sales surpassed 20 million units worldwide — lots of little helpers!
🎮 The BBC micro:bit was gifted to about 1 million UK students in 2016 to spark coding and electronics learning.
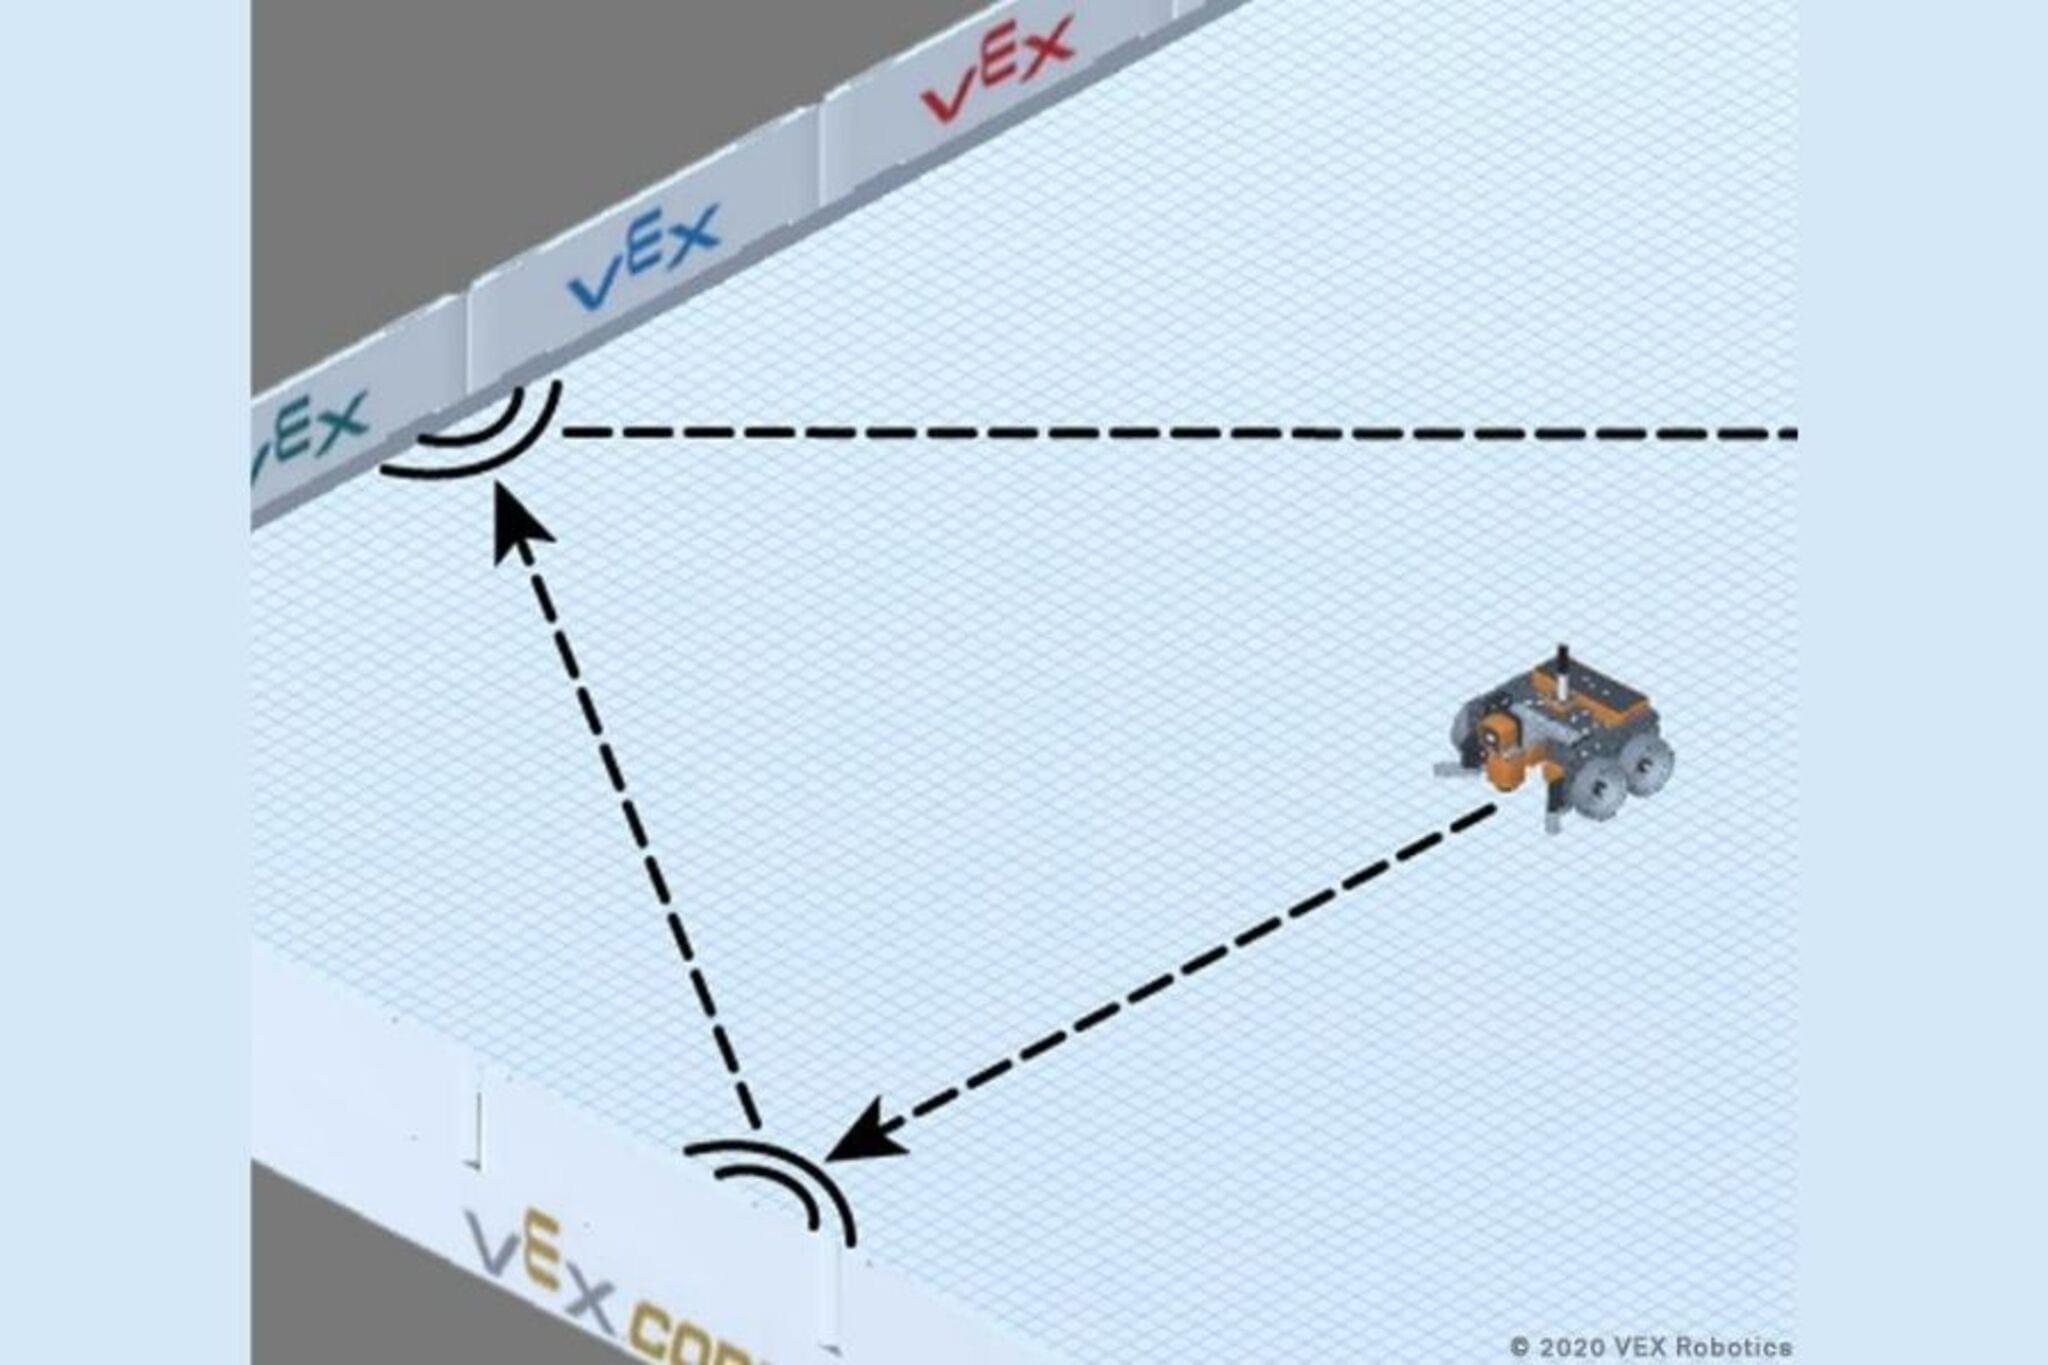
📡 Ultrasonic sensors 'ping' with sound and measure echo time to figure out how far obstacles are—like echolocation!
🧭 Some robot vacuums use SLAM (Simultaneous Localization and Mapping) to build maps and clean in neat, efficient routes.
How do you code a robotic vacuum cleaner?
What materials do I need for a robotic vacuum project?
What ages is coding a robotic vacuum suitable for?
What safety tips and benefits come from this activity?
