Code a Robotic Vacuum Cleaner
Code a simple robotic vacuum using a small robot kit with sensors; program movement, obstacle detection, and basic cleaning behaviors with beginner-friendly code.


Step-by-step guide to code a robotic vacuum cleaner
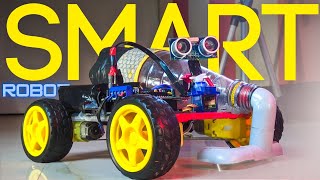
How to Make Arduino based WiFi-Controlled Smart Vacuum Cleaner Robot Best for Science Project V2 DIY
Step 1
Charge the robot's battery fully using the USB cable.
Step 2
Assemble the robot kit following the kit's guide until the motors and distance sensor are connected.
Step 3
Attach the small soft cloth or sock to the front of the robot with tape or a rubber band so it can wipe the floor.
Step 4
Clear a flat open floor area and place the robot on the floor facing forward.
Step 5
Open the robot's coding app or online editor on your computer and create a new project named "RoboVac".
Step 6
Write code to set both motors to move forward at medium speed (about 50%).
Step 7
Add code to read the distance sensor continuously while the robot is moving.
Step 8
Add code that checks if the distance sensor reads less than 15 centimeters and then stops the motors.
Step 9
Add code that makes the robot back up for 0.5 seconds after it stops.
Step 10
Add code that makes the robot turn right about 90 degrees after backing up.
Step 11
Add code that makes the robot go forward for 5 seconds after the turn to create a zigzag cleaning motion.
Step 12
Put the forward movement obstacle routine and the zigzag steps inside a forever loop so the robot keeps cleaning until you stop it.
Step 13
Upload the program from the editor to your robot.
Step 14
Press the robot's start button and watch it clean for a few minutes to see how it behaves.
Step 15
Share your finished RoboVac project on DIY.org.
Help!?
If I don't have the exact USB cable, the kit cloth, or tape/rubber band listed in the instructions, what can I substitute?
Use any USB cable or a phone charger/power bank that fits the robot's charging port to fully charge the battery, replace the small soft cloth or sock with a microfiber cloth or handkerchief for the wiping step, and secure it to the front with a small zip tie, Velcro strip, or twist tie instead of tape or a rubber band.
My robot won't move or the distance sensor doesn't trigger when testing the 'read the distance sensor continuously' step—what should I check?
Verify the battery is fully charged via the USB cable, confirm the motors and distance sensor are connected exactly as shown in the kit's guide, ensure the cloth isn't blocking the sensor, and test each motor and the sensor with a simple one-action program before uploading the full forever loop.
How can I adapt the project for younger children or make it more challenging for older kids?
For younger kids, preassemble the motors and distance sensor and use block-based code that only sets both motors to 50% and stops when distance <15cm, while older kids can replace timed actions like the 0.5s backup and 90° turn with encoder-based movements, add variable speeds, or implement mapping in the coding app.
What are some easy ways to extend or personalize the RoboVac after it runs the zigzag cleaning loop?
Personalize it by swapping the cloth for colored or scented microfiber, add an LED or buzzer that activates when the distance sensor reads <15cm, install a second distance sensor or wheel encoders to improve coverage instead of relying on the 5-second forward and timed 90° turn, and then upload and share the enhanced project on DIY.org.
Watch videos on how to code a robotic vacuum cleaner
How to Make Arduino based Smart Vacuum Cleaner Robot Best for Science Project
4 Videos
How to Make Arduino based Smart Vacuum Cleaner Robot Best for Science Project

How to make a simple smart robot vacuum cleaner version 2

DIY Simple Robot Vacuum Cleaner | Cleaning Robot Arduino | Robot Penghisap Kotoran

Root rt1 iRobot Coding Robot Review: Teach your kid to code!
Facts about robotics and programming for kids
🧹 The first mainstream robotic vacuum, the Roomba, launched in 2002 and made robot cleaning a household idea.
🤖 Robotic vacuums are a form of autonomous robot — sensors + motors + code let them decide where to go without a human driving them.
📡 Simple obstacle detection can use bump switches, infrared (IR) sensors, or ultrasonic sensors — each 'sees' differently.
🗺️ Advanced models may use LIDAR or cameras to build room maps and plan efficient cleaning routes instead of random wandering.
💡 Beginner robot kits can simulate 'cleaning' by adding a spinning brush or programming coverage patterns that visit every square.
How do I guide my child to code a simple robotic vacuum cleaner using a beginner robot kit?
What materials and tools are needed to build and program a kid-friendly robotic vacuum?
What ages is coding a robotic vacuum suitable for?
What safety tips should parents follow when building and coding a robotic vacuum cleaner with kids?
