Recreate Paper Cut City in Layers
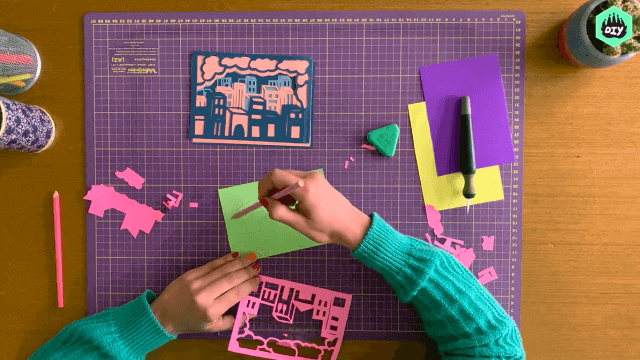
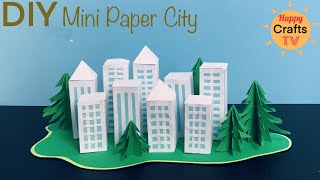
Make a layered paper-cut city scene by designing, cutting, and stacking colored paper buildings, streets, and details to explore depth, perspective, and creativity.


Step-by-step guide to Recreate Paper Cut City in Layers
Step 1
Gather all the Materials Needed and sit at a clear workspace.
Step 2
Sketch a simple layout on scrap paper showing three horizontal layers labeled background midground and foreground.
Step 3
Cut the sturdy cardboard to the size you want for your city base.
Step 4
On a sheet of colored paper draw building silhouettes for the background including simple window outlines and roof shapes.
Step 5
Cut out the background silhouettes carefully along your drawn lines.
Step 6
Make small folded paper spacers by folding short strips of scrap paper into little boxes or loops.
Step 7
Glue the background silhouettes to the top of the cardboard base using the spacers so they stand slightly off the board.
Step 8
On a different colored sheet draw the midground buildings and simple street shapes like roads or bridges.
Step 9
Cut out the midground pieces carefully along your lines.
Step 10
Glue the midground pieces to the base using spacers placing them a bit in front of the background to create depth.
Step 11
On a final colored sheet draw the foreground buildings and street-level details like trees signs and sidewalks.
Step 12
Cut out the foreground pieces carefully along your lines.
Step 13
Glue the foreground pieces to the base with spacers so they cast small shadows and pop forward.
Step 14
Ask an adult to help you upload a photo and a short description of your layered paper-cut city to DIY.org so you can share your creation.
Help!?
What can we use if we don't have sturdy cardboard or glue?
If you don't have sturdy cardboard, double up a cereal box or use foam board, and if you lack glue use double-sided tape, glue dots, or small staples to attach the background, midground, and foreground pieces with your scrap-paper spacers.
My buildings keep flopping over after gluing; how can we fix that?
If silhouettes flop when glued, make larger folded spacers from scrap paper or thin cardboard, press and hold or clip each spacer until the glue dries, or switch to a stronger PVA or tacky glue when attaching the background, midground, and foreground pieces.
How can I adapt this activity for younger or older kids?
For younger children, have an adult pre-draw or pre-cut the silhouettes and let them stick pieces with a glue stick and safety scissors, while older kids can add fine window details with an X-Acto knife, create extra layers, or design bridges and roads on the midground for more complexity.
How can we make the paper-cut city more interesting or shareable?
Enhance and personalize your city by adding marker or watercolor textures to building silhouettes, gluing tiny tissue-paper windows with a battery tea light behind them before mounting the foreground, creating movable parts on tabs, and photographing the finished cardboard base to upload to DIY.org with a short description.
Watch videos on how to Recreate Paper Cut City in Layers
DIY PAPER CITY MODEL I HOW TO MAKE A MINI CITY WITH JUST A4 PAPER I EASY DIY PAPER CRAFTS
4 Videos
DIY PAPER CITY MODEL I HOW TO MAKE A MINI CITY WITH JUST A4 PAPER I EASY DIY PAPER CRAFTS
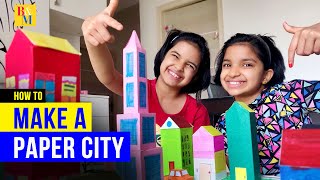
How to Make a Cute Paper City | Easy paper craft buildings & vehicles | Craft | Kids | Origami | DIY

How to Teach Layered Silhouette Cityscape on Tracing Paper | Drawing Art Activity | Zart Art
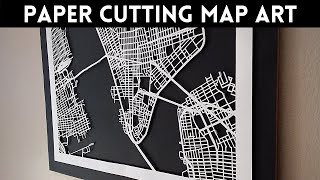
How to Make a Cut Out Map from Paper | New York City Map | 3D Paper Hanging Wall Art
Facts about paper crafts for kids
✂️ Kirigami is the Japanese art of cutting paper — unlike origami, kirigami includes cuts to create intricate shapes.
🏙️ Paper-cut city scenes use stacked layers of paper to create real shadows and a strong sense of depth.
📐 One-point and two-point perspective tricks help buildings look realistic by aligning edges toward vanishing points.
🎨 Using cooler colors (blues, purples) for background layers and warmer colors (reds, yellows) for foreground makes scenes feel deeper.
♻️ Recycled paper like cereal boxes, magazine pages, or scrap cardstock can make sturdy buildings and reduce waste.
How do you make a layered paper-cut city scene?
What materials do I need to make a layered paper-cut city?
What ages is this layered paper-cut city activity suitable for?
What are the benefits of making a layered paper-cut city?
