Draw a Kawaii Character with DIY Star @Snowflake333
Draw a kawaii character and create a DIY star accessory using simple shapes, coloring with markers, and step-by-step guidance from @Snowflake333.


Drawing Apps
Step-by-step guide to draw a kawaii character with DIY star @Snowflake333
Step 1
Place a sheet of paper on a flat surface and put your pencil and eraser next to it.
Step 2
Open or find @Snowflake333's step-by-step guide to look at the kawaii style you will copy.
Step 3
Lightly draw a large circle near the top of the paper for the kawaii character's head.
Step 4
Draw a small rounded bean shape under the circle for the character's body.
Step 5
Draw two big round eyes inside the head using simple circles.
Step 6
Draw a tiny smiling mouth under the eyes.
Step 7
Draw two small curved cheek lines to make cute blush marks.
Step 8
Draw simple rounded arms and short legs coming from the body.
Step 9
On a separate small piece of paper draw a five-point star using straight lines.
Step 10
Cut out the star carefully with scissors.
Step 11
Decorate and color the star using markers and small shapes like dots or hearts.
Step 12
Glue a short piece of string or ribbon to the back of the star to make it a hanging accessory.
Step 13
Color your kawaii character with markers using bright happy colors.
Step 14
Trace over your pencil lines with a black marker to make your drawing bold and neat.
Step 15
Share a photo of your finished kawaii character and DIY star on DIY.org.
Help!?
What can we use if we don't have scissors, string, or a black marker?
If you don't have scissors, ask an adult to cut the star or use safety scissors or torn paper for the star; if you lack string or ribbon, make a paper loop or use tape to hang it, and if you don't have a black marker trace over your pencil lines with a dark crayon or colored pencil.
My five-point star keeps tearing or looking uneven when I cut it—how can I fix that?
Redraw the five-point star on thicker paper or cardstock, cut slowly with small snips from the center out or fold the small paper and cut one half at a time, and reinforce fragile edges with clear tape before decorating.
How can I change the activity for younger kids or make it more challenging for older kids?
For younger children, pre-draw the large circle head and bean body on bigger paper, give chunky markers and safety scissors or star stickers, while older kids can add shading and patterns with fine liners, cut the star from cardstock, and create multiple hanging stars with string to form a mobile.
What are some ways to personalize or extend my finished kawaii character and DIY star?
Personalize by coloring unique outfits before tracing with the black marker, glue on googly eyes or sequins to the character and star, add glitter or small stickers to the star, or attach several decorated stars on strings to make a hanging mobile or backpack charm to share on DIY.org.
Watch videos on how to draw a kawaii character with DIY star @Snowflake333
10 DIY KAWAII CHARMS - POLYMER CLAY TUTORIAL
4 Videos
10 DIY KAWAII CHARMS - POLYMER CLAY TUTORIAL
DIY Paper Snowflake Tutorial | Easy Winter Craft for All Ages
20 DIY KAWAII CRAFTS YOU WILL LOVE - Kawaii School Supplies - Paper Craft - Room Decor and more...
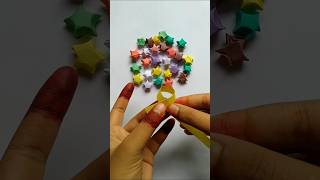
Easy Paper Stars Tutorial ✨ | Cute Origami Craft 🌟#youtubeshorts #shorts
Facts about drawing and simple crafts for kids
✨ Kawaii means "cute" in Japanese and grew into a big pop-culture movement in Japan during the 1970s.
🐻 Kawaii characters often use oversized heads and big eyes with tiny mouths to look extra friendly and lovable.
🖊️ Dual-tip or alcohol-based markers are favorites for coloring characters because they blend smoothly and add bright colors.
✂️ You can draw a classic five-pointed star with one continuous line by connecting five outer points in order.
📝 'Chibi' literally means "short" or "small" in Japanese and describes tiny, simplified character designs.
How do I draw a kawaii character and make the DIY star accessory from @Snowflake333?
What materials do I need for Draw a Kawaii Character with DIY Star @Snowflake333?
What ages is the Draw a Kawaii Character with DIY Star activity suitable for?
What are the benefits of drawing kawaii characters and making a DIY star?
