DIY Christmas Advent Calendar with DIY STAR LiviaBivia!
Make a DIY Christmas advent calendar with numbered pockets and a decorative paper star topper, then fill pockets with small surprises for each day.


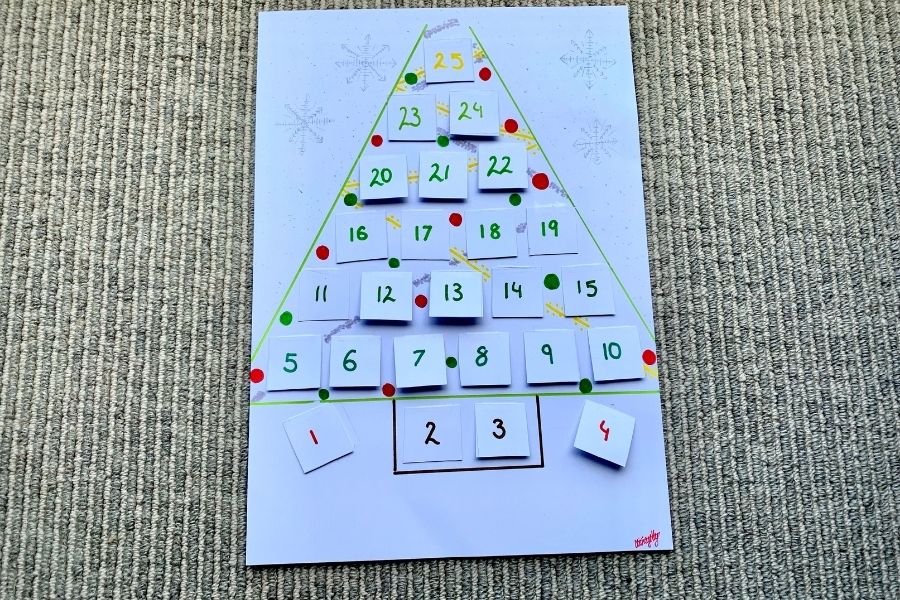

Step-by-step guide to make a DIY Christmas advent calendar with a paper star topper
Step 1
Lay your large cardboard or poster board flat on the table.
Step 2
Decide how many pockets you want for your advent calendar (for example 24) and choose a rows by columns layout.
Step 3
Use your ruler and pencil to lightly mark the positions for each pocket on the cardboard.
Step 4
Cut a paper rectangle for each pocket from colored paper about 10 cm by 7 cm (4 in by 3 in).
Step 5
Fold each rectangle up about one third from the bottom to make a pocket flap.
Step 6
Apply glue to the back of the folded flap on each pocket piece.
Step 7
Press each pocket onto its marked spot on the board and hold for a few seconds so it sticks.
Step 8
Write numbers on the pockets from 1 to your chosen number using a marker or add number stickers.
Step 9
Cut a large star shape from colored paper to make your decorative star topper.
Step 10
Decorate the star with coloring materials and stickers to make it shine.
Step 11
Attach the decorated star to the top of your cardboard using glue or tape.
Step 12
Tie string or ribbon to the top of the board so you can hang the calendar if you want to.
Step 13
Fill each numbered pocket with a small surprise like a note sticker or tiny toy.
Step 14
Share a photo of your finished DIY Christmas advent calendar with the star topper on DIY.org.
Help!?
What can I use if I don't have large cardboard, colored paper, or glue listed in the instructions?
Use a flattened cereal box or shoebox cardboard for the board, color plain printer paper with crayons to make the 10 cm × 7 cm pocket rectangles, and substitute tape or a glue stick in place of white glue when attaching pockets.
My pockets keep coming off the board—what step am I doing wrong and how can I fix it?
Make sure you fold each rectangle up about one third from the bottom, apply glue to the back of the folded flap (or use double-sided tape), press each pocket onto its penciled mark on the board and hold for several seconds so it sticks firmly.
How can I adapt this advent calendar activity for different age groups?
For preschoolers have an adult pre-cut the 10×7 cm pockets and let them decorate the star and stick number stickers, for elementary kids let them measure, cut, fold and write numbers, and for older kids let them design the rows×columns layout and add personalized small gifts or notes to each pocket.
What are simple ways to enhance or personalize the finished calendar beyond the basic instructions?
Make some pockets larger for tiny toys, line pockets with patterned paper or fabric, decorate the star with glitter and a battery tea light behind it for a glow, and fill pockets with mini activity notes before sharing your photo on DIY.org.
Watch videos on how to make a DIY Christmas advent calendar with a paper star topper
DIY Advent Calendar in a Box: Easy Tutorial
4 Videos
DIY Advent Calendar in a Box: Easy Tutorial
Make your own Advent Calendar
DIY Christmas Advent Calendar | Tutorial
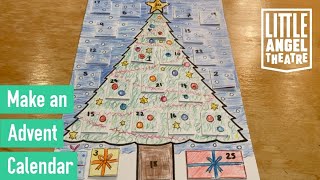
Make an Advent Calendar I Activities for Children
Facts about Christmas crafts for kids
🎁 Advent calendars have roots in 19th-century Germany and the first mass-printed versions appeared in the early 1900s.
🎄 Prince Albert helped popularize the indoor Christmas tree in Britain in the 1840s, bringing a German holiday tradition to the royal family.
✂️ Papercraft can transform simple sheets into pockets, boxes, and stars — and paper is recyclable, making it a craft-friendly material.
⭐ Origami literally means "paper folding" in Japanese and traditional origami relies only on folds — no glue or scissors.
🌟 The Moravian star, a multi-pointed paper star decoration, became popular in 19th-century German communities and is now a common Christmas ornament.
How do I make a DIY Christmas advent calendar with numbered pockets and a decorative paper star topper?
What materials do I need to make a DIY Christmas advent calendar with a DIY star topper?
What ages is this pocket advent calendar activity suitable for?
What are the benefits of making a DIY Christmas advent calendar with kids?
