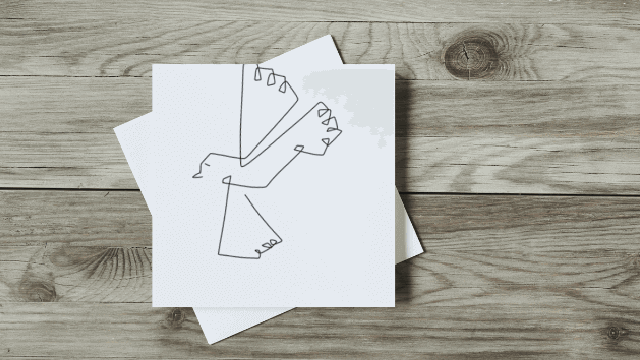
Geometric One Line Bird
Draw a geometric bird using a single continuous line, combining simple shapes and angles while practicing planning, steady hand control, and creative problem-solving.

Drawing Apps
Step-by-step guide to draw a Geometric One Line Bird
Step 1
Lay your paper flat on a table and place your scrap paper and pencil nearby so you are ready to practice.
Step 2
Look at birds or pictures for one minute and decide where the body wing tail head and beak will go on your page.
Step 3
On scrap paper practice drawing one continuous line that makes a circle a triangle and a rectangle without lifting your pencil.
Step 4
Lightly draw big simple geometric shapes on your final paper to mark the body wing tail head and beak using your pencil.
Step 5
With one finger trace the route your pencil will take to connect all the shapes in one continuous path so you can see how the line will travel.
Step 6
Start at one spot and draw the whole bird with your pencil in one continuous line without lifting the pencil from the paper.
Step 7
If a section feels shaky slowly retrace that same continuous path once with your pencil to steady your stroke.
Step 8
Use the eraser to gently remove any extra guideline marks while leaving your continuous pencil line intact.
Step 9
Slowly trace over your continuous pencil line once with the black marker or pen without lifting the pen.
Step 10
Wait a minute for the ink to dry so it doesn't smudge.
Step 11
Add connected interior details like an eye or feather by looping the same continuous line into the detail and back to the main line.
Step 12
Use your coloring materials to color or decorate areas of your bird if you like.
Step 13
Take a photo of your finished geometric one line bird and share your creation on DIY.org
Help!?
I don't have a black marker or fine pen—what can I use instead when finalizing the continuous line?
If you don't have a black marker or pen to "Slowly trace over your continuous pencil line once," substitute a dark ballpoint pen, fine-tip Sharpie, dark colored pencil, or a thin paintbrush with black acrylic and then wait for the ink or paint to dry before smudging.
My continuous line keeps feeling shaky or I accidentally lift the pencil—how can I fix that?
Use the "On scrap paper practice" step and the "With one finger trace the route your pencil will take" rehearsal to build confidence, draw the final line slowly, and if a section feels shaky "slowly retrace that same continuous path once" to steady your stroke.
How can I adapt this activity for younger or older children?
For younger kids, follow the "Lightly draw big simple geometric shapes" step on larger paper and let them trace with a thick marker, while older kids can experiment on scrap paper with more complex continuous-shape combos, add connected interior details, or set a timed challenge.
How can we extend or personalize the finished geometric one-line bird?
After you "Use the eraser to gently remove any extra guideline marks" and "Wait a minute for the ink to dry," personalize by adding patterns with your coloring materials, painting a background wash, drawing additional linked birds to make a flock, and then take a photo to share on DIY.org.
Watch videos on how to draw a Geometric One Line Bird
How to Draw Parrot 🦜 in Geometric Style | Shapes Art for Kids | Learn with Fun | Doodle World Kids
4 Videos
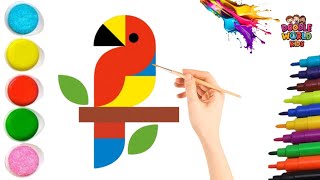
How to Draw Parrot 🦜 in Geometric Style | Shapes Art for Kids | Learn with Fun | Doodle World Kids
How To Draw Baby Bird WITH SHAPES! (for young artists)
How To Draw A Bird | Simple Drawing Lesson for Kids | Step By Step

How to draw a birds | Easy bird drawing tutorial | kids drawing
Facts about one-line drawing and geometric art
🖊️ Pablo Picasso made famous single-line drawings of bulls and animals, showing how expressive one continuous stroke can be.
🐦 There are over 10,000 bird species worldwide — lots of shapes and silhouettes to inspire your geometric bird!
📐 Triangles are one of the sturdiest simple shapes and are great building blocks for geometric designs.
🧠 Blind-contour and continuous-line exercises are used by artists to boost hand-eye coordination and observation.
✏️ Continuous-line (one-line) drawings force you to plan your path and solve visual puzzles without lifting your pen.
How do you draw a geometric one-line bird?
What materials do I need for a geometric one-line bird activity?
What ages is the geometric one-line bird activity suitable for?
What are the benefits of drawing a geometric one-line bird?
