What's Your Favorite One Line Style?
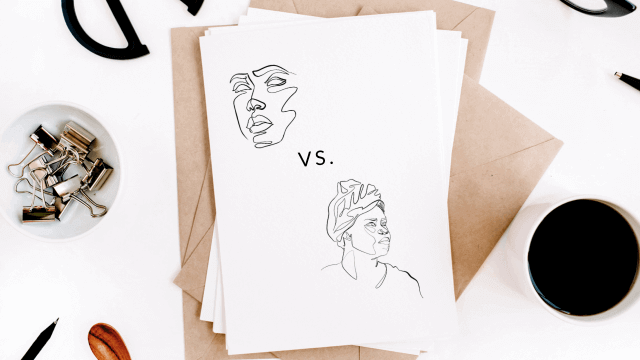
Create continuous one-line drawings of portraits or animals using pencil and paper, exploring shapes, proportions, and creativity while practicing steady hand control.


Drawing Apps
Step-by-step guide to create continuous one-line portrait and animal drawings
Step 1
Pick a comfy spot and set your paper and pencil on a flat surface.
Step 2
Warm up on a scrap piece of paper by drawing slow continuous loops and squiggles without lifting your pencil.
Step 3
Decide if you will draw a portrait or an animal and find a photo or imagine one to look at.
Step 4
Study your subject and spot the big shapes like a circle for the head or an oval for the body.
Step 5
Make a tiny light dot on the paper where you will start your one-line drawing.
Step 6
Put your pencil on the dot and draw the outer shape of the head or body in one continuous line without lifting.
Step 7
Use the same continuous line to add features like eyes nose mouth ears or paws while moving slowly.
Step 8
Create texture and detail with loops gentle curves and crossings using the same line without lifting your pencil.
Step 9
Press a little harder or lighter as you draw to make parts of the line look thicker or thinner.
Step 10
Connect your line back to the beginning or finish with a neat flourish then lift your pencil.
Step 11
Erase any faint guide dots you made so the drawing looks clean.
Step 12
Add color to your artwork using your colouring materials if you want.
Step 13
Share your finished continuous one-line drawing on DIY.org
Help!?
What can we use if we don't have a pencil, eraser, or colouring materials from the instructions?
Use a ballpoint pen, felt-tip marker, or crayon on any sturdy paper or cardboard placed on a flat surface, and if you lack an eraser accept the permanent line or practice warm-up loops on scrap paper first.
What should we do if our hand keeps lifting the pencil while trying to draw the outer shape and features in one continuous line?
If you keep lifting the pencil when drawing the outer shape or adding eyes and nose, slow down, repeat the warm-up continuous loops on scrap paper, make a tiny light starting dot as instructed, and keep your wrist relaxed while drawing.
How can we change the activity to suit different ages while still following the steps like making guide dots and adding texture?
For younger kids simplify by using larger guide dots and big shapes to trace, while older kids can add finer texture loops, crossings, and pressure variation as in the instructions to create more detailed portraits or animals.
What are some ways to extend or personalize the finished one-line drawing after erasing guide dots and before sharing on DIY.org?
After erasing guide dots you can color with your colouring materials, vary line thickness by pressing harder or lighter, add patterned backgrounds or multiple overlapping one-line figures, and sign or date the piece before sharing on DIY.org.
Watch videos on how to create continuous one-line portrait and animal drawings
One Line Art for Kids: Easy Drawing Tutorials from the Practice Book
4 Videos
One Line Art for Kids: Easy Drawing Tutorials from the Practice Book
15 Easy Single Line Drawings for Kids

2-Minute Art Hack: The ONE Line Drawing Technique That Will Transform Your Sketching!
12 One Line Drawing Ideas/Easy Single Line Drawing for Beginners/kids/One line drawing tutorial
Facts about drawing techniques for kids
🎨 Pablo Picasso made many famous continuous-line portraits—sometimes drawing without lifting his pen to keep the flow.
✍️ Blind-contour exercises are a classic art-teacher trick to sharpen observation and hand–eye coordination.
🐾 A single continuous line can quickly capture an animal's motion and personality better than a slow, detailed sketch.
🧠 Practicing one-line drawings strengthens steady-hand control and boosts focus on shapes and proportions.
⏱️ Many artists use 30–60 second one-line warm-ups to loosen up and spark playful creativity.
How do I create continuous one-line drawings of portraits or animals?
What materials do I need for a one-line drawing activity?
What ages is this continuous one-line drawing activity suitable for?
What are the benefits of practicing one-line drawings with kids?
