Recreate Coconut Tree Leaf on Paper
Draw and recreate a coconut tree leaf on paper using tracing, folding, cutting fringes, and coloring to practice symmetry, observation, and fine motor skills.


Step-by-step guide to recreate a coconut tree leaf on paper
Step 1
Gather all your materials and put them on a flat workspace.
Step 2
Place the picture or real coconut leaf beside your paper so you can look at it while you work.
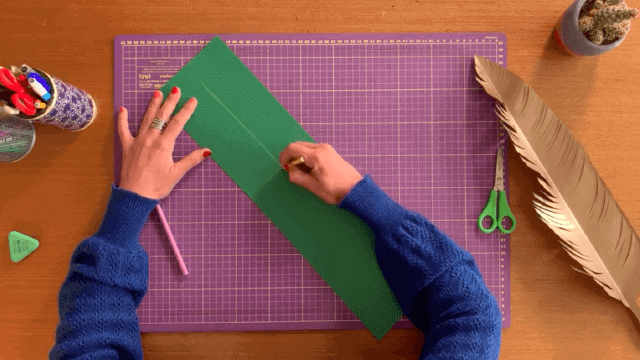
Step 3
Fold the paper lengthwise so the long edges meet and press the fold to make a clear center line.
Step 4
Hold the folded paper over the picture against a window or bright light and trace half of the leaf outline along the fold with your pencil.
Step 5
Darken the pencil outline if it is faint so you can see it clearly for cutting.
Step 6
Cut carefully along the outer pencil outline through both layers of the folded paper.
Step 7
From the outer edge of the cut shape, cut small vertical fringes toward the folded edge and stop about 1 cm from the fold so the center stays connected.
Step 8
Unfold the paper gently to reveal the full symmetrical coconut leaf.
Step 9
Trim any uneven fringe tips to make the leaflets look even.
Step 10
Cut a thin strip of paper and tape it to the base of the leaf to make a stem.
Step 11
Color the leaf with different shades of green using your coloring materials.
Step 12
Add veins and fine details using a darker color while looking at your reference picture.
Step 13
Share your finished coconut tree leaf on DIY.org.
Help!?
If I don't have a bright window to trace the leaf over, what materials can I substitute so I can still trace half the leaf as instructed?
If you don't have a bright window, hold the folded paper and reference picture over a desk lamp, use a smartphone flashlight behind the picture, or place tracing paper over the reference and trace without folding.
My scissors keep slipping when I cut through both layers of the folded paper and my fringe pieces tear—how can I fix that?
Press the fold firmly to make a crisp center line, use sharp scissors to cut slowly through both layers while keeping the paper flat, and stop each fringe cut about 1 cm from the fold as instructed to avoid tearing toward the center.
How can I adapt this activity for different ages so it's safe and still fun?
For toddlers, have an adult fold and trace the leaf and draw wider fringe lines so they can cut with safety scissors and color, while older children can perform all steps independently, add finer fringe cuts, and draw veins with darker colors.
What are easy ways to enhance or personalize the finished coconut leaf beyond the basic coloring and stem?
After trimming the fringes and adding a taped stem, personalize by layering several leaves around a rolled brown-paper trunk to make a 3D palm, blend multiple green shades for realistic shading, and add veins with a dark marker before sharing on DIY.org.
Watch videos on how to recreate a coconut tree leaf on paper
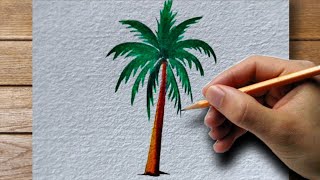
How to Draw a Cute Coconut Tree 🌴 | Easy & Fun Art Tutorial for Kids!
4 Videos
How to Draw a Cute Coconut Tree 🌴 | Easy & Fun Art Tutorial for Kids!
How to draw a coconut tree easy #drawing
How to Draw a Coconut Tree Step by Step | Easy Tree Drawing for Beginners | Art with Sen
"Master the Art of Drawing: Easy Coconut Tree Tutorial for Beginners!"
Facts about paper crafts for kids
🌴 Coconut palms (Cocos nucifera) produce long fronds that people have used for shelter and crafts for centuries.
🍃 A coconut frond is made of many leaflets arranged along a central stem, giving it clear bilateral symmetry kids can copy.
✂️ In many cultures coconut leaves are woven or cut into fringes to make baskets, roofs, and festive decorations.
🔁 Folding paper and cutting a mirrored fringe is the same symmetry trick used to make paper snowflakes and many traditional paper crafts.
🎨 Tracing, folding, cutting, and coloring are great fine-motor workouts—kids who practice these skills get better at hand-eye coordination and pencil control.
How do you recreate a coconut tree leaf on paper?
What materials do I need to recreate a coconut tree leaf on paper?
What ages is this activity suitable for?
What are the benefits of making a coconut tree leaf on paper?
