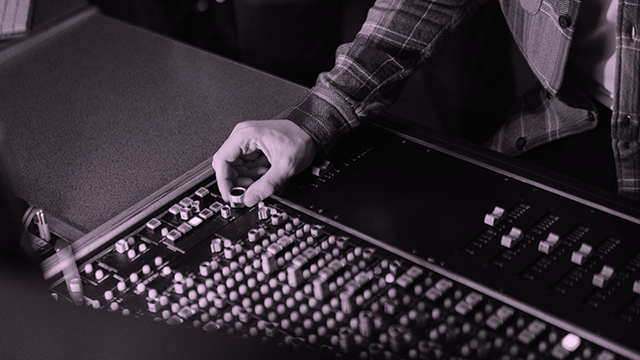
Replace the Virtual Instruments with Your Favorite Instruments
Swap virtual instrument sounds in a simple music project by recording or playing your favorite real instruments, testing mixes, and sharing the new song.

Step-by-step guide to Replace the Virtual Instruments with Your Favorite Instruments
Step 1
Open your simple music project on your computer or tablet.
Step 2
Listen to the whole song once to hear all the virtual instruments.
Step 3
Solo one virtual instrument track at a time to hear each part clearly.
Step 4
Choose which virtual instrument tracks you want to replace and pick which real instrument will play each part.
Step 5
Set up your microphone or smartphone close to the instrument you will record.
Step 6
Put on your headphones so you can hear the project and avoid speaker feedback.
Step 7
Make a short test recording of the instrument to check how it sounds.
Step 8
Listen to the test recording and move the microphone if the sound is too quiet or too loud.
Step 9
Record a full take for the instrument part you will replace.
Step 10
Import or drag your new recording into the music project and place it where the original part plays.
Step 11
Mute the original virtual instrument track you replaced so only your recording plays.
Step 12
Adjust the new track’s volume and left/right position so it mixes well with the other tracks.
Step 13
Add a small effect like light reverb if the new recording sounds too dry next to the other tracks.
Step 14
Export or bounce your finished song to an audio file such as MP3 or WAV.
Step 15
Share your finished song on DIY.org.
Help!?
What can we use if we don't have a separate microphone or a USB mic?
Use your smartphone's built-in mic or a wired earbud/headset mic placed close to the instrument when you 'Set up your microphone or smartphone' and then make the 'short test recording'.
My recording is too quiet or I'm getting feedback—what should I try?
Follow the 'Make a short test recording', move the microphone closer or farther from the instrument, put on your headphones to avoid speaker feedback, and lower the input level in your recording app if the test sounds too loud.
How can I adapt this activity for a younger child or make it harder for a teen?
For younger kids, have a parent help with 'Set up your microphone or smartphone' and press record while the child plays a simple part, and for teens record multiple takes, import the best take, mute the original virtual instrument track, and tweak volume, panning, and effects like the suggested light reverb.
What are some ways to personalize or improve the finished song before sharing?
Layer extra takes or complementary real instruments, adjust the new track's volume and left/right position, add a small effect like light reverb as instructed, then 'Export or bounce your finished song to an audio file such as MP3 or WAV' and 'Share your finished song on DIY.org'.
Watch videos on how to Replace the Virtual Instruments with Your Favorite Instruments
The Most FUN & BEST Kids Musical Instruments! | First University
4 Videos
The Most FUN & BEST Kids Musical Instruments! | First University
Introduction to Musical Instruments for Kids | First University

Learning Music - Wind, String, Percussion Instruments for Kids
Fun with Musical Instruments! | Let's Learn Together! | Kindergarten Music Lesson
Facts about music production for kids
🎸 Many virtual instruments are built from real recordings — some sample libraries capture hundreds of velocity levels and articulations per note.
🎛️ Swapping a virtual piano for a real guitar can instantly change a song's mood and energy without rewriting the melody.
🎧 A basic home setup (microphone + audio interface + DAW) is often enough to record clean instrument tracks for remixing.
🎤 Field recording a room's natural reverb or an outdoor space can give a recorded instrument a unique, realistic atmosphere.
🎵 Learning to record and swap real instruments helps kids develop listening, timing, and creativity — skills used by musicians and producers.
How do I replace virtual instruments with my favorite real instruments in a simple music project?
What materials do I need to swap virtual instrument sounds for real ones?
What ages is this instrument-swapping activity suitable for?
What are the benefits, safety tips, and fun variations for replacing virtual instruments?
