Create a Backbeat
Build a simple drum kit from household containers and rhythm sticks, then create and practice a steady backbeat to explore tempo and rhythm.


Step-by-step guide to create a backbeat
Step 1
Gather all your materials and bring them to a clear floor or table space.
Step 2
Lay the towel or cushions down to protect the surface where you will play.
Step 3
Arrange the containers in a row like a drum kit from largest to smallest.
Step 4
Secure each container with tape or place it on the non-slip mat so they don’t slide.
Step 5
Pick two rhythm sticks or wooden spoons and hold one in each hand by the middle.
Step 6
Tap each container one time to hear the different sounds and decide which will be your “bass” and which will be your “snare.”
Step 7
Set a steady tempo using a metronome or by counting out loud “1-2-3-4” at a comfortable speed.
Step 8
Practice a steady pulse by hitting your bass drum on every beat “1-2-3-4” for eight counts.
Step 9
Practice the snare by hitting the snare drum only on beats 2 and 4 for eight counts while you count.
Step 10
Combine the bass on beats 1 and 3 with the snare on beats 2 and 4 and play the pattern for eight measures.
Step 11
Try the same pattern at a faster tempo and play it for eight measures to feel the change.
Step 12
Add a light tick on a smaller container between the beats (on the “and” counts) to make a hi-hat sound.
Step 13
Practice dynamics by playing the groove softly for eight measures and then loudly for eight measures.
Step 14
Create a short 8-measure backbeat groove that uses the sounds and tempo you like and practice it until it feels steady.
Step 15
Share a video or photo of your finished drum kit and your backbeat groove on DIY.org.
Help!?
What can we use if we don’t have rhythm sticks or a non-slip mat?
Use wooden spoons or chopsticks instead of rhythm sticks and put a folded towel, rug scrap, or book under the containers in place of a non-slip mat, then secure them with tape so they don’t slide as the instructions say.
My containers keep sliding or falling over when I play; how do I fix that?
Make sure to follow the step to secure each container with tape or place them on a non-slip surface, use heavier containers or add cushions under the towel, and press the tape down firmly so your bass and snare hits stay steady.
How can I adapt this backbeat activity for younger or older children?
For younger kids use only two or three large containers with an adult counting '1-2-3-4' at a slow tempo, while older children can add smaller containers for hi-hat 'and' ticks, increase the tempo, practice dynamics, or write an 8-measure groove to perform.
How can we personalize or extend the drum kit and groove once we’ve learned the basic backbeat?
Add colored stickers to label bass and snare, try different container materials for new sounds, record your 8-measure groove with a phone metronome and layer claps or vocals, then share the video on DIY.org.
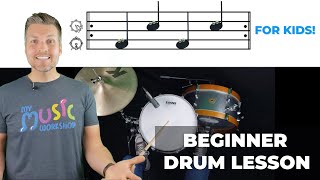
Watch videos on how to create a backbeat
My Music Workshop | Easy Drum Lesson #2-for Kids!
4 Videos
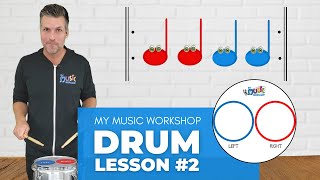
My Music Workshop | Easy Drum Lesson #2-for Kids!

Learn all about the Drums | Beginner Music Lesson for Kids

Drum Lesson for Kids | The Drummer's Job
Easy First Drum Set Lesson for Kids | Beginner Drum Beat
Facts about percussion and rhythm for kids
🥁 The modern drum kit was invented so one player could cover bass, snare and cymbals — that’s why drummers have so many pieces!
🪣 Plastic buckets can be surprisingly loud and are a favorite for street drummers — perfect inspiration for a DIY drum kit.
⏱️ A backbeat usually accents beats 2 and 4 in 4/4 time, and that push is what makes many songs feel danceable.
🎯 Practicing with a metronome even a few minutes a day helps your internal tempo get steadier and more confident.
👯 A steady backbeat makes it easy for others to lock in the groove — great for jamming with friends or family.
How do I build a simple drum kit from household items and teach a child to keep a steady backbeat?
What materials do I need to make a DIY drum kit and rhythm sticks at home?
What ages is this homemade drum kit activity suitable for?
What are the benefits of building a drum kit and practicing a backbeat, and are there safety tips or fun variations?
