Digital Art with DIY Star KawaiiSilverWolf
Create a kawaii star-themed digital illustration using simple drawing apps, tracing, color layers, and stickers while learning shapes, symmetry, and digital brushes.


Step-by-step guide to Digital Art with DIY Star KawaiiSilverWolf
Step 1
Open your drawing app and create a new square canvas to start your kawaii star.
Step 2
Turn on the symmetry or mirror tool so one side will copy to the other.
Step 3
Make a new layer and name it "Sketch" to keep your drawing separate.
Step 4
Trace or draw one half of a star on the Sketch layer using a light color.
Step 5
Use the symmetry tool to mirror your half-star so a full star appears instantly.
Step 6
Create a new layer under the Sketch layer and name it "Base Color."
Step 7
Pick a soft pastel color and fill the star shape on the Base Color layer.
Step 8
Create a new layer above Base Color and name it "Details."
Step 9
Draw a cute kawaii face (big eyes and a tiny smile) on the Details layer.
Step 10
Add soft blush circles near the face using a low-opacity round brush on the Details layer.
Step 11
Add tiny white sparkles or highlights on the Details layer to make the star shine.
Step 12
Create a new layer named "Stickers" to keep decorations separate.
Step 13
Place stickers or draw little stars and hearts around your main star on the Stickers layer.
Step 14
Save or export your finished illustration as a PNG or JPG file.
Step 15
Share your finished kawaii star illustration on DIY.org
Help!?
What if my drawing app doesn't have a symmetry/mirror tool or layers?
If your app lacks symmetry or layers, draw one half of the star on the Sketch step, duplicate and flip it manually to make the full star, and mimic separate layers by saving incremental files labeled 'Base Color', 'Details', and 'Stickers' or work on paper and photograph the result.
What should I do if the mirrored halves don't line up or the color fill spills outside the star?
Make sure the Sketch half is exactly centered before mirroring, and to keep color inside the shape use a selection/magic-wand tool or lock transparency/alpha on the Base Color layer when filling.
How can I adapt this activity for younger kids or older kids?
For younger kids simplify by using a premade star shape, big fill brushes and placing stickers on the 'Stickers' layer, while older kids can add shading, blush and highlights on the 'Details' layer, experiment with blend modes and textured brushes, or create a more detailed background.
How can we enhance or personalize the kawaii star once the basic steps are done?
Personalize by adding a gradient or patterned background behind your layers, drawing custom little stars and hearts on the 'Stickers' layer, creating animated sparkles by duplicating 'Details' into frames, or export as a PNG to print or share on DIY.org.
Watch videos on how to Digital Art with DIY Star KawaiiSilverWolf
✅️ Reverse play ✅️ Cute Star Character Drawing 🌟 | Easy Step-by-Step for Kids | Cartoon Drawing ✨️
4 Videos
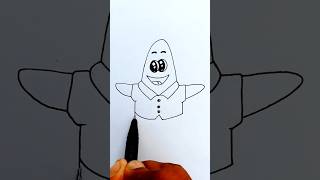
✅️ Reverse play ✅️ Cute Star Character Drawing 🌟 | Easy Step-by-Step for Kids | Cartoon Drawing ✨️
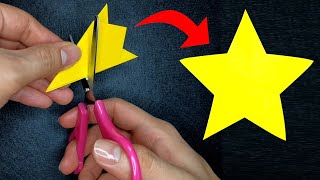
How To Cut a Perfect Star | Make a Perfect Star with Just One Cut

START HERE with Digital Art | Step by step Tutorial
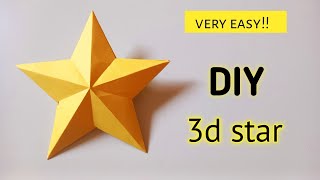
DIY 3D star|How to make 3d star at home|DIY paper Star|3d star with paper|Christmas decoration ideas
Facts about digital art for kids
🎀 "Kawaii" means "cute" in Japanese and grew into a global style filled with friendly, rounded characters and bright colors.
🎨 Digital art often uses layers so you can edit colors or details on one layer without changing the rest — like stacking transparent sheets.
✏️ Tracing is a long-used learning technique: it helps artists study shapes, proportions, and how lines connect.
🔁 Symmetry makes designs feel balanced and pleasing — humans tend to notice and prefer symmetrical faces and patterns.
🖌️ Digital brushes can mimic pencils, watercolors, and textures; adjusting size, opacity, and texture totally changes the look.
How do I create a kawaii star digital illustration with DIY Star KawaiiSilverWolf?
What materials and apps do I need for DIY Star KawaiiSilverWolf digital art?
What ages is the DIY Star KawaiiSilverWolf digital art activity suitable for?
What are the benefits of making kawaii star digital art?
