Create IRL versions a Minecraft character, build or tool
Create an IRL Minecraft character costume, blocky build, or foam tool using cardboard, paint, and safe craft supplies while learning measuring and assembling skills.

Step-by-step guide to create an IRL Minecraft character, build, or tool
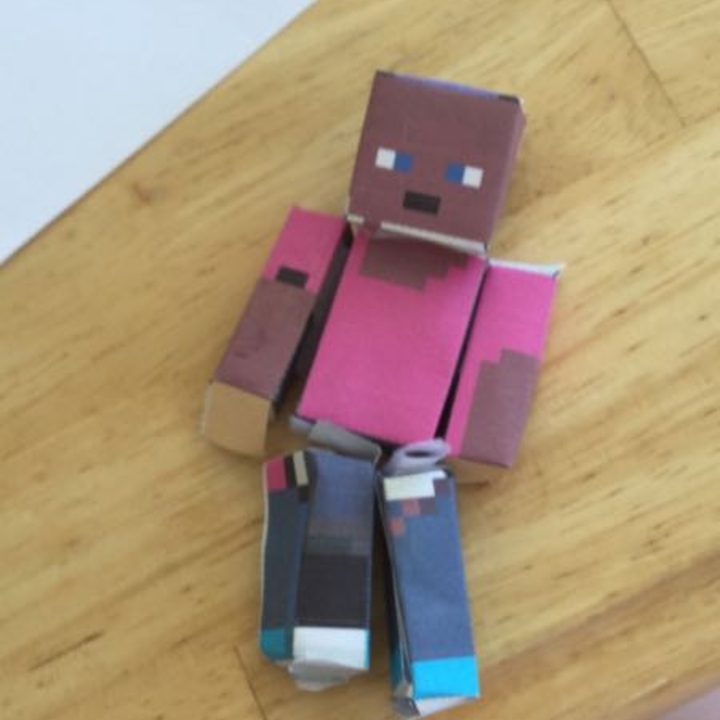
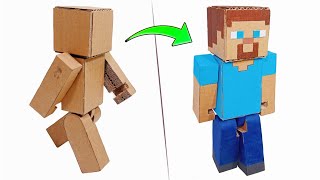
Building Minecraft Steve in REAL LIFE Creative Mode
Step 1
Gather all the materials on the table so everything is ready and easy to reach.
Step 2
Pick if you will make a Minecraft character costume a blocky build or a foam tool and decide how big you want it to be.
Step 3
Use the ruler and pencil to measure and mark the cardboard pieces for each part of your project.
Step 4
Draw a pixel grid on the cardboard faces where you will paint details to help keep your design blocky and neat.
Step 5
Cut out the cardboard pieces along your marked lines using scissors and work slowly to follow the shapes.
Step 6
Score fold lines with the edge of your ruler or the pencil to make folding the cardboard easier.
Step 7
Fold the cardboard along the scored lines to form boxy shapes like heads bodies or blocks.
Step 8
Tape or glue the seams and edges to assemble each piece into its final shape.
Step 9
Attach craft foam or extra cardboard pieces for depth handles or tool blades using tape or glue.
Step 10
Paint a flat base coat on each surface where you plan to add pixels and let the paint dry.
Step 11
Fill in the pixel grid with square colors using your paintbrushes to create the Minecraft look and let everything dry completely.
Step 12
Try on your costume or test your build or tool to make sure it fits and feels sturdy.
Step 13
Share your finished creation on DIY.org and show the world your awesome Minecraft IRL project.
Help!?
Can I substitute hard-to-find materials like craft foam, glue, or acrylic paint?
If craft foam is hard to find, layer extra cardboard or use felt for depth, swap strong white glue for hot glue or heavy-duty tape for seams, and use washable tempera or paint markers instead of acrylics to fill the pixel grid.
What should I do if the cardboard rips or seams won't hold when assembling the pieces?
If the cardboard rips or seams fail, score fold lines with the ruler or pencil to reduce stress, reinforce edges and seams with extra tape or hot glue before painting, and re-measure pieces with the ruler and pencil to ensure proper fit.
How can I adapt the steps for younger kids versus older kids?
For younger children, pre-measure and pre-cut the cardboard, draw larger pixel grids, and let them paint and tape under supervision, while older kids can measure, score folds, use a craft knife for precision, and add foam handles or straps.
How can we extend or personalize the Minecraft project after the basic build and painting?
Enhance and personalize the project by adding LED lights inside a cardboard head, attaching Velcro for removable armor or tools, sealing the painted pixel grid with a clear coat, and then share photos on DIY.org.
Watch videos on how to create an IRL Minecraft character, build, or tool
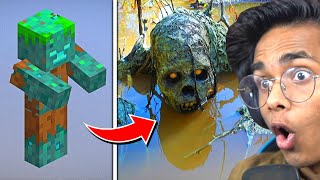
50 Genius Builds to Make Minecraft Look TOO Real
4 Videos
50 Genius Builds to Make Minecraft Look TOO Real
I Show Craft Skills: How To Make Minecraft Characters With Cardboard Part. 1
MINECRAFT: CHARACTERS IN REAL LIFE (mobs, animals, items)
Realistic Herobrine & Minecraft Characters Recreated with AI!
Facts about cardboard crafting and model-making for kids
🟩 Minecraft has sold over 200 million copies and is famous for its square, blocky world — perfect inspiration for IRL builds.
🎭 Cosplay makers often use cardboard and foam to craft props and costumes because they're lightweight and easy to shape.
✂️ Papercraft (also called pepakura) turns flat paper or cardstock into 3D models — great for building Minecraft-style heads and blocks.
📏 Learning to measure and score cardboard boosts real-life building skills: even a small measurement change can make pieces fit differently.
🛠️ EVA foam is a favorite for kid-friendly props — it's bendy, lightweight, and takes acrylic paint well for colorful Minecraft tools.
How do I make an IRL Minecraft character, block, or foam tool?
What materials do I need to create a Minecraft costume, block, or foam tool?
What ages is this IRL Minecraft craft suitable for?
What safety tips and creative variations should I know?
