Make a scarecrow with @AbbyAndCharlie
Make a friendly scarecrow with Abby and Charlie using old clothes, straw or crumpled paper, sticks, and markers to decorate safely.


Step-by-step guide to make a friendly scarecrow with Abby and Charlie
Step 1
Gather all your materials and bring them to a clear workspace where you can make a little mess.
Step 2
Ask an adult to help you make a stick frame by placing the shorter stick across the longer stick and tying them tightly where they cross with the twine.
Step 3
Slide the shirt onto the cross so the crossbar becomes the shoulders and the long stick becomes the body.
Step 4
Push straw or crumpled paper into the shirt through the neck and sleeves until the shirt looks puffy.
Step 5
Tie string around the shirt waist to keep the stuffing from falling out.
Step 6
Slide the pants onto the bottom of the long stick so they sit under the shirt.
Step 7
Stuff the pants with straw or crumpled paper until they look full and fun.
Step 8
Tie the pant legs at the ankles with string so the stuffing stays inside.
Step 9
Make a head by filling a small pillowcase or piece of fabric with straw or crumpled paper and tie the bottom closed with string.
Step 10
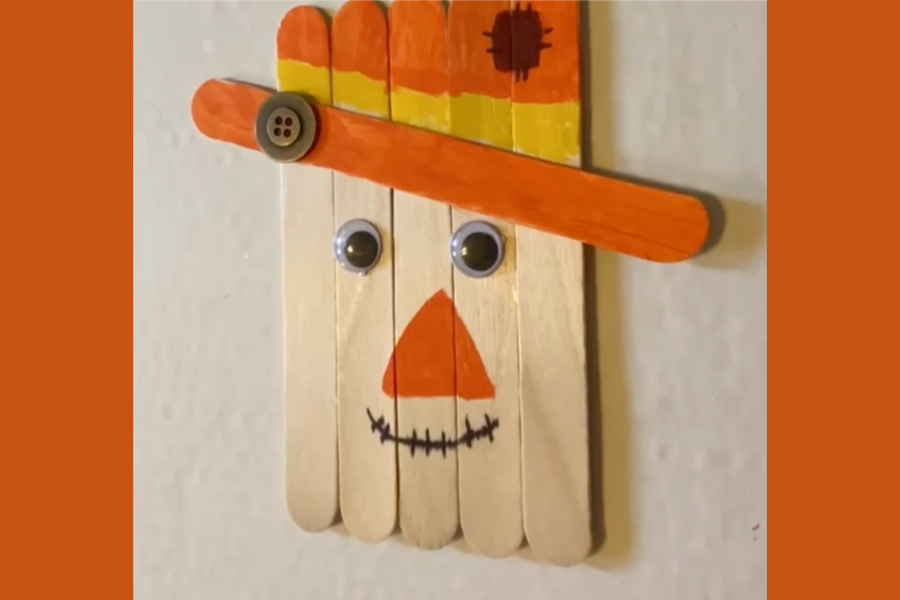
Use markers to draw a friendly face on your scarecrow’s head.
Step 11
Place the head on top of the long stick and tie it securely with twine.
Step 12
Add one or two accessories like a hat or scarf and fasten them so they won’t fly away.
Step 13
Ask an adult to help you put the scarecrow in the yard by pushing the long stick into the ground or resting it against a fence.
Step 14
Share your finished friendly scarecrow on DIY.org.
Help!?
What can we use if we don't have twine, straw, or a small pillowcase?
If you don't have twine use strong string or zip ties for tying the stick frame and head, replace straw with crumpled newspaper or grocery bags when stuffing the shirt and pants, and make a head from a fabric scrap tied with string if you lack a small pillowcase.
My stick frame keeps loosening and the shirt slides down—how can we fix that?
Retie the shorter stick to the longer stick with several tight knots of twine as in step 2, wrap extra twine or strong tape where the shirt sits (step 3) to stop slipping, and compact the stuffing in the shoulders (step 4) so the shirt holds its shape.
How can this activity be adapted for younger or older children?
Have an adult do the stick-frame building and help push the long stick into the ground (steps 2 and 14) while toddlers stuff shirts and draw the face (steps 4 and 10), and let older kids sew a pillowcase head, tie knots, or add painted details and sturdy fastenings (steps 8–12).
How can we personalize the scarecrow or make it more durable outdoors?
Personalize it by painting the shirt, adding buttons or patches, securing a hat and scarf with extra twine (step 12), stuff with plastic bags for water resistance, and spray fabric with a water-resistant sealant before placing it in the yard (step 14).
Watch videos on how to make a friendly scarecrow with Abby and Charlie
How To Make A Scarecrow | DIY art & craft videos for kids from SMART
4 Videos
How To Make A Scarecrow | DIY art & craft videos for kids from SMART

Easy Fabric Scarecrow Making | How to make a Scarecrow without stitching | No Sew Scarecrow Doll
How to Build a DIY Scarecrow in 5 Steps
How to Make a Scarecrow - Step By Step Craft Project
Facts about kids' crafts with recycled materials
🌾 Scarecrows have been used for thousands of years — ancient farmers from Egypt to Greece used them to guard crops.
👕 Turning old clothes into a scarecrow is a fun form of upcycling that keeps textiles out of landfills.
🪵 A classic scarecrow frame can be made from just two crossed sticks — simple, sturdy, and kid-safe.
🎨 Washable markers let kids draw cheerful faces and decorations that can be changed again and again.
🎪 Many towns host scarecrow festivals where people create playful, famous, or wildly creative scarecrows.
How do you make a friendly scarecrow with Abby and Charlie?
What materials do I need to make the scarecrow?
What ages is this scarecrow activity suitable for?
What are the benefits and safety tips for making a scarecrow?
