Make a V - Wing Plane
Make a V wing paper plane using paper, tape, and simple folds. Test flights, adjust wing angles, and learn about lift and stability.

Step-by-step guide to make a V-wing paper plane
"V-Wing Jet ✈️ | Fastest Paper Airplane Design Ever!"
Step 1
Fold the paper lengthwise (long edges together) and press the crease firmly.
Step 2
Open the paper back flat so the crease line is in the middle.
Step 3
Fold the top left corner down to the center crease so the top edge lines up with the center.
Step 4
Fold the top right corner down to the center crease so the top edge lines up with the center.
Step 5
Fold each of the new top edges once more toward the center crease to make a sharp nose point.
Step 6
Fold the whole paper in half along the center crease with your nose folds on the outside.
Step 7
Fold the top layer on one side down to create the first wing, lining the wing edge with the bottom of the body.
Step 8
Fold the top layer on the other side down to create the second wing matching the first wing.
Step 9
Bend the back edge of both wings up a little (about 20 degrees) so the wings form a V shape when viewed from the front.
Step 10
Put a small piece of tape over the nose tip to secure the folds.
Step 11
Go to an open space and gently throw your V-wing plane forward to test its flight.
Step 12
Watch how it flies and notice if it glides straight rolls to one side or dives downward.
Step 13
If it rolls to one side, bend the wing backs up a little more to increase the V angle; if it dives, add a tiny piece of tape to the nose to add weight, then test again.
Step 14
Take a photo or short note about your best flight and share your finished V-wing plane project on DIY.org.
Help!?
What can we use if we don't have tape or the exact paper called for in the instructions?
If you don't have the 'small piece of tape over the nose tip', secure the nose with a paperclip, a tiny staple, or a dab of glue and use heavier construction paper or fold two sheets of printer paper together if the single sheet is too flimsy for the folds.
My plane keeps rolling or diving—what should I check and fix from the steps?
If it rolls to one side, follow the troubleshooting step and bend the back edge of that wing up a little to increase the V angle, and if it dives add a tiny piece of tape to the nose for weight while also ensuring both wings were folded evenly along the bottom of the body and the nose folds are sharp.
How can I adapt the folding steps for younger or older children?
For younger kids, pre-fold the center crease and the top corner folds (steps 1–4) and let them do the wing folds and decorations, while older kids can use heavier paper, make more precise nose folds, and fine-tune the 20-degree V wing angle to experiment with glide performance.
What are simple ways to personalize or extend the V-wing plane activity?
Decorate the body and wings, try adding a small paper rudder or paperclip at the nose instead of tape to change weight, cut different paper sizes to test wing span, record your best flight notes or photos, and share the finished project on DIY.org as suggested in the instructions.
Watch videos on how to make a V-wing paper plane
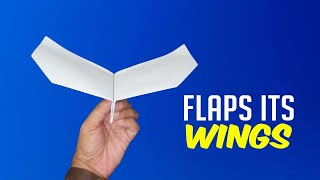
Simple ! how to make a paper airplane that flaps its wings - Have You Ever Seen
4 Videos

Simple ! how to make a paper airplane that flaps its wings - Have You Ever Seen
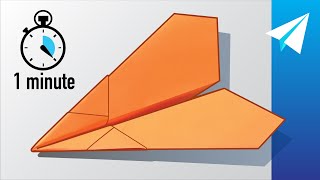
FLIES OVER 100 FEET!!! How to Make an EASY Paper Airplane in 1 Minute (60 Seconds)
Easy Ways to Make a Perfect Plane - Bird Plane - how to make a paper airplane that flaps its wings
I Made 4 Super Cool Paper Airplanes! 🚀🔥 (Easy & Fast Flying) 4 Designs, 1 Winner - Watch Them Fly!
Facts about aerodynamics for kids
✈️ The world record for the farthest paper airplane throw is 226 ft 10 in (69.14 m), set in 2012 by John Collins and Joe Ayoob.
🛠️ A slight V-shape in the wings (dihedral) helps paper planes self-correct and stay level during flight.
🧲 Adding tape or a paperclip to the nose moves the center of gravity forward and often makes the plane fly straighter and farther.
🌬️ Wings make lift because air moves faster over the top surface, creating lower pressure above the wing — that helps the plane rise!
🎯 Small changes to wing angles (angle of attack) can make a plane climb, glide, dive, or even stall — perfect for testing and learning.
How do I make a V-wing paper plane step by step?
What materials do I need to build a V-wing paper plane?
What ages is making a V-wing paper plane suitable for?
What are the benefits, safety tips, and variations for V-wing planes?
