Make a Spider Cobweb
Make a spider cobweb using yarn, glue, and cardboard; learn about symmetry, patterns, and measurements while creating a safe decorative web for play.


Step-by-step guide to make a spider cobweb
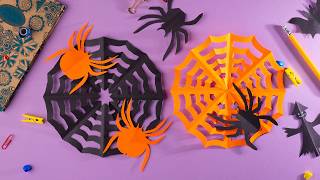
How to Make a Paper Spiderweb | Easy Halloween Craft for Kids | Fun DIY Halloween Decoration 2025 🎃
Step 1
Cut a circle about 20 cm across from the cardboard using safety scissors.
Step 2
Mark the exact center of the cardboard circle with your pencil.
Step 3
Fold a scrap sheet of paper into eighths and use it to mark eight evenly spaced dots around the circle edge with your pencil.
Step 4
Use the ruler to draw straight lines from each edge dot to the center to make spoke guides.
Step 5
Cut a small 1 cm slit at each marked dot on the outer edge using safety scissors.
Step 6
Tie one end of a length of yarn tightly to the center of the circle with a knot.
Step 7
Pull the yarn from the center to one slit and secure it in that slit with a small piece of tape.
Step 8
Wrap the yarn in a spiral from the center outward by looping it around each spoke guide toward the next slit.
Step 9
Put a small dab of white glue at each loop where the yarn crosses a spoke to secure the yarn to the cardboard as you go.
Step 10
When you reach the outer edge tie off the yarn, trim any extra with scissors, and press the final glue spots until dry.
Step 11
Cut a small spider shape from leftover cardboard with safety scissors.
Step 12
Colour and decorate your spider using the marker or colouring materials.
Step 13
Glue the spider onto the web or hang it from the web with a short yarn thread and let it dry.
Step 14
Share a photo of your finished spider cobweb and describe what you learned about symmetry patterns and measurements on DIY.org.
Help!?
What can we use instead of cardboard, yarn, or white glue if those are hard to find?
Use a sturdy paper plate or cereal-box cardboard for the 20 cm circle, embroidery floss or thin twine in place of yarn, and a glue stick or hot glue (with adult help) instead of white glue to secure the loops.
My yarn keeps slipping out of the slits or loosening while I wrap—what can I do?
Reinforce each 1 cm slit with a small piece of tape before inserting the yarn, knot the yarn tightly at the center as instructed, and add the small dab of white glue at every loop while pressing until dry to keep the spiral secure.
How can I adapt this spider cobweb activity for younger children or older kids?
For preschoolers have an adult pre-cut the 20 cm cardboard circle, mark the center and eight dots and make the slits, and give thick yarn to loop while older kids can measure and draw the spokes with the ruler, add more spokes, or use thinner yarn and beads for a more detailed web.
How can we extend or personalize the spider cobweb after finishing the basic web?
Paint or decorate the cardboard before tying the yarn, use multi-colored yarn or beads when you 'Wrap the yarn in a spiral,' add glow-in-the-dark paint, or hang multiple decorated spiders from the web with short yarn threads for a custom display.
Watch videos on how to make a spider cobweb
How to make a paper spider web (Cobweb) for Halloween [Paper craft]
4 Videos
![How to make a paper spider web (Cobweb) for Halloween [Paper craft]](https://img.youtube.com/vi/OGdjY4z1Dow/mqdefault.jpg)
How to make a paper spider web (Cobweb) for Halloween [Paper craft]
Easy DIY Paper Spiderweb & Spider | Quick Halloween Decorations Tutorial
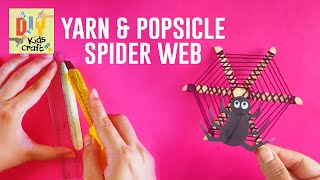
How to Make a Spider Web With Yarn And Popsicle Sticks | Spider Web Craft for Kids | DIY Kids Craft
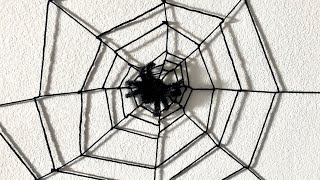
How to make a Spiderweb 🕸 out of yarn
Facts about crafts and basic geometry for kids
🕷️ Many orb-weaver spiders eat and rebuild their webs daily, recycling the silk proteins into a fresh web.
🕸️ Spider silk is incredibly strong for its weight—comparable to steel in tensile strength—making it a great nature-inspired idea for yarn webs.
📏 Orb webs often show radial symmetry with repeating spokes (commonly 8–36), perfect for practicing measuring angles and spacing.
🧶 Yarn comes in different weights (thicknesses); chunkier yarn is easier for small hands to handle when weaving a decorative web.
📦 Cardboard is made from layered paper and gets stronger when folded or rolled, so it makes a sturdy frame for your cobweb craft.
How do you make a spider cobweb using yarn, glue, and cardboard?
What materials do I need to make a spider cobweb craft?
What ages is the spider cobweb activity suitable for?
What are the benefits and safety tips for making a spider cobweb?
