Doodle a Scenery
Draw a simple outdoor scene using pencils, markers, and paper; add foreground, middle ground, and background to practice perspective and creativity.


Step-by-step guide to doodle a scenery
Easy Scenery Drawing | Simple Pencil Sketch for Beginners (Step-by-Step Tutorial)
Step 1
Place a clean flat sheet of paper on your workspace.
Step 2
Put your pencil eraser markers and colouring materials within reach.
Step 3
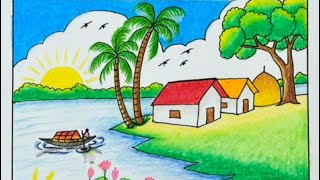
Choose one outdoor scene to draw such as a beach park forest mountain or backyard.
Step 4
Lightly sketch a horizon line across the paper to separate sky from land.
Step 5
Mark three zones with faint lines or tiny shapes for background middle ground and foreground.
Step 6
Draw small simple background elements like distant hills trees or clouds.
Step 7
Draw medium-sized middle-ground objects like a path houses or bushes.
Step 8
Draw large detailed foreground objects like a big tree flowers rocks or a person.
Step 9
Add overlaps and make nearer objects larger than farther ones to show depth.
Step 10
Trace the lines you want to keep with markers to make your shapes bold.
Step 11
Color the background with lighter colors and the foreground with brighter or darker colors to enhance perspective.
Step 12
Share your finished scenery on DIY.org.
Final steps
You're almost there! Complete all the steps, bring your creation to life, post it, and conquer the challenge!


Help!?
What can we use if we don't have markers or a clean flat sheet of paper?
Use colored pencils, crayons, or watered-down paint with a thin brush instead of markers, and replace a clean flat sheet of paper with a cut-to-size cereal box panel or clipboard as your drawing surface.
My drawing looks flat and depth isn't showing—what should I check or fix?
Lighten or erase the faint zone and horizon lines, make nearer objects larger and add overlaps as the instructions say, then trace only the final lines with markers and color the background in lighter hues and the foreground in brighter or darker colors to boost depth.
How can I adapt this activity for younger or older children?
For younger kids simplify to just a horizon and one big foreground object to color with crayons, while older kids can add detailed middle-ground elements like houses or paths, use fine markers for tracing, and practice shading to emphasize perspective.
How can we extend or personalize the finished scenery?
Personalize it by gluing paper cutouts or natural materials onto the foreground for a 3D effect, add a short caption or story about the scene, and photograph the traced-and-colored final piece to share on DIY.org.
Watch videos on how to doodle a scenery
Beautiful Village Scenery Drawing | Easy Step-by-Step for Kids
4 Videos
Beautiful Village Scenery Drawing | Easy Step-by-Step for Kids
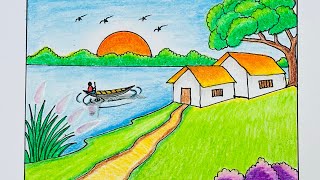
Easy Village Nature Drawing for Kids | Step-by-Step Colorful Scenery Tutorial

Easy village nature drawing for kids | Step by step colorful scenery tutorial
How to Draw & Color a Beautiful Landscape | Easy Step-by-Step Tutorial for Kids
Facts about drawing and perspective
✏️ Pencil grades range from H (hard, lighter) to B (soft, darker); B pencils are great for shading foregrounds.
🌫️ Atmospheric perspective makes distant objects look lighter and bluer, which artists use to show depth in landscapes.
📐 In one-point perspective, parallel lines converge to a single vanishing point on the horizon — perfect for roads or fences.
🖊️ Marker pens (especially alcohol-based) blend nicely for bright skies but can bleed through thin paper, so use a heavier sheet.
👁️ Placing objects in foreground, middle ground, and background — plus overlap and size changes — helps viewers perceive depth.
How do I doodle an outdoor scenery with foreground, middle ground, and background?
What materials do I need to doodle a scenery with pencils and markers?
What ages is the doodle-a-scenery activity suitable for?
What are the benefits of doodling outdoor scenes for kids?


One subscription, many ways to play and learn.
Only $6.99 after trial. No credit card required