Do the Paper Bag Production
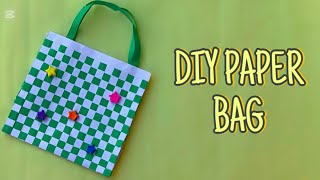
Make simple paper bags using recycled paper, scissors, glue, and rulers; measure, fold, and decorate while learning about recycling and production steps.


Step-by-step guide to make simple paper bags
Step 1
Find a clean flat workspace to make your paper bag.
Step 2
Place one sheet of recycled paper flat on the workspace.
Step 3
Measure and mark a rectangle about 20 cm wide and 28 cm tall so you have roughly 4 cm extra at one end for the bottom flap.
Step 4
Cut out the marked rectangle with scissors.
Step 5
Fold the paper in half so the short edges meet.
Step 6
Run your finger or a ruler along the fold to make a sharp crease.
Step 7
Apply glue in a thin strip along one short edge of the folded paper.
Step 8
Fold the paper back to join the glued edge to the opposite edge to form a tube.
Step 9
Press the glued seam firmly for 10 seconds to secure it.
Step 10
Fold up the extra 4 cm at one end to make the bottom flap.
Step 11
Apply glue to the inside of the bottom flap.
Step 12
Fold the bottom flap up and press the bottom edges together to seal the base.
Step 13
Decorate your bag with colouring materials and stickers any way you like.
Step 14
Write one sentence on the bag explaining how recycling helps the planet.
Step 15
Share your finished paper bag on DIY.org
Help!?
What can we use if recycled paper or liquid glue are hard to find?
If you don't have a recycled paper sheet, use a clean brown paper lunch bag, kraft paper, or two printer sheets taped together, and swap the liquid glue in step 10 for a glue stick, double-sided tape, or a stapler for the seam and bottom flap.
My glued seam won't hold—how can I fix it?
If the glued seam at step 8 comes apart, reopen the tube, apply a thicker strip of glue or double-sided tape along the short edge, press the seam firmly for 20 seconds, and let it dry flat before folding the 4 cm bottom flap in step 11.
How should we change the activity for different age groups?
For ages 3–5, have an adult pre-measure and cut the 20 cm × 28 cm rectangle and let the child fold, press the crease, and use a glue stick and stickers, while ages 8+ can measure and cut independently and reinforce the bottom flap with extra glue at step 11 for heavier contents.
What are easy ways to improve or personalize the finished paper bag?
To personalize and strengthen the bag, glue a small cardboard rectangle inside the bottom flap at step 11 for a flat base, attach ribbon or magazine-strip handles to the inside top, and decorate around the recycling sentence before sharing on DIY.org.
Watch videos on how to make simple paper bags
INCL ART DIY CUTE GIFT BAG | HOW TO MAKE PAPER BAG STEP BY STEP
4 Videos
INCL ART DIY CUTE GIFT BAG | HOW TO MAKE PAPER BAG STEP BY STEP
How To Make Origami Paper Handbag / Paper Purse
How To Make a Paper Bag at Home - Paper Shopping Bag Craft Ideas (Very Easy)
How to Make a Paper Bag | DIY Paper Bag Tutorial | Easy Steps
Facts about paper crafts and recycling
🛍️ The flat-bottom paper bag was developed in the 1800s — inventors like Francis Wolle and Margaret E. Knight helped automate bag-making.
♻️ Recycling one ton of paper can save about 17 trees and a lot of energy compared to making new paper from raw wood.
✂️ Simple paper bags can be made using folding techniques similar to origami — sometimes you don't need glue at all!
📏 Making accurate measurements and crisp creases makes a paper bag much stronger and better at holding weight.
🎨 Kraft paper (the common brown bag material) gets its name from the German word for "strength" and is great for decorating.
How do I do the Paper Bag Production activity with my child?
What materials do I need to make simple paper bags using recycled paper?
What ages is the Paper Bag Production suitable for?
What are the benefits and safety tips of making paper bags with kids?
