Fix your alignment
Build a simple floating compass using a magnetized paperclip, cork, and bowl of water; practice aligning it to find magnetic north.


Step-by-step guide to build a simple floating compass
Step 1
Straighten the paperclip into a long straight "needle" using your fingers.
Step 2
Hold the paperclip and stroke it with the magnet 30 times in the same direction along its length.
Step 3
With adult help cut the cork in half lengthwise so you have a flat round piece.
Step 4
Push the magnetized paperclip through the center of the flat cork so equal lengths stick out both sides and it can spin freely.
Step 5
Fill the shallow bowl about two-thirds full with water.
Step 6
Gently place the cork with the paperclip on the water so the cork floats and the paperclip can turn easily.
Step 7
Wait until the paperclip stops moving and the cork settles still on the water.
Step 8
Ask an adult to use a known compass or phone compass to point out which way is magnetic north.
Step 9
Look at the paperclip and mark the end that points toward the direction the adult showed using your marker.
Step 10
Slowly turn your body in a full circle while watching the floating paperclip to see the marked end keep pointing the same way.
Step 11
Move the bowl to a different spot and float the cork again to check the marked end still points to magnetic north.
Step 12
Share a photo and a short note about your floating compass and what you learned on DIY.org.
Help!?
If I don't have a cork, a paperclip, or a magnet, what can I use instead?
If you don't have a cork, use a small round piece of craft foam or a flattened plastic bottle cap with a bit of modeling clay as the flat round piece from step 3, and if you lack a paperclip or magnet you can straighten a safety pin for the 'needle' in step 1 and use a fridge magnet or a stronger bar magnet for step 2.
The paperclip won't spin or the cork keeps sinking—what should I try to fix it?
If the paperclip won't spin or the cork sinks, re-magnetize the straightened paperclip by stroking it 30–60 times in the same direction with a stronger magnet (step 2), make sure the paperclip is pushed exactly through the cork center so equal lengths stick out (step 4), and float it in a clean, shallow bowl of water (step 5) so it can turn freely.
How can I adapt this activity for different ages?
For younger children have an adult do the straightening and the cork cutting (steps 1 and 3) and let them place and watch the floating cork (steps 6–7), while older kids can measure the bearing to magnetic north using a phone compass (step 9), test different magnets or paperclip lengths, and record results to share on DIY.org (step 11).
What are some ways to extend or personalize the floating compass?
To extend the activity decorate the cork and mark the north-pointing end after step 9, try mounting the magnetized paperclip on a straw pivot instead of floating (steps 4–6) to reduce drift, and run trials in different rooms or outside (step 10) before posting your best photo and note to DIY.org (step 11).
Watch videos on how to build a simple floating compass
Procedures And Steps To Perform A Wheel Alignment
4 Videos
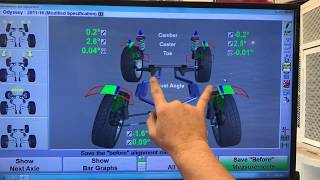
Procedures And Steps To Perform A Wheel Alignment

How to Perform Wheel Alignment by Yourself

Aligning Your Lesson Plans with Standards: Essential Tips for Every Teacher | STEAMspirations

Tinkercad Mastery: A Beginner's Guide To Perfect Alignment
Facts about magnetism and navigation
🧭 The magnetic compass was invented in China by the 11th century and sailors later used it to cross oceans.
🧲 Rubbing a paper clip with a magnet lines up tiny magnetic domains and turns the clip into a temporary magnet.
🌍 Magnetic north is different from the geographic North Pole and can drift tens of kilometers each year.
🫧 A cork floater reduces friction so a magnetized needle or paper clip can swing freely and point to magnetic north.
🚢 Before GPS, sailors trusted compasses because they work even when stars and the sun are hidden by clouds.
How do I make and align a floating compass using a magnetized paperclip, cork, and bowl of water?
What materials do I need to make a simple floating compass?
What ages is the floating compass activity suitable for?
What safety tips and variations can we try for the floating compass?
