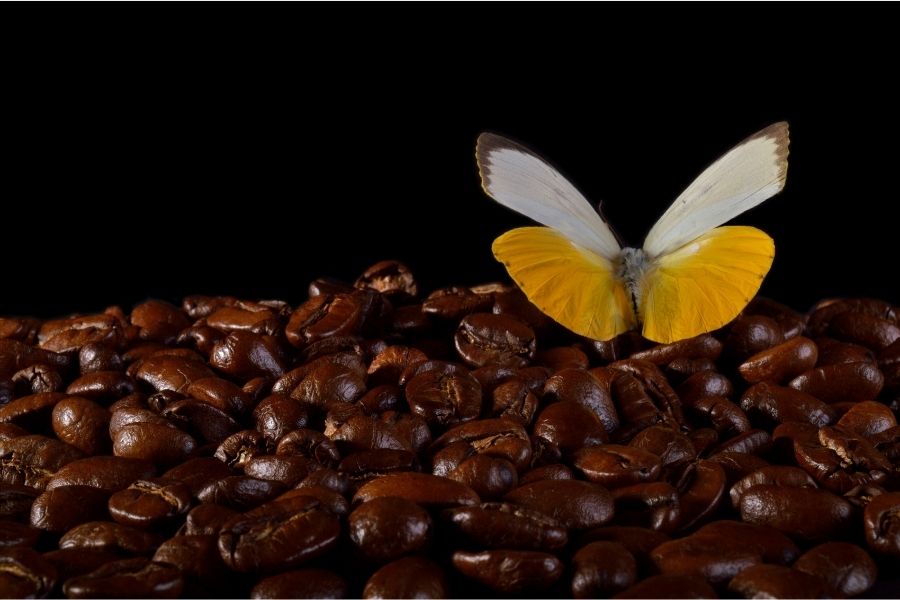
Make Coffee Butterflies
Make coffee-dyed paper butterflies using coffee filters, brewed coffee or instant, clothespins, and pipe cleaners, exploring color, texture, and simple crafting techniques.


Step-by-step guide to make coffee butterflies
Step 1
Pour a little brewed coffee into a small bowl or stir instant coffee into warm water until it is a strong brown color.
Step 2
Spread a paper towel or tray on your work surface so your filters can dry without making a mess.
Step 3
Flatten one coffee filter gently and place it on the paper towel or tray.
Step 4
Dip your paintbrush or dropper into the coffee and drip or brush the coffee onto the filter to make spots and rings.
Step 5
Repeat Step 3 and Step 4 to dye more filters if you want a colorful bunch of butterflies.
Step 6
Let all the dyed filters dry completely on the paper towel or tray until there is no wetness left.
Step 7
Fold one dried filter into an accordion fan shape by making small back-and-forth folds across the filter.
Step 8
Pinch the middle of the folded filter tightly to form the butterfly wings.
Step 9
Clip a clothespin onto the pinched center to hold the wings in place.
Step 10
Wrap a pipe cleaner around the clothespin once or twice to make the butterfly body and tuck the tail under the clothespin to secure it.
Step 11
Bend the two loose ends of the pipe cleaner into small curves to make antennae.
Step 12
Trim any extra pipe cleaner with scissors if needed and fluff the wings to make them look pretty.
Step 13
Share a photo of your finished coffee butterfly on DIY.org so everyone can see your craft!
Help!?
What can we use if we don't have coffee, a paintbrush, dropper, clothespin, or pipe cleaners?
For Step 1 substitute brewed black tea or diluted brown watercolor, for Step 4 drip dye with a straw or teaspoon, for Step 8 use a binder clip or paperclip to hold the pinched filter, and for Step 9 make the body and antennae from yarn, a twist tie, or a strip of aluminum foil.
My filters are tearing, staying wet, or the wings won't hold—what should I try?
If filters tear when folding in Step 6 fold more gently and use completely dry filters, if they stay wet after Step 6 blot excess coffee and air-dry longer or place them near a warm spot, and if the wings won't hold in Steps 7–8 pinch tightly and secure with the clothespin or a small drop of glue where you wrap the pipe cleaner.
How can I adapt this activity for different ages?
For toddlers have an adult handle Steps 6–9 while they do Step 3–4 dyeing and Step 12 fluffing, for elementary kids let them fold (Step 6) and assemble (Steps 7–10) with supervision, and for older kids add detailed painting in Step 4, layer filters in Step 5, or make antennae from thin wire in Step 9.
How can we extend or personalize the finished coffee butterflies?
After Step 12 personalize each butterfly by gluing googly eyes to the clothespin, adding sequins or marker designs to the dyed wings from Step 4, or stringing several finished butterflies into a garland or mobile for display.
Watch videos on how to make coffee butterflies
Make Beautiful Coffee Filter Butterflies 🦋 - Easy Preschool Craft!
3 Videos

Make Beautiful Coffee Filter Butterflies 🦋 - Easy Preschool Craft!

Coffee Filter Butterflies Craft
Coffee Filter Butterfly with Kids
Facts about paper crafts for kids
☕ Melitta Bentz invented the paper coffee filter in 1908 so brewed coffee wouldn't have grounds — her idea sparked a whole industry.
🦋 Butterfly wings are covered in tiny overlapping scales; those scales create the colors and patterns you see.
📄 Coffee filters are porous paper designed to pass liquid but trap solids, which is why kids use them for painting and dyeing crafts.
🐛 Pipe cleaners are also called chenille stems and got the name “pipe cleaner” because they were used to clean tobacco pipes before becoming a craft staple.
🎨 Brewed or instant coffee can be used as a natural dye for paper and fabric — leave it soaking longer for deeper sepia tones.
How do you make coffee-dyed paper butterflies?
What materials do I need for coffee-filter butterflies?
What ages is this coffee-filter butterfly craft suitable for?
What are the benefits of making coffee-filter butterflies?
