Photograph a Natural Phenomenon
Take photos of a natural phenomenon—like clouds, shadows, rainbows, or the Moon—learn observation, composition, and safety while documenting changes over time.


Step-by-step guide to photograph a natural phenomenon
Natural Phenomena for Kids. Learn About Rainbows, Thunder, Snow, Hail, Wind, Vulcano & More!
Step 1
Choose a natural phenomenon to photograph like clouds shadows rainbows or the Moon.
Step 2
Ask an adult for permission to go outside or to the area where you will take photos.
Step 3
Choose a safe location and a time when your phenomenon is easy to see.
Step 4
Open your notebook and write today’s date and the name of the phenomenon.
Step 5
Ask an adult or check a trusted source for the safety rule you must follow for your chosen phenomenon.
Step 6
Set up your camera or phone on a tripod or steady surface so it will not shake.
Step 7
Compose your first photo using the rule of thirds or by putting something interesting in the foreground.
Step 8
Take at least three photos from the same spot to capture small details.
Step 9
Change your angle or zoom and take three more photos to show a different perspective.
Step 10
Write the time the photo was taken the weather and one sentence describing what you see in your notebook.
Step 11
Return at regular intervals and repeat taking photos and writing notes to document how the phenomenon changes over time.
Step 12
Look through your photos and choose your best three images.
Step 13
Edit or crop one photo to improve the brightness or framing if you want to make it look better.
Step 14
Write a short title and a one‑sentence caption for each chosen photo in your notebook.
Step 15
Share your finished photo project and notes on DIY.org
Help!?
What can we use if we don't have a tripod or a notebook?
If you don't have a tripod, stabilize your camera or phone on a stack of books or a table edge and use your phone's notes app or a printed sheet to record the date, time, phenomenon and captions instead of the notebook.
My photos came out blurry or shaky — what should I try?
When photos are blurry, follow the instruction to set your camera on a steady surface, use the self-timer or burst mode, and take at least three photos from the same spot so you can choose the sharpest one.
How can this activity be changed for younger or older kids?
For younger children let an adult handle the 'ask an adult for permission' and tripod setup while the child composes one clear photo and dictates the date, time and one-sentence caption to write in the notebook, and for older kids encourage independent use of rule of thirds, multiple angles, repeated visits, and basic editing of a crop for brightness.
How can we make the project more interesting or personal?
Extend the project by returning at regular intervals to build a time-lapse sequence, include a small object or scale in the foreground to personalize comparisons, edit one photo for brightness or framing as instructed, and share your three titled photos and captions on DIY.org.
Watch videos on how to photograph a natural phenomenon
How Do Rainbows Form
4 Videos

How Do Rainbows Form
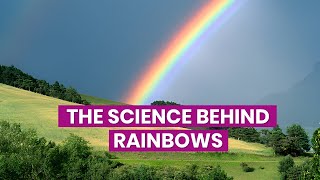
The Science Behind Rainbows | How Light Creates Nature's Most Beautiful Illusion

How Rainbows Are Formed 🌈 | Science for Kids | Fun Learning Explained

Rainbow Magic: How Are Rainbows Formed?
Facts about nature photography for kids
☁️ A single cumulus cloud can weigh more than 1 million kilograms because of all the tiny water droplets inside it!
🌕 The Moon drifts about 3.8 centimetres away from Earth every year — very slowly but for sure.
🌈 A rainbow is actually a full circle, but we usually see just an arc because the ground gets in the way.
🌗 Shadows change size and direction during the day — ancient people used them as the first clocks (sundials).
📸 Time-lapse photography squishes hours into seconds so you can watch clouds, shadows, or the Moon move quickly.
How do I teach my child to photograph a natural phenomenon like clouds, rainbows, shadows, or the Moon?
What materials and tools are needed to photograph natural phenomena with a child?
What ages is photographing natural phenomena suitable for?
What safety tips should I follow when photographing natural phenomena with children?
