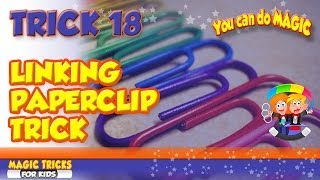
The Linking Paper Clip Trick
Link paper clips into a chain using a folded paper tab and gentle twisting to weave them together while exploring patterns and fine motor skills.


Step-by-step guide to the Linking Paper Clip Trick
Step 1
Gather your paper clips and a sheet of paper and sit at a clear table.
Step 2
Choose one paper clip to be your very first link.
Step 3
Fold the paper into a narrow tab about as wide as the loop of a paper clip.
Step 4
Slide one end of the folded paper tab between the two inner loops of the chosen paper clip.
Step 5
Gently twist the paper tab to nudge the paper clip open a tiny gap.
Step 6
Slide a second paper clip through the tiny gap so it loops onto the first clip.
Step 7
Pull the paper tab out to release the two linked paper clips.
Step 8
Insert the paper tab into the inner loops of the most recently added clip.
Step 9
Twist the tab gently to open a small gap in that newest clip.
Step 10
Slide another paper clip through the gap to add it to your chain.
Step 11
Repeat Steps 8 to 10 to make your chain as long as you like.
Step 12
Choose paper clips in different colors or sizes to create a repeating pattern as you add them.
Step 13
Share your finished paper clip chain on DIY.org.
Help!?
What can I use if I don't have a sheet of paper or the exact paper clips mentioned?
If you don't have a sheet of paper, cut a thin strip from a magazine, receipt, or printer paper and fold it into a narrow tab about as wide as a paper clip loop (Step 2), and if standard paper clips are missing try similarly sized binder-style clips or small key rings that will accept another clip's loop.
The paper keeps tearing or the clip won't open—what should I try differently?
If the paper tears in Step 5 or the clip won't open, refold a narrower, double-thick tab as in Step 2 and insert it between the inner loops more gently while twisting slowly to nudge only a tiny gap (Steps 4–5).
How can I adapt this activity for different ages?
For preschoolers, have an adult pre-fold the paper tab (Step 2) and pre-open the first clip slightly so the child can complete Step 6, while older kids can work independently to make longer chains and deliberate color patterns (Step 11).
How can we make the paper clip chain more creative or useful after making it?
To enhance the outcome, alternate colored or sized clips as in Step 11 to create repeating patterns, add beads or ribbon to the finished chain to turn it into a bracelet or garland, and then photograph your design to share on DIY.org (Step 12).
Watch videos on how to link paper clips using a folded paper tab
How to Do the Linking Paper Clips Trick | Magic Tricks
4 Videos

How to Do the Linking Paper Clips Trick | Magic Tricks
Linking Paper Clips Magic Trick Tutorial
Linking Paper Clips Illusion - Try for yourself - You link Paperclips in-front of their eyes

Linking Paper Clips Revealed #science #trick
Facts about fine motor skills and paper crafts for kids
📎 The 'Gem' paperclip shape most people use today dates back to the late 1800s and holds papers without needing a twist!
🤏 Linking paper clips into chains helps build fine motor skills — practicing tiny hand movements makes fingers stronger and steadier.
🎨 Folding a small paper tab is a bit like mini-origami: a few simple folds can create a clever hook for weaving clips together.
🧮 Making color or size patterns while linking clips is a fun way to explore sequencing — a basic building block of math!
♻️ Most paper clips are made of steel, so they can be straightened, reshaped, or recycled when you’re finished playing.
How do I do the Linking Paper Clip Trick with a folded paper tab?
What materials do I need for the Linking Paper Clip Trick?
What ages is the Linking Paper Clip Trick suitable for?
What are the benefits and safety tips for the Linking Paper Clip Trick?
