Star in a Cosplay Photoshoot
Make a simple costume and prop using safe craft materials, plan poses, set up a backdrop, and take cosplay photos to practice storytelling.


Step-by-step guide to star in a cosplay photoshoot
5 Tips for Underage Cosplayers | Cosplay Tips
Step 1
Pick a character to cosplay and say one short sentence about their story.
Step 2
Decide to make a mask and a simple handheld prop.
Step 3
Sketch a mask shape and a prop shape on cardboard or craft foam.
Step 4
Cut out the mask base from your cardboard or foam with safety scissors.
Step 5
Cut out eye holes in the mask so you can see clearly.
Step 6
Decorate the mask using coloring materials and fabric scraps glued or taped on.
Step 7
Attach the elastic band to both sides of the mask so it fits your head.
Step 8
Cut and shape the prop (like a wand or sword) from cardboard or craft foam.
Step 9
Decorate the prop with colors and fabric scraps to match your character.
Step 10
Hang a fabric scrap or sheet on a wall with tape to make a smooth backdrop.
Step 11
Practice three different poses in front of a mirror and pick your favorites.
Step 12
Put on your mask and hold your prop ready for the photos.
Step 13
Ask a grown-up or friend to take photos or set a timer and take at least six pictures of your poses.
Step 14
Pick your favorite photo from the set to show your story.
Step 15
Share your finished cosplay photo and story on DIY.org.
Help!?
If I can't find craft foam or an elastic band, what can I use instead for the mask and prop?
If you don't have craft foam for the mask or prop, use sturdy cereal box cardboard for the mask base and wand/sword and replace the elastic band with ribbon, a shoelace, or tape loops tied to both sides of the mask.
What should I do if the cardboard tears when I cut the mask or the eye holes end up uneven?
If the cardboard tears while cutting with safety scissors or the eye holes are uneven, reinforce the mask base with a fabric scrap glued on the back, mark eye hole centers with a pencil, then carefully recut or use a hole punch to make clean attachment points for the elastic or ribbon.
How can I adapt this photoshoot activity for younger or older kids?
For younger children, pre-cut the mask and prop shapes and let them decorate with coloring materials and glued fabric scraps, while older kids can fully sketch, cut with safety scissors, layer cardboard for a sturdier prop, and plan three complex poses in the mirror before the photoshoot.
How can we extend or personalize the cosplay photoshoot to make the final photo more dramatic?
Enhance the final photos by adding shiny stickers or battery LED lights to the prop and mask, creating a multi-layer fabric backdrop taped to the wall, and encouraging matching poses and a short character sentence to tell a stronger story in the chosen photo.
Watch videos on how to star in a cosplay photoshoot
Beginner's Guide to Cosplay Contests | Competitive Cosplay: Up Your Game!
3 Videos

Beginner's Guide to Cosplay Contests | Competitive Cosplay: Up Your Game!
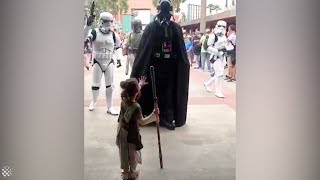
Four-year-old girl dressed as Rey meets Star Wars characters

Star Wars Trying On 30 Costumes for Whole Family | Halloween Costumes and Toys
Facts about cosplay and costume making for kids
🎭 Cosplay began as fans dressing up at sci‑fi conventions and has grown into a global hobby with huge community events.
✂️ Many cosplay costumes are made from everyday craft supplies like felt, foam, cardboard, and hot glue—no fancy sewing required!
📸 Good lighting and a simple backdrop (a bedsheet or colored paper) can make your photos look studio‑made.
⚠️ Make props lightweight and free of sharp edges, and always get an adult to help with hot glue, cutting, or power tools.
🌟 A few strong poses and tiny scene details can turn a single photo into a story about your character.
How do you set up a Star in a Cosplay Photoshoot with a simple costume and prop?
What materials do I need for a kid-friendly cosplay photoshoot craft?
What ages is a cosplay photoshoot activity suitable for?
What are the benefits of doing a cosplay photoshoot with kids?
