Make a Cardboard Guitar
Build a simple cardboard guitar using cardboard, rubber bands, and glue; learn about sound and tension while decorating and testing strumming techniques.


Step-by-step guide to make a cardboard guitar
Step 1
Gather all your materials and clear a flat workspace to build your guitar.
Step 2
Draw a guitar shape on the cardboard showing a body and a neck using the pencil and ruler.
Step 3
Cut out the guitar shape from the cardboard using scissors.
Step 4
Draw a long narrow rectangle on cardboard for a neck reinforcement strip.
Step 5
Cut out the long narrow rectangle strip with scissors.
Step 6
Glue the rectangular strip along the top of the neck to make the neck sturdier.
Step 7
Draw a round sound hole in the center of the guitar body with your pencil.
Step 8
Cut out the sound hole carefully from the guitar body.
Step 9
Cut a small folded cardboard block to use as a bridge near the bottom of the guitar body.
Step 10
Glue the small cardboard bridge block onto the body so it stands slightly above the surface.
Step 11
Stretch 3–6 rubber bands of different widths across the guitar body over the bridge and sound hole so they sit like strings.
Step 12
Change the tension of each rubber band by sliding the bridge or moving the bands until each one sounds different.
Step 13
Decorate your guitar with coloring materials stickers and tape to make it look awesome.
Step 14
Experiment with strumming in different places and with different fingers to hear how the sound changes with tension and position.
Step 15
Take a picture or video of your finished cardboard guitar and share your creation on DIY.org
Help!?
If I don't have rubber bands, glue, or scissors, what can I use instead for the rubber-band strings, attaching the bridge, and cutting the guitar shape?
Use hair ties or elastic bits or string/yarn wrapped and taped across the body in place of the 3–6 rubber bands, use strong tape (duct or packing tape) instead of glue to attach the bridge and neck reinforcement, and use a blunt craft knife or ask an adult to help with cutting if scissors aren't available.
My neck keeps bending and the rubber bands buzz without making clear notes — how can I fix those steps?
If the neck bends, glue or tape an extra long narrow cardboard reinforcement strip along the top of the neck and press it flat while it dries, and if bands buzz, slide the small cardboard bridge block closer to or farther from the sound hole and tighten individual bands to change tension until each string sounds different.
How can I adapt the project for very young kids or older kids who want a challenge?
For younger children have an adult pre-cut the guitar body, sound hole, and bridge and let them decorate and stretch 3 large bands, while older kids can cut the sound hole themselves, use 6 thinner bands, add multiple reinforcement strips or craft sticks to the neck, and experiment with precise bridge placement for different tones.
What are simple ways to extend or personalize the cardboard guitar after finishing the basic steps?
Follow the decorate step by adding stickers and paint, swap the small bridge for a stacked cardboard block to experiment with tone, and add clothespins or pencils as makeshift tuning pegs on the neck to fine-tune each band.
Watch videos on how to make a cardboard guitar
Make a Fun Little Guitar | Homemade Carboard Guitar | DIY Tutorial #diyforchildren
3 Videos
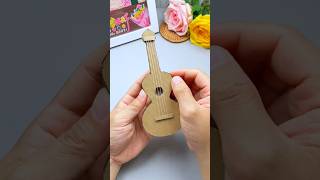
Make a Fun Little Guitar | Homemade Carboard Guitar | DIY Tutorial #diyforchildren
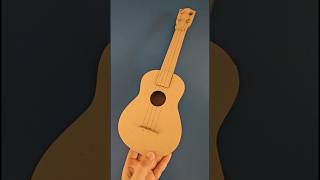
Make a Cardboard Guitar 🎸 | #shorts
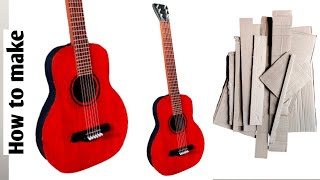
DIY || How to make guiter with cardboard || Easy and step by step
Facts about DIY musical instruments for kids
🎸 Most standard guitars have six strings, but musicians also play 7-, 8-, and 12-string guitars for different sounds.
📦 Cardboard can act as a lightweight soundbox — DIY cardboard instruments are commonly used in classrooms and workshops.
🪢 A rubber band’s pitch rises when you tighten it because higher tension makes it vibrate faster.
🎶 Shorter vibrating lengths make higher notes, so pressing a string or shortening it changes the pitch you hear.
🔬 Sound is vibration: a guitar’s body amplifies string vibrations into louder tones we can hear across the room.
How do you make a cardboard guitar?
What materials do I need for a cardboard guitar?
What ages is this cardboard guitar activity suitable for?
What are the benefits of making a cardboard guitar?
