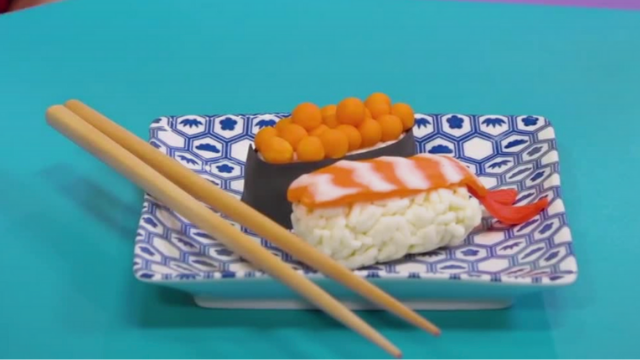
Make a Clay Sushi Platter
Make a realistic clay sushi platter using air-dry clay, simple tools, and paint; model different sushi pieces, arrange them on a decorated tray.


Step-by-step guide to make a clay sushi platter
Step 1
Cover your work surface with paper towel to keep clay clean and protect the table.
Step 2
Decorate your tray by covering the cardboard or tray with coloured paper or drawing a pattern with markers.
Step 3
Break the air-dry clay into several small pieces to make different sushi parts.
Step 4
Roll one small piece of clay between your palms to make an oval rice mound.
Step 5
Flatten a different small piece of clay into a thin rectangle to make a fish slice.
Step 6
Gently press the fish slice onto the rice oval to make a nigiri sushi.
Step 7
Roll three small pieces of clay together into a short cylinder to make a maki roll base.
Step 8
Roll a thin strip of dark clay and wrap it around the cylinder to make the nori seaweed.
Step 9
Cut the cylinder into several round slices using the plastic knife to make maki pieces.
Step 10
Shape a new small rice oval for a gunkan style sushi base.
Step 11
Wrap a thin strip of dark clay around the sides of the gunkan rice to form a seaweed cup.
Step 12
Roll tiny orange beads of clay and press them onto the top of the gunkan to make fish roe.
Step 13
Place all your sushi pieces on the decorated tray and leave them to dry for 24 hours until hard.
Step 14
Paint your dried sushi pieces and the tray with colours and details you like and let the paint dry.
Step 15
Share your finished clay sushi platter on DIY.org
Help!?
I can't find air-dry clay, the cardboard tray, or a plastic knife — what can I use instead?
If you can't find air-dry clay, substitute polymer clay or homemade salt-dough, use a sturdy paper plate or thin wooden board in place of the cardboard tray, and cut maki slices with a butter knife or a clay modeling tool instead of the plastic knife.
Some pieces fall apart or don't stick together — how do I fix that?
If the fish slice or nori strip won't stay on the rice or maki unravels, press seams gently and blend edges with a slightly damp finger, score contact points before joining, and smooth again before leaving the pieces to dry for 24 hours.
How can I adapt this activity for younger or older children?
For toddlers, pre-roll rice ovals and provide pre-cut fish slices and stickers to press onto a paper plate tray, while older kids can sculpt thinner maki, add tiny roe beads, and paint detailed patterns after the 24-hour dry.
How can we make the clay sushi look more realistic or extend the activity?
To enhance the platter, press a toothpick to add rice texture, mix mica powder or glitter into paints for shimmery fish slices, varnish finished pieces for shine, and create matching chopsticks and a soy-sauce dish for display.
Watch videos on how to make a clay sushi platter
🔴DIY How to Make Miniature SUSHI SET - Easy Polymer Clay, Fondant, plastilina Tutorial
3 Videos
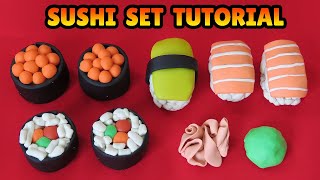
🔴DIY How to Make Miniature SUSHI SET - Easy Polymer Clay, Fondant, plastilina Tutorial
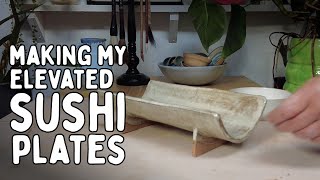
How I Hand Build Textured Sushi Platters
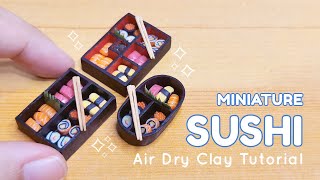
Mini Sushi 🍣 | 1:12 Scale Miniature | Air Dry Clay Tutorial
Facts about air-dry clay crafts
🍣 Sushi began as a way to preserve fish in fermented rice centuries ago, and today it's served fresh and artful.
🍙 Nigiri is a hand-pressed rice ball topped with fish—perfect inspiration for tiny clay rice + topping models.
🧱 Air-dry and modeling clays often need 24–72 hours to harden fully; thinner pieces dry much faster than thick ones.
🎨 Painting in layers—base color, shadows, then tiny highlights—makes little sushi pieces look surprisingly real.
🥢 A sushi platter (moriawase) shows variety—mix nigiri, maki rolls, wasabi, and pickled ginger for a colorful display.
How do you make a clay sushi platter?
What materials do I need to make a clay sushi platter?
What ages is making a clay sushi platter suitable for?
What are safety tips and fun variations for clay sushi crafting?
