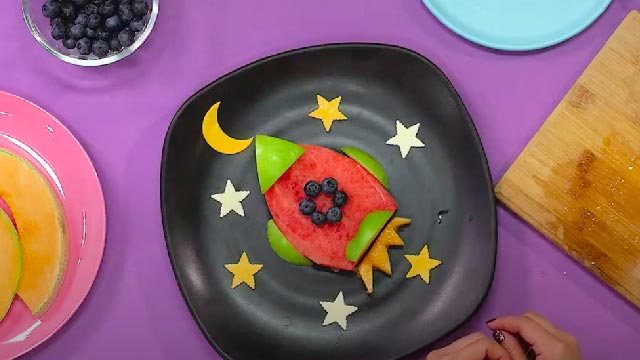
Craft an Edible Rocket Ship
Build an edible rocket ship using fruit, crackers, pretzels, and frosting; practice design, balance, and safe food assembly while decorating your tasty spacecraft.


Step-by-step guide to craft an edible rocket ship
Step 1
Gather all Materials Needed and place them on your small plate or countertop.
Step 2
Wash and dry the fruit so it is clean and ready to eat.
Step 3
With adult help use the plastic knife to cut larger fruit into rocket-friendly shapes like slices or cones.
Step 4
Lay out the fruit crackers and pretzels on the plate to plan how your rocket will look without attaching anything.
Step 5
Spoon some frosting into the small bowl to make easy-to-use edible glue.
Step 6
Spread a thin layer of frosting on one cracker to start the rocket body.
Step 7
Press another cracker on top of the frosted cracker to stack and build the rocket height.
Step 8
Press a strawberry or a banana slice onto the top cracker using frosting to make the nose cone.
Step 9
Push pretzel sticks gently into the frosting at the rocket base to add fins or boosters.
Step 10
If your rocket is wobbly ask an adult to carefully add a toothpick through the center for extra stability.
Step 11
Decorate your rocket with extra frosting and sprinkles to make it colorful and tasty.
Step 12
Share your finished edible rocket ship on DIY.org
Help!?
What can we use instead of a plastic knife, store-bought frosting, pretzels, or toothpicks if those are hard to find?
Use a butter knife with adult help to cut fruit, spread cream cheese or thick yogurt from the spoon as edible glue, swap pretzels for carrot sticks or celery for fins, and use uncooked spaghetti strands instead of toothpicks for center stability.
My rocket keeps wobbling or the nose cone slides off—what should I try?
Add a thicker layer of frosting between the cracker layers, press and hold each piece while the frosting sets, chill the plate briefly to firm the 'glue,' and if it's still unstable ask an adult to carefully insert a toothpick through the center as instructed.
How can I adapt the steps for different ages so it's safe and engaging for little kids and older kids?
For toddlers have an adult pre-cut fruit and spoon the frosting while the child arranges crackers and pretzels, for school-age children supervise use of the plastic knife to create shapes, and for older kids encourage building taller, multi-stage rockets with toothpick reinforcements and more detailed decoration.
What are simple ways to enhance or personalize our edible rocket after the basic assembly and decorating step?
After following the decoration step with frosting and sprinkles, personalize it by piping colored frosting for stripes, using chocolate chips as windows, adding fruit-slice flame trails, and photographing your finished edible rocket ship to share on DIY.org.
Watch videos on how to craft an edible rocket ship
LAUNCH Your Own DIY Rocket Ships for Kids Learning Fun! 🚀🌈
4 Videos

LAUNCH Your Own DIY Rocket Ships for Kids Learning Fun! 🚀🌈

EASY DIY Cup Rockets for kids
How To Make A Rocket Ship | Creativity Tips

How to Make a Cardboard Rocket for Kids | DIY Craft Rocket | Twinkl
Facts about edible food crafts for kids
🚀 The first liquid-fueled rocket flight was launched by Robert H. Goddard in 1926 — a tiny but game-changing moment for space travel!
🍎 Firm fruits like apple slices, grapes, and berries work great as edible building blocks because they hold shape and add color.
🥨 Pretzels date back over a thousand years — their crunchy sticks and twists are perfect for making rocket struts and antennas.
🍪 Crackers come in many shapes and stack well, making them a simple way to build a stable rocket body without baking.
🎨 Icing (like royal icing) acts as edible glue and can harden to help keep your tasty spacecraft firmly assembled.
How do I build an edible rocket ship using fruit, crackers, pretzels, and frosting?
What materials do I need to make an edible rocket ship?
What ages is the edible rocket ship activity suitable for?
Is the edible rocket ship activity safe? What allergy and choking precautions should I take?
