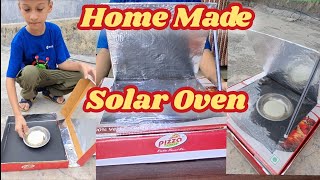
Build a DIY Solar Oven!
Build a DIY solar oven from cardboard, foil, and plastic wrap to safely heat snacks and learn about sunlight, reflection, and thermal energy.


Step-by-step guide to build a DIY solar oven
Step 1
Place a clean pizza box or large shoebox on a table with the lid closed.
Step 2
Use a ruler to draw a rectangle on the top of the lid leaving about a 1-inch border on three sides.
Step 3
Carefully cut along the three drawn sides to make a flap that stays attached on the fourth side.
Step 4
Cover the inside of the flap with aluminum foil shiny side out and tape the foil flat and smooth.
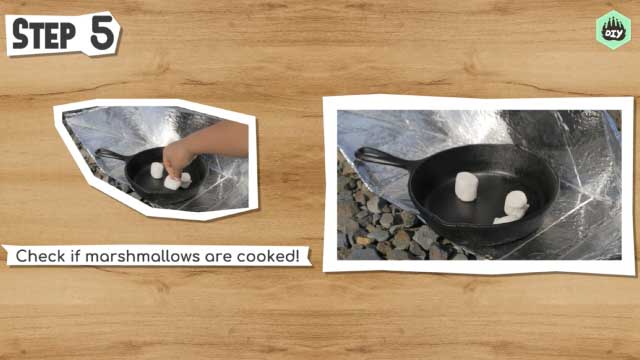
Step 5
Line the bottom inside of the box with black construction paper and tape it flat.
Step 6
Stretch a double layer of clear plastic wrap over the cut-out opening and tape the edges to make a sealed window.
Step 7
Place a small plate with your snack on the black paper inside the box.
Step 8
Close the lid of the box.
Step 9
Take the box outside and place it where it will get direct sunlight.
Step 10
Turn the box so the foil flap faces the sun and prop the flap with a stick to reflect sunlight into the box.
Step 11
Leave the solar oven in the sun for 30 to 60 minutes while you watch it with an adult nearby.
Step 12
With adult help, carefully open the box and remove your warmed snack.
Step 13
Share your finished creation on DIY.org
Final steps
You're almost there! Complete all the steps, bring your creation to life, post it, and conquer the challenge!

Help!?
What can we use instead of a pizza box, aluminum foil, or black construction paper if we can't find them?
If you don't have a pizza box or large shoebox use a shallow cereal or shipping box taped closed, replace the flap foil with a shiny mylar emergency blanket or smooth canned-food foil taped shiny-side out, and substitute black construction paper by coloring plain paper black so the plate still sits on a dark surface inside the box.
My solar oven isn't warming the snack—what might be wrong and how can we fix it?
Make sure the foil on the flap is taped flat and shiny-side out and angled to reflect sunlight, the double layer of clear plastic wrap is sealed over the cut-out window with no gaps, the black construction paper lies flat under the plate, and the box is turned so the foil flap faces the sun and propped securely with a stick.
How should we change the steps for younger children or older kids to make the project safe and challenging?
For preschoolers have an adult handle the ruler and 'cut along the three drawn sides' and the hot-food removal while the child smooths foil, tapes plastic, and decorates, and for older kids let them measure, cut the flap themselves, experiment with flap angles and 30–60 minute times, and add a thermometer to record results.
How can we improve or personalize our solar oven to cook better or make it more fun to share?
Boost performance by adding an extra layer of plastic over the window, insulating the sides with crumpled newspaper under the black paper, attaching extra foil reflectors to the outside flap, decorating the lid before cutting, and testing melted s'mores or warmed cheese to photograph and share on DIY.org.
Watch videos on how to build a DIY solar oven
Little Scientist #6: Homemade Solar Oven
4 Videos
Little Scientist #6: Homemade Solar Oven
How to Build a Solar Oven | The Science of Cooking | SciShow Kids
Easy and Useful Solar Oven
Homemade Solar Oven || How to make Solar Oven at Home || School Project working Model of Solar Oven
Facts about solar energy and heat transfer
☀️ Some solar cookers can reach temperatures over 100°C — hot enough to boil water using only sunlight.
🖤 Dark colors absorb heat best — lining your box with black paper or paint helps it warm up faster.
🪞 Shiny foil reflects and concentrates sunlight: angling reflective panels can make your oven much hotter.
🌍 Solar cooking helps reduce fuel use and indoor smoke, protecting forests and health in many parts of the world.
🥪 Solar ovens have been used to bake bread, cook rice, and heat snacks like nachos and s'mores without any fuel.
How do you build a DIY solar oven to heat snacks safely?
What materials do I need to make a solar oven from cardboard, foil, and plastic wrap?
What ages is making a DIY solar oven suitable for?
What are the benefits, safety tips, and variations for a cardboard solar oven?


One subscription, many ways to play and learn.
Only $6.99 after trial. No credit card required