Solve the Last Layer Cross
Learn to solve the last layer cross on a 3x3 Rubik's Cube by practicing simple algorithms, observation skills, and step-by-step pattern recognition.

Step-by-step guide to solve the Last Layer Cross on a 3x3 Rubik's Cube
Step 1
Hold the cube so the two solved layers are on the bottom and the unsolved last-layer color is on top.
Step 2
Look at the top face and name the pattern you see: dot L-shape line or cross.
Step 3
If you already see a cross on the top face go to Step 10 to share your success.
Step 4
If you see an L-shape turn the whole cube until the L sits in the top-left corner of the top face.
Step 5
If you see a line turn the whole cube so the line is horizontal across the top face.
Step 6
Perform this algorithm once by turning faces in this order: front clockwise right clockwise up clockwise right counterclockwise up counterclockwise front counterclockwise.
Step 7
Look at the top face again and repeat Steps 4 to 6 until the top shows a full cross.
Step 8
When the cross appears stop turning and check that all four top edge stickers match the top color.
Step 9
Practice the detect-orient-and-run routine a few more times from a dot pattern to build speed and confidence.
Step 10
Take a photo or note of your finished last-layer cross and share your achievement on DIY.org.
Help!?
What can we use if we don't have a physical Rubik's Cube or can't take a photo?
Use a free cube‑solving app or a printable cube net to practice the hold-and-orient steps, and if you can't take a photo for Step 10, draw the finished cross or save a screenshot instead.
The algorithm doesn't seem to make progress—what am I doing wrong?
Check that the two solved layers are on the bottom and that the L is placed in the top-left or the line is horizontal before performing the algorithm F R U R' U' F' exactly once, then repeat Steps 4–6 until a full cross appears.
How can I adapt this activity for different ages?
For preschoolers, have an adult hold the cube and let the child name dot/L/line patterns, for early school ages practice performing the single algorithm slowly, and for older kids time repeated 'detect-orient-and-run' routines to build speed.
How can we extend or personalize the activity after making the cross?
Extend it by timing multiple attempts from a dot to a cross, keeping a progress chart, decorating the cube stickers for personalization, and sharing the finished cross photo on DIY.org as suggested in Step 10.
Watch videos on how to solve the Last Layer Cross on a 3x3 Rubik's Cube
How to Solve the Last Layer of the Rubik's Cube | Intermediate Method Explained
4 Videos
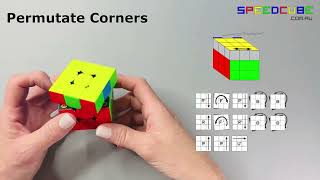
How to Solve the Last Layer of the Rubik's Cube | Intermediate Method Explained
![How to Solve Last Layer of Rubik's Cube [World's Easiest Method]](https://img.youtube.com/vi/6WrzbzKmP9U/mqdefault.jpg)
How to Solve Last Layer of Rubik's Cube [World's Easiest Method]
You Can Solve The Last Layer | Rubik's Cube Last Layer Problems
![10 Must Know Cross Tips! [CFOP Method]](https://img.youtube.com/vi/HDlDcRhCR0Q/mqdefault.jpg)
10 Must Know Cross Tips! [CFOP Method]
Facts about Rubik's Cube solving
🎯 The last layer cross orients the four top edges and is the first step of the OLL stage in the CFOP method.
⏱️ Top speedcubers often plan and place their cross during the 15-second inspection to save time in fast solves.
🧠 There are just a few common last-layer edge-orientation patterns to learn: dot, 'L' shape, line, and the full cross.
🔢 The Rubik's Cube has about 43 quintillion (43,252,003,274,489,856,000) possible positions—algorithms help you find the path!
🎓 Ernő Rubik invented the cube in 1974 to teach 3D geometry; learning the last-layer cross builds pattern recognition and algorithm skills.
How do I teach my child to solve the last layer cross on a 3x3 Rubik's Cube?
What materials do I need to practice the last layer cross?
What ages is learning the last layer cross suitable for?
What are the benefits of practicing the last layer cross with my child?
