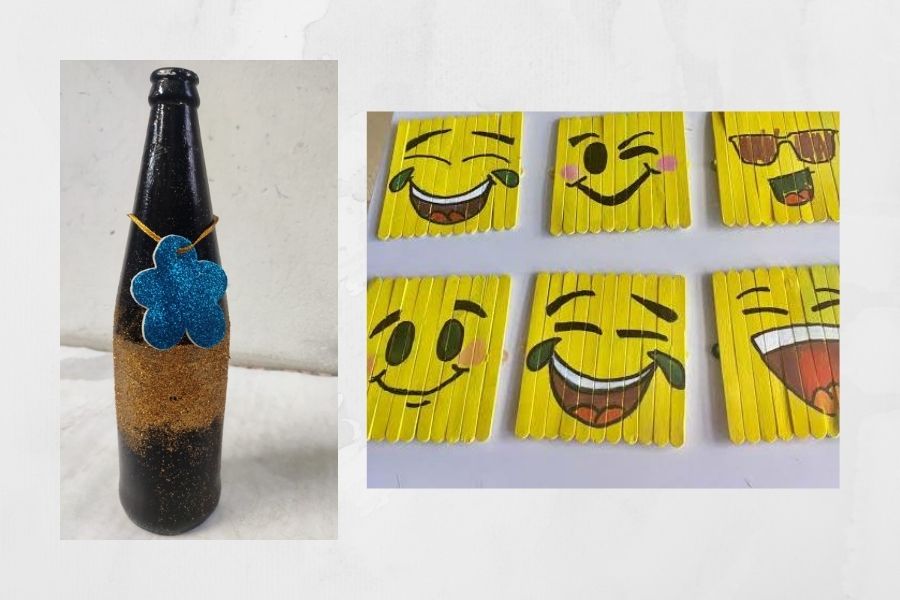
Create Upcycled Art from Household Items
Make colorful upcycled art using household items like cardboard, bottle caps, fabric scraps, glue, and paint while learning creativity and recycling.


Step-by-step guide to Create Upcycled Art from Household Items
Step 1
Gather all the materials and lay them out on a flat workspace.
Step 2
Pick one piece of cardboard to be the base of your artwork.
Step 3
Cut the cardboard into the shape and size you want for your art.
Step 4
Paint a bright background color on the cardboard to start your design.
Step 5
Let the paint dry completely before touching the surface.
Step 6
Sort your bottle caps and fabric scraps into color and size groups you like.
Step 7
Arrange the bottle caps and fabric on the dry cardboard to create a design without using glue.
Step 8
Trim any fabric scraps into the shapes you planned using scissors.
Step 9
Put a small dab of glue on the back of a bottle cap.
Step 10
Press the glued bottle cap onto the cardboard firmly in its planned spot.
Step 11
Put a small dab of glue on the back of a fabric scrap.
Step 12
Press the glued fabric scrap onto the cardboard firmly in its planned spot.
Step 13
Add painted details or marker accents to finish your picture.
Step 14
Let the whole artwork dry completely before moving it.
Step 15
Share a photo of your finished upcycled art on DIY.org.
Help!?
What can I use instead of cardboard, bottle caps, or fabric scraps if I can't find them?
Use a cereal box or stiff paper as the cardboard base, plastic jar lids or punched paper circles instead of bottle caps, and old T‑shirts, napkins, or colored paper in place of fabric scraps.
My bottle caps or fabric aren't sticking—what should I try?
Make sure the paint is fully dry (step 5), use a small dab of glue and press firmly as shown in steps 9–11, and hold or weight pieces down until the glue sets so they adhere.
How can I adapt this activity for different ages?
For toddlers, pre-cut the cardboard (step 3), pre-paint the background (step 4), and use glue sticks or tape with large items, while older kids can trim fabric into detailed shapes (step 8), add painted details/marker accents (step 12), and post on DIY.org (step 14).
How can we extend or personalize the upcycled art?
Create depth by stacking bottle caps, glue on sequins or small LED tealights, add painted or marker accents (step 12), then seal or frame the dried artwork (step 13) before sharing on DIY.org (step 14).
Watch videos on how to Create Upcycled Art from Household Items
What Natural Materials Are Best For Kids' Upcycling Crafts? - The Upcycle Lab
4 Videos
What Natural Materials Are Best For Kids' Upcycling Crafts? - The Upcycle Lab
What Fun Bottle Cap Art Can Kids Make From Upcycled Plastic? - The Upcycle Lab
What Easy Upcycling Projects Can Kids Make With Nature Finds? - The Upcycle Lab
10 DIY Crafts Using Recycled Materials - EASY and CHEAP CRAFTS #recycle
Facts about upcycling and recycling crafts
♻️ Upcycling turns everyday trash into treasure—making art from waste reduces landfill and sparks creativity.
🎨 Marcel Duchamp's 1917 work "Fountain" helped popularize the idea that ordinary objects can be art.
📦 Cardboard is a craft superstar: it's lightweight, easy to cut, paintable, and perfect for sculptures and collages.
🧵 Fabric scraps and bottle caps add color and texture while keeping small items out of the bin.
🧼 A quick wash and dry for bottles, caps, and containers makes them safe and fresh for kid-friendly projects.
How do I make colorful upcycled art from household items with my child?
What materials do I need for upcycled art using bottle caps and fabric scraps?
What ages is creating upcycled art from household items suitable for?
What are the benefits and safety tips for upcycled art projects with children?
