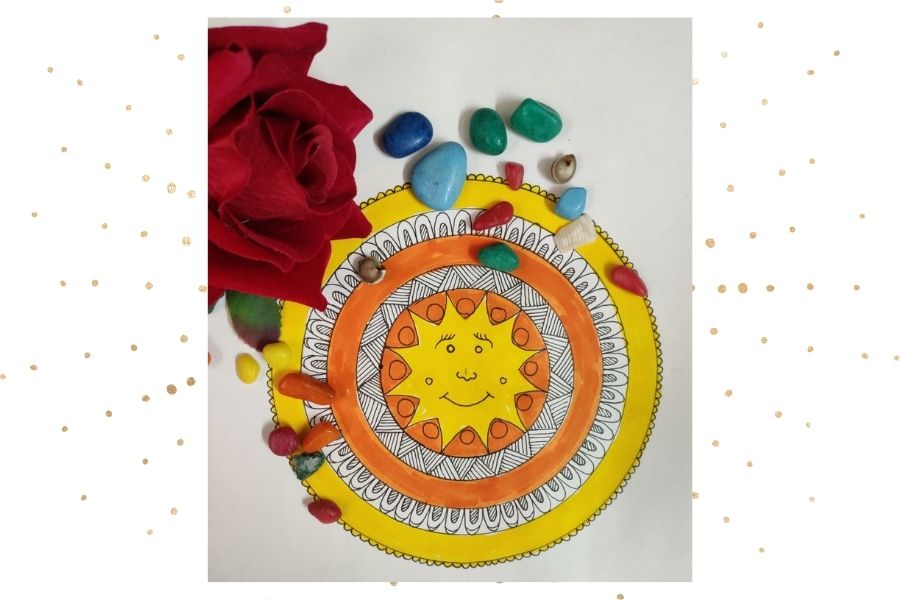
Draw Mandala Art
Draw a colorful mandala using compass, ruler, pencil, and markers to create repeating patterns and learn about radial symmetry and concentration.


Step-by-step guide to draw mandala art
Step 1
Clear a flat workspace and place your paper and all materials within reach.
Step 2
Lightly mark the center of your paper with a small pencil dot.
Step 3
Use the compass to draw several concentric circles around the center, increasing the radius each time.
Step 4
Place the ruler through the center and draw straight lines across the circles to divide them into equal slices (try 8 slices).
Step 5
Choose the innermost ring and draw a simple shape in pencil repeatedly around that ring.
Step 6
Choose another ring and draw a different repeating shape around that ring.
Step 7
Copy the same shapes into each slice so every slice matches and your design shows radial symmetry.
Step 8
Carefully trace over your pencil shapes and circle lines with the thin black marker to make them bold.
Step 9
Wait a moment for the ink to dry and then gently erase the pencil guide lines.
Step 10
Colour each repeating shape using your colouring materials and repeat colours in every slice to keep the symmetry.
Step 11
Share your finished mandala art on DIY.org.
Help!?
I don't have a compass — what can I use to draw the concentric circles?
Trace round objects like bottle caps, cups, or lids of different sizes around the pencil-dot center and use a string tied to a pencil anchored at the center for larger circles before dividing with the ruler into slices.
My slices look uneven — how can I fix that so the mandala keeps radial symmetry?
Fold the paper into 8 equal parts or use a protractor to mark equal angles and then draw straight lines through the pencil-dot center with your ruler so every slice matches before copying shapes into each slice.
How can I adapt this mandala activity for younger or older kids?
For younger children, pre-draw fewer concentric rings and 4 large slices and let them use stickers or crayons to repeat simple shapes, while older kids can add more rings, smaller slices, intricate repeating shapes, and trace with a thin black marker for finer detail.
What are simple ways to enhance or personalize the finished mandala?
Embellish coloured repeating shapes with metallic gel pens or glitter glue, write your name or date in the innermost ring, and photograph the finished piece to share on DIY.org.
Watch videos on how to draw mandala art
How to Draw a Mandala: Easy Step-by-Step Tutorial for Beginners!
4 Videos
How to Draw a Mandala: Easy Step-by-Step Tutorial for Beginners!
How to Draw a Beginner Mandala in a Few Easy Steps: Drawing Tutorial for Beginner Artists

Let's create Mini Mandalas with some basic & easy Patterns ✨🥰 How to draw Mandala Art for beginners
How to draw Mandala Art for beginners | Easy colorful Mandala | Doodle/Zentangle drawing
Facts about geometry and symmetry in art
🎨 Mandalas have been used for centuries in Hindu and Buddhist art as tools for meditation and storytelling.
🔁 Radial symmetry means a design repeats around a center point — like flower petals or a bicycle wheel.
🧭 A drawing compass helps you make perfect circles; artists and architects have used them for ages.
🌈 Choosing contrasting colors makes patterns pop, while analogous colors (neighbors on the color wheel) create harmony.
🧘 Making mandalas can boost focus and calm — art therapists often use them to help people relax.
How do you draw a colorful mandala using a compass, ruler, pencil, and markers?
What materials do I need to draw mandala art with a compass and markers?
What ages is mandala drawing suitable for and how can it be adapted?
What are the benefits of drawing mandalas for kids?
