Craft a Teapot Box
Build a teapot-shaped storage box from cardboard, scissors, glue, and paint; measure, cut, assemble, and decorate while learning basic crafting skills.

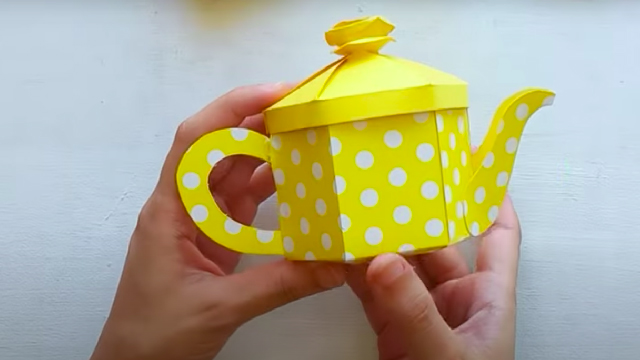

Step-by-step guide to craft a teapot box
Step 1
Gather all your materials and clear a flat workspace so you have room to draw and cut.
Step 2
Draw two identical teapot shapes on the cardboard using your pencil and ruler as guides.
Step 3
Draw a long rectangle strip about 2 inches wide that will wrap around the teapot outlines and be long enough to go all the way around.
Step 4
Draw a small lid piece a spout shape and a handle shape on the cardboard for later attaching.
Step 5
Cut out the two teapot outlines the long strip the lid the spout and the handle carefully with scissors.
Step 6
Score the long strip with the blunt side of the scissors or a ruler to make fold lines about every inch so it can bend smoothly.
Step 7
Fold along the scored lines so the strip curves to match the teapot outline shape.
Step 8
Apply glue to one long edge of the strip and press it to the edge of one teapot outline to form the box wall.
Step 9
Apply glue to the other edge of the strip and press the second teapot outline onto it to close the box shape.
Step 10
Glue a small folded tab to the back of the lid piece and attach the lid to the top edge so it can open and close.
Step 11
Glue the spout and then glue the handle onto the sides of the teapot box in the places you drew.
Step 12
Let the glue dry completely before you move on to decorating so nothing comes apart.
Step 13
Paint and decorate your teapot box using your paint brushes and decorations to make it bright and fun.
Step 14
Share a photo of your finished teapot box on DIY.org so everyone can see your awesome creation.
Help!?
What can we use if we don't have thick cardboard, a ruler, or scissors?
Use layered cereal boxes or a flattened shipping box instead of thick cardboard, a straight-edged book as a ruler, and an adult-supervised craft knife or child-safe scissors if you lack regular scissors, and be sure to score before drawing the teapot outlines.
The long strip won't bend evenly or the box has gaps—how can I fix that?
Re-score the long strip with the blunt side of the scissors or a ruler and add fold lines closer than every inch so it curves to match the teapot outline, then press and hold the glued edges together until the glue sets to close any gaps.
How can I adapt the steps for different age groups?
For younger kids, pre-cut the two teapot outlines, long strip, lid, spout, and handle and let them glue and decorate, while older kids can draw precise templates with a ruler, score the strip every inch themselves, and paint detailed decorations.
What are some ways to enhance or personalize the finished teapot box?
Before attaching the second teapot outline, glue in a small internal divider or decorative paper, add a tiny magnet to the lid tab for a secure closure, and finish by painting, adding sequins, or decoupaging to personalize the teapot box.
Watch videos on how to craft a teapot box
Teapot Favour Box - UPDATED Assembly Tutorial
4 Videos
Teapot Favour Box - UPDATED Assembly Tutorial
Teapot Favour Box - Assembly Tutorial
Teapot Storage Box | Simple Organizer | DIY Paper Crafts | DIY Kitchen Decoration | Desk Decor Ideas
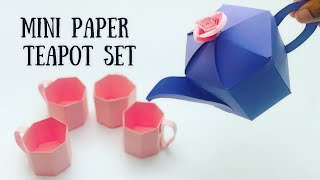
DIY MINI PAPER TEAPOT AND CUPS / Paper Craft / mini Paper Teapot set crafts / mini paper cup
Facts about cardboard crafts for kids
🫖 Teapots as we know them first appeared in 17th-century China, and Yixing clay teapots became famous for brewing tea.
📦 Corrugated cardboard was developed in the 19th century and quickly became the go-to lightweight, strong material for boxes and craft projects.
✂️ Scissors have been used for over 3,000 years — ancient civilizations like the Egyptians used early bronze cutting tools for craft and daily life.
🖌️ Mix two primary paint colors to make a secondary color: red + yellow = orange, red + blue = purple, blue + yellow = green — great for decorating your teapot box!
📐 Scoring (lightly creasing) cardboard makes clean folds and helps 3D shapes like teapot boxes assemble neatly and stay sturdy.
How do I make a teapot-shaped storage box with my child?
What materials do I need to make a teapot box?
What ages is a teapot box craft suitable for?
What are the benefits of making a teapot box with kids?
