Make a Tie-and-Dye snowflake
Make a tie-and-dye snowflake by folding fabric, binding sections with rubber bands, applying washable dye, then rinsing to reveal colorful snowflake patterns.


Step-by-step guide to make a tie-and-dye snowflake
Step 1
Spread the plastic table cover on your work surface to protect it from dye.
Step 2
Lay your square cotton bandana or cloth flat and smooth out any wrinkles with your hands.
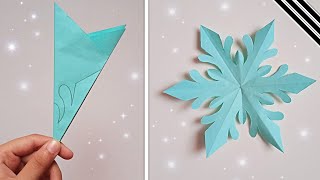
Step 3
Fold the cloth in half diagonally to make a triangle.
Step 4
Fold the triangle into thirds by folding one corner over about one third and then folding the other corner over to form a narrow wedge.
Step 5
Wrap 4 to 6 rubber bands around the narrow wedge at equal spaces to create separate color sections.
Step 6
Squeeze different washable dye colors onto each rubber-banded section using the squeeze bottles.
Step 7
Blot any large drips gently with a paper towel so colors do not run too far.
Step 8
Let the dyed fabric sit undisturbed for 6 to 8 hours so the dye can set.
Step 9
Carry the fabric to a sink and rinse it under cold running water while keeping the rubber bands on until the rinse water runs mostly clear.
Step 10
Carefully remove the rubber bands from the fabric.
Step 11
Gently unfold the cloth to reveal your colorful snowflake pattern.
Step 12
Hang the fabric or lay it flat to dry completely.
Step 13
Share a photo of your finished tie-and-dye snowflake on DIY.org.
Help!?
What can we use if we don't have a cotton bandana, squeeze bottles, or a plastic table cover?
If you don't have a square cotton bandana use a white 100% cotton T‑shirt or tea towel, substitute squeeze bottles with a cleaned ketchup bottle or turkey baster for applying washable dye, and protect your surface with garbage bags or layered newspaper instead of the plastic table cover.
My colors are bleeding together or the dye looks faint — what should I check or do differently?
If colors are bleeding, immediately blot large drips with a paper towel, make sure the folded triangle wedge is wrapped tightly with rubber bands, and if the dye looks faint confirm you used washable dye on cotton and let the fabric sit undisturbed for the full 6 to 8 hours before rinsing under cold running water.
How can I adapt this activity for younger children or older kids?
For younger children, pre-fold the cloth and pre-place the rubber bands and let them squeeze two pre-measured dye colors with close supervision, while older kids can fold the triangle into tighter thirds, use 4–6 rubber bands for more sections, experiment with more dye colors from the squeeze bottles, and handle the 6–8 hour setting and rinsing steps themselves.
How can we personalize or extend the finished snowflake?
After you gently unfold and hang the fabric to dry completely, personalize the revealed colorful snowflake with fabric markers or fabric paint accents, turn the bandana into a pillow or wall hanging, or share a photo of your finished piece on DIY.org as the instructions suggest.
Watch videos on how to make a tie-and-dye snowflake
☃️ SNOWFLAKES ❄️ tie dye tutorial || how to fold and dip dye sekka shibori (snow flower)
4 Videos
☃️ SNOWFLAKES ❄️ tie dye tutorial || how to fold and dip dye sekka shibori (snow flower)
DIY CAPTIVATING SNOWFLAKE CRAFT | EASY PAPER SNOWFLAKE STEP BY STEP
♥️DIY SNOWFLAKE WITH HEARTS TUTORIAL | CHRISTMAS CRAFTS INCL ART
How to Make 6-Pointed Snowflakes with Paper and Scissors, Christmas Decorations 2022,paper snowflake
Facts about tie-dye and fabric dyeing
🎨 Tie-dye became hugely popular in the 1960s during the hippie movement when people celebrated bright, hand-made patterns.
❄️ No two snowflakes are exactly alike — so every tie-and-dye snowflake you create is totally unique!
🧵 Natural fibers like cotton soak up dye much better than many synthetic fabrics, giving brighter, longer-lasting colors.
🌈 Mixing two washable dye colors can make a whole new shade — try blue + yellow to get green!
🧪 Rinsing until the water runs clear helps set the pattern and keep colors crisp; always rinse with an adult to stay safe.
How do you make a tie-and-dye snowflake?
What materials do I need for a tie-and-dye snowflake?
What ages is this activity suitable for?
What are safety tips and variations for tie-and-dye snowflakes?
