Build Your Unique Garden Space
Design and build a small container garden using soil, seeds, labels, and decorations; learn plant care, observation, and creativity while tracking growth each week.


Step-by-step guide to Build Your Unique Garden Space
Homemade Mini Garden | Kids Craft
Step 1
Pick one container or pot you want to use for your garden.
Step 2
Ask an adult to help add drainage holes if your container does not have any.
Step 3
Place the empty container in a sunny spot where the plants will get light.
Step 4
Fill the container with potting soil leaving about one inch of space at the top.
Step 5
Read the seed packet to find the correct planting depth and spacing.
Step 6
Use a spoon or your finger to make small planting holes at the right spacing.
Step 7
Put the seeds into the holes and gently cover them with soil.
Step 8
Write the plant name on a label and stick it into the soil next to each seed type.
Step 9
Water the soil gently until it is evenly moist but not soggy.
Step 10
Decorate the rim or surface of your container with stones stickers or small figurines.
Step 11
Create a weekly growth chart in your notebook with spaces for the date the plant height and a drawing.
Step 12
Every seven days measure the plant height and record the measurement and date in your chart.
Step 13
Each week draw a picture of your plant in the notebook to show how it changes.
Step 14
Share a photo and a short story about your finished container garden on DIY.org
Help!?
What can we use if we don't have potting soil, a labeled pot, or a container with drainage holes?
If you don't have potting soil use a mix of garden soil and compost (about 3:1), ask an adult to drill or poke drainage holes in a recycled yogurt cup or tin, and make plant labels from popsicle sticks or masking tape to write the plant name.
My seeds aren't sprouting or the soil stays soggy—what should I check and fix?
Check the seed packet for correct planting depth and spacing, confirm an adult added drainage holes and that you water gently until the soil is evenly moist but not soggy, and move the container to a sunnier spot if seedlings are weak.
How can I adapt this garden activity for a 4-year-old, an 8-year-old, or a 12-year-old?
For a 4‑year‑old have an adult pre-fill the container and let them press large seeds with a spoon and decorate with stones, for an 8‑year‑old let them read the seed packet, make labels, and draw the weekly growth chart, and for a 12‑year‑old have them plan spacing, measure plant height every seven days, and write the short story for DIY.org.
What are simple ways to personalize or extend our container garden once the seeds are planted?
Add a small trellis or painted popsicle-stick markers, arrange different seed types in labeled sections, decorate the rim with stones, stickers, or small figurines, and expand the weekly chart into a photo diary to share on DIY.org.
Watch videos on how to Build Your Unique Garden Space
🥰 Creative Backyard Crafts and Garden Hacks to Upgrade Outdoor Space
4 Videos
🥰 Creative Backyard Crafts and Garden Hacks to Upgrade Outdoor Space
Transform Your Space: Easy Indoor Gardening Hacks for Beginners ☘
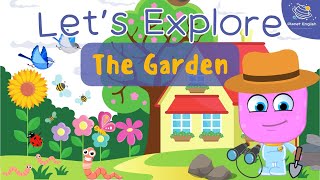
Let's Explore the Garden! | Fun Outdoor Adventure for Kids | Kindergarten | EYFS
In the Garden | ESL Vocabulary Games for Kids
Facts about container gardening for kids
🌱 Many seeds (like radishes or lettuce) can sprout in just 3–7 days when kept warm and moist.
🪴 Container gardens let you grow herbs, veggies, and flowers in tiny spaces—even a milk carton can be a pot!
♻️ Compost made from kitchen scraps and yard waste becomes rich soil that helps plants grow strong.
📸 Taking a weekly photo and measuring your plants helps you spot growth, pests, or water problems fast.
🎨 Colorful labels and decorations make your garden unique and help you remember what you planted where.
How do I design and build a small container garden with my child?
What materials do I need for the Build Your Unique Garden Space activity?
What ages is a container garden activity suitable for?
What are the benefits of building a container garden with kids?
