Build your Chest of Materials
Build and decorate your chest of materials, collect, sort, and label craft supplies, and create an inventory to organize projects and inspire creativity.


Step-by-step guide to build your chest of materials
Step 1
Gather your shoebox or small box and all your craft supplies and bring them to a clean flat workspace.
Step 2
Empty all your craft supplies onto the table so you can see every item clearly.
Step 3
Sort your supplies into groups like ribbons buttons paper and beads and place each group into its own small container or resealable bag.
Step 4
Use sticky labels or masking tape and your marker to write a name for each group and stick the labels onto each container or bag.
Step 5
Turn your box into a chest by removing the lid if there is one and smoothing any rough edges with tape.
Step 6
Cover the outside of the box with wrapping paper or magazine pages and secure them with tape or glue.
Step 7
Decorate the top and sides of the chest with stickers drawings or coloured designs to make it look awesome.
Step 8
Arrange the labeled containers neatly inside the chest so everything fits and is easy to find.
Step 9
Write a simple inventory on a sheet of paper listing each supply group and the number of items in each group.
Step 10
Attach the inventory paper to the inside of the lid or the inside wall of the chest with tape so you can check it anytime.
Step 11
Create a small card with one or two project ideas and tuck it into the chest to inspire future creations.
Step 12
Put a name label on the outside of your chest and close it so it’s ready to store and organize your supplies.
Step 13
Share a photo and a short description of your finished Chest of Materials on DIY.org
Help!?
What can we use instead of sticky labels or small containers if we can't find them?
Use strips of paper secured with masking tape as labels and replace small containers with resealable sandwich bags or recycled egg carton cups to sort supplies during step 3 and label them in step 4.
What should we do if the box edges are still sharp or the wrapping paper won't stick when turning the box into a chest?
Smooth any rough edges by applying wide masking tape to the inside and outside as instructed in step 5, and if wrapping paper won't stick, use small strips of tape under seams and press with a book until the glue dries from step 6.
How can we adapt this activity for younger or older children?
For younger kids, have them sort large items into open containers, stick ready-made labels, and use stickers for decoration, while older kids can measure and trim wrapping paper, write a detailed inventory in step 9, and craft project cards with step-by-step ideas in step 11.
How can we make the Chest of Materials more useful or personalized after finishing it?
Enhance the chest by color-coding groups with washi tape, laminating the inventory sheet and attaching it inside the lid, adding a small pocket for extra project cards, and painting or adding a foam nameplate on the outside in steps 6–12.
Watch videos on how to build your chest of materials
How to Make a Stunning DIY Chest from Cardboard and Paper
4 Videos
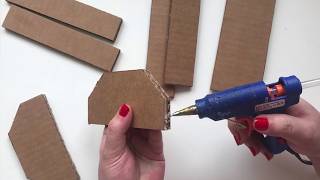
How to Make a Stunning DIY Chest from Cardboard and Paper

Working Model of Respiratory System/Lungs Model with Balloon/Kansal Creation/School Science Project
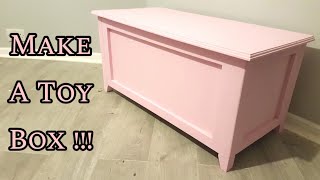
DIY Toy Chest | Toy Chest Build | Storage Chest | Easy Simple Build
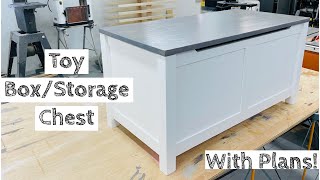
Building a Toy Box/Storage Chest | Plans Available!
Facts about craft organization for kids
🧰 Wooden storage chests have been used for centuries — even ancient civilizations used boxes to protect tools and treasures.
🎨 Sorting craft supplies by color, size, or material makes it easier to find what you need and can spark new project ideas.
🏷️ Picture and color labels help young makers find and return supplies before they can read full words.
📋 Keeping a simple inventory or checklist prevents buying duplicates and makes planning craft projects faster.
♻️ Decorating your chest with upcycled bits (like old ribbons, bottle caps, or fabric scraps) makes each box unique and eco-friendly.
How do I build and organize a chest of materials for craft projects?
What materials do I need to make a child-friendly chest of materials?
What ages is a chest-of-materials activity suitable for?
What are the benefits of building a chest of materials with my child?
