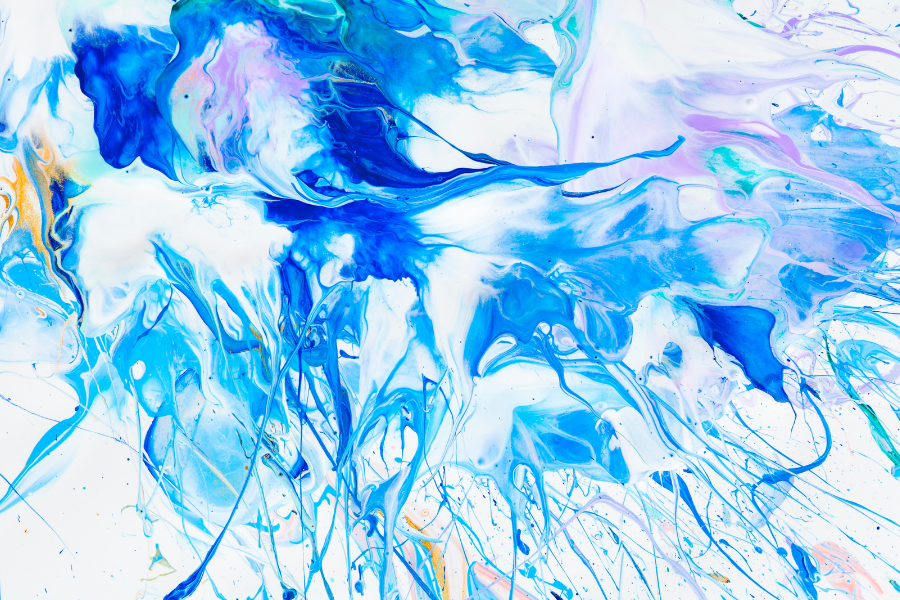
Make a watercolour splash piece by @sealight!
Make a watercolor splash piece inspired by @sealight, experimenting with wet paint, blowing, tilting, and sprinkling salt to create shimmering sea textures.


Step-by-step guide to make a watercolour splash piece by @sealight
Step 1
Spread the newspaper or washable cover over your table to protect it.
Step 2
Tape the edges of your watercolor paper to the covered table so it stays flat.
Step 3
Dip a clean brush in water and gently wet the whole surface of the paper until it looks slightly shiny.
Step 4
Mix a watery blue and a watery green wash on your palette to make sea colors inspired by @sealight.
Step 5
Dot several puddles of the blue and green wash onto the wet paper using your brush.
Step 6
Pick up a straw and gently blow on each puddle to push the paint outward and make splashy shapes.
Step 7
Tilt the taped paper a little to let the colors run and meet each other across the page.
Step 8
Sprinkle a pinch of table salt over the wet paint where you want shimmering sea texture.
Step 9
Wait and let the painting sit undisturbed until the paint feels completely dry.
Step 10
Brush or flick the dried salt off the paper with a dry brush or your finger to reveal the texture.
Step 11
Slowly peel the tape off the paper to reveal clean edges around your artwork.
Step 12
Share your finished watercolor splash piece on DIY.org
Help!?
What can I use instead of watercolor paper, table salt, or a straw if I don't have them?
Use heavyweight mixed-media paper or thick cardstock taped to the table like the watercolor paper, substitute coarse sea or kosher salt for table salt for stronger texture, and replace the straw with a clean pipette, turkey baster, or short piece of rolled paper to blow the puddles.
My puddles aren't spreading or the paint looks muddy—what should I try to fix it?
Make sure you follow the wetting step so the paper looks slightly shiny, use more watery blue and green washes so drops spread, blow gently with the straw to avoid overworking the paint, and tilt the taped paper only after puddles have some movement to prevent muddiness.
How can I adapt this activity for different age groups?
For younger kids let an adult wet the paper and pre-dot puddles to blow with a pipette or short straw, for elementary kids let them mix watery washes and practice gentle blowing, and for older kids encourage experimenting with multiple layers, masking fluid, or varied salt sizes for texture.
How can we extend or personalize the watercolor splash piece after it dries?
After brushing off the dried salt and peeling the tape for clean edges, add ink or white gel-pen details over splash shapes, introduce metallic watercolor accents before drying, or collage shell cutouts to reinforce the @sealight sea theme before sharing on DIY.org.
Watch videos on how to make a watercolour splash piece by @sealight
How To Draw A Baby Seal Cartoon
4 Videos
How To Draw A Baby Seal Cartoon
How To Draw A Spring Kid Jumping Into A Puddle
How To Draw A Baby Seal

Easy Trees Water Color Painting Art
Facts about watercolour painting techniques for kids
🎨 Watercolor paint is often transparent, so artists usually preserve highlights by leaving the paper white instead of painting white on top.
🌊 Seascapes surged in popularity during the 17th-century Dutch Golden Age—painters loved capturing light on waves and dramatic skies.
🧂 Sprinkling table salt on wet watercolor absorbs water and pigment to create glittery, crystalline textures perfect for sandy or foamy sea effects.
💨 Blowing wet paint through a straw or tilting the paper helps create flowing, organic shapes that look like currents, splashes, and seaweed.
🎯 Jackson Pollock made splatter and drip painting famous—proving that energetic, messy techniques can be celebrated art (he used house paint, not watercolor).
How do I make a watercolor splash piece like @sealight?
What materials do I need to make a watercolor sea splash inspired by @sealight?
What ages is this watercolor splash activity suitable for?
Are there safety tips or fun variations for the watercolor splash activity?
