Make a Pop Up Box
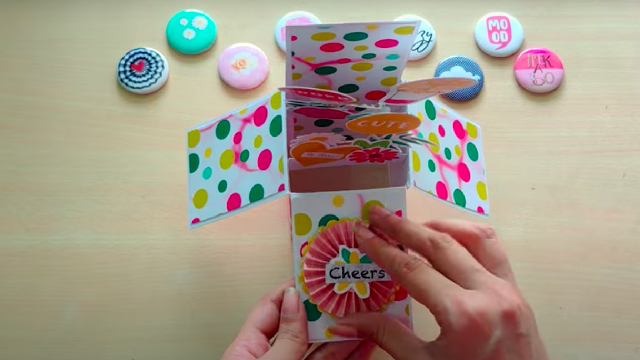
Make a pop up surprise box using cardstock, scissors, glue, and simple folds; decorate it and learn about tabs, hinges, and three dimensional construction.


Step-by-step guide to make a pop up box
Step 1
Clear a flat workspace and lay out all your materials so everything is easy to reach.
Step 2
Use the ruler and pencil to draw a 14 cm square on a piece of cardstock for the box base.
Step 3
Use the ruler and pencil to draw a 15 cm square on a second piece of cardstock for the lid.
Step 4
Carefully cut out both squares along the pencil lines.
Step 5
On the 14 cm square use the ruler and pencil to mark 3.5 cm from each edge to make four fold guides.
Step 6
Score along each marked guide on the 14 cm square using the ruler and the blunt side of the scissors so the paper folds cleanly.
Step 7
Cut small corner slits at the four corners of the scored 14 cm square to create tabs.
Step 8
Fold up the sides of the 14 cm square along the scored lines so the tabs line up inside the box.
Step 9
Put glue on each tab and press the tabs inside to secure the box base; hold until the glue sets.
Step 10
Repeat Steps 5 to 9 on the 15 cm square to make the lid (mark 3.5 cm score the lines cut corner slits fold sides and glue tabs) so the lid fits over the box.
Step 11
Make a pop-up hinge: cut a strip 10 cm by 3 cm from scrap cardstock score at 3 cm and 7 cm then fold the strip into a Z fold and glue one end inside the back wall of the box and the other end to a small cut-out surprise shape.
Step 12
Decorate the outside and inside of your pop-up box with colouring materials stickers and extra paper shapes then share your finished creation on DIY.org.
Help!?
What can we use instead of cardstock, a ruler, or the blunt side of scissors if we don't have them?
If you don't have cardstock, use two sheets of printer paper glued together for the 14 cm and 15 cm squares, use a book edge or a folded piece of cardboard as a straightedge to draw the squares, and score the fold guides with the back of a butter knife or a plastic spoon instead of the blunt side of scissors.
The sides aren't folding cleanly or the tabs won't stay glued inside—how can we fix that?
If the sides don't fold neatly after step 5, re-score the 3.5 cm fold guides lightly with your scoring tool and ruler, make the corner slits from step 6 smaller so tabs sit flat, and press each glued tab from step 8 firmly while the glue sets.
How can we adapt this pop-up box for younger children or older kids?
For younger children have an adult pre-cut and pre-score the 14 cm and 15 cm squares and guide them through folding, tab-gluing, and decorating, while older kids can measure and cut their own pieces and design more complex Z-fold hinges and detailed surprise shapes.
How can we make the pop-up box more exciting or personal beyond decorating it?
To enhance the project, add multiple Z-fold strips like the 10 cm × 3 cm hinge from step 11 for layered pop-ups, use patterned scrap cardstock for the lid and base so the lid fits visually as well as physically, or attach a small LED or movable parts to the surprise shape before decorating.
Watch videos on how to make a pop up box
Pop Up Cubes in a box Tutorial | Step by Step Pop Up Cubes DIY | Jumping Cubes
4 Videos
Pop Up Cubes in a box Tutorial | Step by Step Pop Up Cubes DIY | Jumping Cubes
DIY Popup Cubes Gift Box Full Tutorial Learn Step By Step | Popup Cubes | Jumping Cubes
Pop-Up Tutorial 14 - The Box
Pop-Up Tutorial 1 - Introduction - Materials and Basic Theory
Facts about paper engineering for kids
📚 Pop-up books grew from medieval volvelles — early movable paper tools used by scientists in the 13th century.
✂️ Kirigami literally means “cut paper” — unlike origami it uses both cuts and folds to make 3D shapes.
🧩 Tabs and paper hinges are clever tricks: a single glued tab can join layers while a folded hinge lets parts swing and fold flat.
📏 Cardstock strength is measured in grams per square meter (gsm) — heavier paper (around 200–300 gsm) makes sturdier pop-ups.
🎨 Pop-up artists like Robert Sabuda design scenes with dozens of moving parts, often needing precise templates and careful folding.
How do I make a pop up surprise box?
What materials do I need to make a pop up surprise box?
What ages is a pop up surprise box suitable for?
What are the benefits and variations of making a pop up surprise box?
