Draw a pumpkin with pencil colors
Draw and color a pumpkin using colored pencils, practicing shading, blending, and simple shapes to create depth and texture on paper.

Drawing Apps
Step-by-step guide to draw a pumpkin with pencil colors
Step 1
Lay out all your materials on a clean flat surface so everything is easy to reach.
Step 2
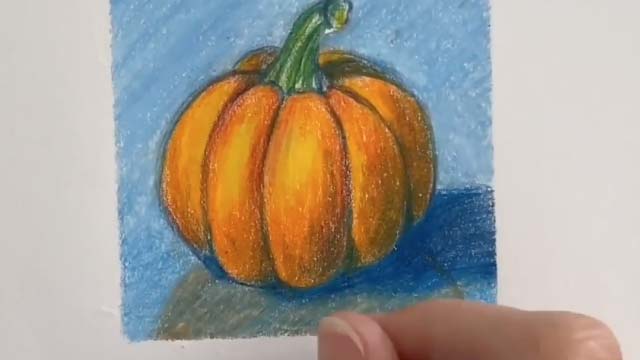
Lightly draw a wide circle or a slightly flattened oval in the middle of the paper as the pumpkin’s main shape.
Step 3
Draw 6 to 8 gentle curved lines from the top to the bottom to divide the shape into pumpkin segments.
Step 4
Sketch a small curved stem on the top center and add a little rounded base where it meets the pumpkin.
Step 5
Mark the direction of the light with a small arrow or dot to help you place shadows and highlights.
Step 6
Use a medium orange colored pencil to lightly fill the entire pumpkin with even short strokes as a base layer.
Step 7
Use a darker orange or brown pencil to add shading along the edges of each segment and on the side away from the light.
Step 8
Blend the darker and base colors together gently using a lighter orange pencil or a tissue so the colors transition smoothly.
Step 9
Add bright highlights with a white or pale yellow pencil on the side facing the light to make it look round.
Step 10
Draw thin curved texture lines near the shadow areas with a sharp dark orange or brown pencil to show pumpkin grooves.
Step 11
Color the stem with brown and a touch of green and add a small shadow where the stem meets the pumpkin.
Step 12
Erase any remaining pencil guide lines that you don’t want to see in the finished picture.
Step 13
Sign your name in a small neat corner to show it’s your artwork.
Step 14
Share your finished pumpkin drawing on DIY.org.
Help!?
What can we use if we don't have the exact colored pencils (medium orange, darker orange, white/pale yellow) or a tissue for blending?
Use wax crayons or soft pastels for the medium and darker orange layers, a white gel pen or pale yellow crayon for highlights, and blend with a cotton swab or clean fingertip instead of a tissue.
My shading looks blotchy and the darker orange won't blend—how can I fix it?
When darker orange or brown shading (steps 7–9) looks blotchy, lighten your pencil pressure, build up color in thin layers, blend using the lighter orange pencil or a clean tissue, and gently lift stubborn dark spots with a kneaded eraser.
How can I adapt this pumpkin drawing activity for different ages?
For younger kids pre-draw the wide circle/flattened oval and limit to 3–4 curved segments and broad coloring with crayons, while older kids can add fine texture lines, careful shading, blended highlights, and a cast shadow (steps 2–11).
What are some ways to enhance or personalize the finished pumpkin drawing?
Personalize by adding a carved face or decorative patterns, drawing a background of fall leaves or a tabletop shadow, adding extra stem details with green and brown, then sign your name (step 13) and share it on DIY.org (step 14).
Watch videos on how to draw a pumpkin with pencil colors
Drawing a Traditional Pumpkin using Colored Pencils
4 Videos
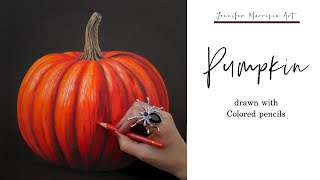
Drawing a Traditional Pumpkin using Colored Pencils
How to Draw and Color a Halloween Pumpkin | Easy Pumpkin Drawing for Kids
Easy Pumpkin Drawing for Kids | Step-by-Step Tutorial

How to Draw a Pumpkin Step by Step | Easy Drawing Tutorial for Kids & Beginners
Facts about colored pencil drawing for kids
🎃 Pumpkins are botanically fruits (a type of berry called a pepo) even though we usually treat them like vegetables when cooking.
✏️ Colored pencils pack pigment into a wax or oil binder inside a wooden casing — they're great for fine details and layering.
🎨 Shading with just three values (light, mid, dark) can make a flat circle look convincingly round, like a pumpkin.
🖌️ You can blend colored pencils by layering colors, using a colorless blender pencil, or softening lines with a tissue or blending stump.
🧡 Pumpkins come in many sizes and colors — from tiny orange varieties to huge gourds and even white or blue pumpkins!
How do I draw and color a pumpkin with colored pencils?
What materials do I need to draw and color a pumpkin with colored pencils?
What ages is this pumpkin drawing activity suitable for?
What are the benefits of drawing and coloring a pumpkin and are there variations or safety tips?
