Paint landscapes with watercolors
Paint three simple landscapes using watercolor paints, brushes, and paper; learn mixing, layering, and basic perspective while exploring color and texture.


Step-by-step guide to paint landscapes with watercolors
Step 1
Gather all your materials and set them where you can reach them easily.
Step 2
Tape your watercolor paper flat to the table with masking tape so it stays smooth while you paint.
Step 3
Use your pencil to draw two light horizontal lines to divide the paper into three equal panels.
Step 4
Lightly sketch a simple horizon and rounded hill shapes in the top panel for your first landscape.
Step 5
Dampen the sky area in the top panel with clean water using a big brush.
Step 6
Apply a light blue wash to the damp sky by mixing blue paint with lots of water on your palette.
Step 7
Drop a slightly darker blue or green into the wet sky to make soft hill shapes that blend on their own.
Step 8
Lightly sketch a tree and grassy shapes in the middle panel for your second landscape.
Step 9
Paint a flat midground base in the middle panel using a medium green mixed on your palette on the dry paper.
Step 10
Wait until the midground base is completely dry before you add more paint.
Step 11
Use a smaller brush to add darker strokes and quick marks over the dry base to create texture and layers.
Step 12
Sketch a road or river that converges to the horizon in the bottom panel to show perspective.
Step 13
Paint the road or river so it is wider in the foreground and narrower toward the horizon using a mid-tone color.
Step 14
Paint the side fields with colors that get lighter and shapes that get smaller toward the horizon to show distance.
Step 15
Share your finished three watercolor landscapes on DIY.org.
Help!?
What can I use if I don't have watercolor paper, masking tape, or a big brush?
Use heavyweight mixed-media or two glued-together printer sheets in place of watercolor paper for step 2, low-tack painter's tape instead of masking tape to hold the paper flat, and a clean wide flat or mop brush (or a soft house-paint brush) to dampen the sky in step 6.
My sky wash is drying with hard edges or the darker color isn't blending—what should I do?
Re-wet the sky area with clean water using the big brush before dropping a darker blue or green as instructed in step 6 so the colors blend softly, or lift hard edges with a clean damp brush or paper towel and practice timing on scrap paper.
How can I adapt this three-panel activity for younger kids or older kids?
For younger children, pre-draw the two horizontal lines and simple horizons and have them work with very diluted paint and the big brush for step 6 and the midground in step 11, while older kids can add glazing after the midground base dries, use the smaller brush for detailed texture in step 12, and refine the converging road/river perspective in the bottom panel.
How can we extend or personalize the finished landscapes before sharing them on DIY.org?
For extra texture and personalization, sprinkle table salt into the damp sky wash during step 6 for granulation, use masking fluid before painting to preserve highlights, and add colored-pencil or ink details over the dry midground base from step 12 before photographing to post on DIY.org.
Watch videos on how to paint landscapes with watercolors
How to Paint a Mountain Sunset in Watercolors Kids Art Tutorial
4 Videos

How to Paint a Mountain Sunset in Watercolors Kids Art Tutorial
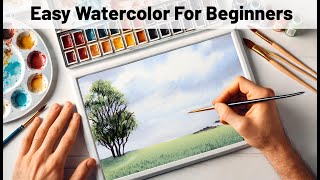
How to Paint a Watercolor Landscape and Sky for Absolute Beginners

watercolor painting landscape mountains for beginners | watercolor art easy landscape tutorial
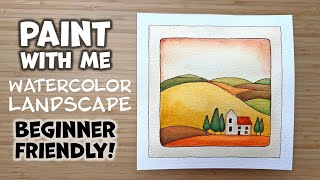
Beginner Watercolor Tutorial 🎨 | Paint a Whimsical Landscape With Me
Facts about watercolor painting for kids
🎨 Watercolor paint can be reactivated with water even after it dries — perfect for lifting and blending.
🌈 You can mix hundreds of shades from just three primaries (red, blue, yellow) — try mixing two at a time!
🖌️ A flat wash with a large brush quickly paints skies, while round brushes are great for trees and details.
🏞️ Use atmospheric perspective: distant objects look lighter, bluer, and smaller to create depth in a landscape.
💧 Wet-on-wet makes soft, dreamy blends; wet-on-dry keeps edges sharp so you can layer textures.
How do I teach my child to paint three simple watercolor landscapes step-by-step?
What materials do I need to paint three watercolor landscapes with my child?
What ages is painting simple watercolor landscapes suitable for?
What are the benefits of painting watercolor landscapes for kids?
