Create a sunset silhouette with watercolors
Paint a watercolor sunset background, then add black silhouette shapes like trees, birds, or buildings to explore color blending and contrast.

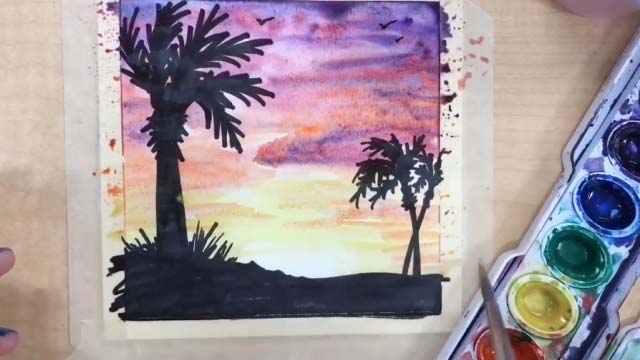

Step-by-step guide to create a sunset silhouette with watercolors
Step 1
Tape the edges of your watercolor paper to a flat surface with masking tape to make a neat white border.
Step 2
Lightly draw a straight horizon line across the paper with your pencil where the sky meets the ground or sea.
Step 3
Choose 3 to 5 sunset colors and put small blobs of each color on your palette or paper plate.
Step 4
Use a clean brush to wet the sky area above the horizon evenly with clear water.
Step 5
Paint the top of the paper with the darkest sunset color using horizontal strokes.
Step 6
Rinse your brush and paint the next lighter color below the first color so the edges touch.
Step 7
Repeat adding more lighter colors toward the horizon so the colors overlap and blend.
Step 8
Use a clean damp brush to gently soften any harsh lines between the colors so they flow into each other.
Step 9
Let the watercolor background dry completely before you continue.
Step 10
Lightly sketch Black silhouette shapes like trees birds or buildings on the dried sky with your pencil.
Step 11
Fill in your sketched silhouettes with black paint or color them solid with a black marker.
Step 12
Let the black paint or marker dry completely so the silhouettes are not smudged.
Step 13
Carefully peel off the masking tape from the paper edges to reveal a clean border.
Step 14
Take a photo of your finished sunset silhouette and share it on DIY.org
Help!?
What can we use if we don't have masking tape, watercolor paper, or watercolor paints?
Use painter's tape or washi tape for the border, heavyweight mixed-media paper or thick cardstock instead of watercolor paper (but use less water in step 3 to avoid buckling), and substitute diluted food coloring, washable tempera, or diluted acrylics on your palette or paper plate for the watercolor blobs in step 4.
My colors look muddy or my silhouettes smudge—what should I do differently?
To prevent muddy colors and smudging, rinse your brush between colors and use the clean damp brush in step 8 to soften edges, blot excess water with a paper towel during steps 5–7, and be sure the watercolor background is completely dry as required in step 9 before sketching or painting silhouettes in steps 10–11.
How can I adapt this activity for different age groups?
For toddlers pre-tape the paper and pre-draw the horizon and let them experiment with 2 colors and large brushes for steps 1–6, elementary kids can choose 3–4 colors and practice wet-on-wet blending and simple silhouettes in steps 7–11, and older kids can refine color transitions, make detailed pencil sketches in step 10, and paint precise black silhouettes in step 11.
How can we extend or personalize the sunset silhouette project?
After completing and drying the watercolor background (step 9) try sprinkling table salt on wet paint for texture, adding tiny white splatters for stars, using black paper cutouts instead of painting silhouettes in step 11, or decorating the white border revealed in step 12 before photographing for DIY.org.
Watch videos on how to create a sunset silhouette with watercolors
Watercolor Sunset Lesson for Kids
4 Videos
Watercolor Sunset Lesson for Kids
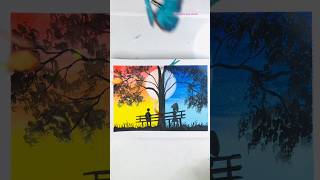
Beautiful Sunset & Moonlight Silhouette | Easy Watercolor Painting for Beginners
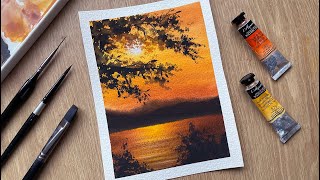
Watercolor Painting For Beginners | Sunset Landscape | Watercolor Tutorial
How To Use Watercolor Pencils To Paint A Beautiful Sunset
Facts about watercolor painting for kids
🎨 Watercolor is a super-efficient medium: a tiny blob of pigment can make many different shades just by adding more or less water.
🌅 Sunsets look red and orange because Earth's atmosphere scatters blue light away, letting longer red wavelengths reach your eyes.
✂️ Silhouette portraits became popular in the 18th century as quick, inexpensive black paper cutouts that captured a person's outline.
💧 The wet-on-wet watercolor technique lets colors mix directly on the paper, creating soft, dreamy gradients perfect for skies.
🖤 A black silhouette on a bright sunset background creates high contrast, so shapes read clearly even from far away.
How do you make a watercolor sunset silhouette?
What materials do I need for a watercolor sunset silhouette?
What ages is this watercolor sunset silhouette activity suitable for?
What are the benefits and variations of making a sunset silhouette?
