Play the chords!
Learn and practice three basic guitar chords, strum simple patterns, and play a short song to explore rhythm, coordination, and musical confidence.

Step-by-step guide to play the chords
Step 1
Tune your guitar to standard tuning (E A D G B E) using a tuner or app so the strings sound right.
Step 2
Place your middle finger on the A string 2nd fret and your ring finger on the D string 2nd fret then strum all strings to play an E minor (Em) chord.
Step 3
Place your ring finger on the A string 3rd fret your middle finger on the D string 2nd fret and your index finger on the B string 1st fret then strum from the A string to play a C chord.
Step 4
Place your index finger on the G string 2nd fret your middle finger on the high E string 2nd fret and your ring finger on the B string 3rd fret then strum from the D string to play a D chord.
Step 5
Hold Em and practice strumming one steady down strum on each beat for 4 beats to feel the pulse.
Step 6
Switch to C and practice strumming one steady down strum on each beat for 4 beats to keep the same pulse.
Step 7
Switch to D and practice strumming one steady down strum on each beat for 4 beats so you can change chords smoothly.
Step 8
Practice switching Em to C to D slowly while strumming 4 steady down strums on each chord until your hands move comfortably.
Step 9
Play the short song using the chord progression Em then C then D then C for one measure each and use the strumming pattern down down up up down up per measure; repeat the four-measure sequence twice.
Step 10
Take a photo or short video of you playing your song and share your finished creation on DIY.org
Final steps
You're almost there! Complete all the steps, bring your creation to life, post it, and conquer the challenge!

Help!?
What can I use if I don't have a tuner or tuning app?
Use an online browser tuner, a pitch pipe, a piano/keyboard to match the E A D G B E strings, or tune to another already-tuned guitar and then check each string.
Why does my chord sound muffled or buzz when I place my fingers for the Em, C, or D chords and how do I fix it?
Make sure your fingertips press just behind the frets with enough pressure, arch your fingers so they don't touch adjacent strings, and adjust your thumb on the back of the neck if strings still buzz when strumming all strings for Em or strumming from the A or D string for C and D.
How can I adapt this activity for different age groups?
For younger kids use a smaller nylon-string guitar or capo to shorten the neck and practice only Em and C with steady down strums, while older kids can use the full Em–C–D–C progression, add the down down up up down up pattern, and use a metronome to increase tempo.
How can we extend or personalize the short song after learning the Em–C–D–C progression and strumming pattern?
Add a one-measure arpeggio intro on Em, experiment with alternate strumming patterns or tempos, write simple lyrics to sing over the Em–C–D–C sequence, and then take a photo or short video to share on DIY.org.
Watch videos on how to play the chords
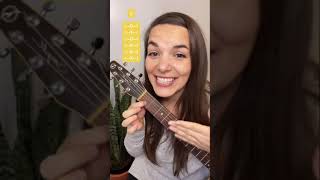
6 EASIER Guitar Chords for Kids or Total Beginners
4 Videos

6 EASIER Guitar Chords for Kids or Total Beginners

Starter Guitar Lessons Song For CHILDREN AND PARENTS
SIMPLER Guitar Chords for Kids 🎸 First 2 Children's Guitar Chords - Made EASY!

Guitar Lesson For Kids - Part 1 - Absolute Beginner Series #guitar #kids
Facts about beginner guitar for kids
⏱️ Use a metronome: start slow and increase tempo gradually (about 5–10% at a time) to keep chord changes clean as you speed up.
🎶 A common beginner strumming pattern fits 4/4 time: four beats per measure and simple down-up strums to keep a steady pulse.
🎸 Many pop and folk songs can be played with just three open chords (like G, C and D) — you can play hundreds of tunes with that trio!
😄 Playing chords while singing or with friends boosts confidence and makes learning feel like performing — which helps you learn faster!
🧠 Practicing 10–15 minutes a day builds muscle memory fast — beginners often notice clear improvement in 2–4 weeks.
How do I teach my child to learn three basic guitar chords, strum simple patterns, and play a short song?
What materials do I need for the 'Play the chords!' activity?
What ages is the 'Play the chords!' activity suitable for?
What are the benefits of learning three basic guitar chords and playing a short song?


One subscription, many ways to play and learn.
Only $6.99 after trial. No credit card required