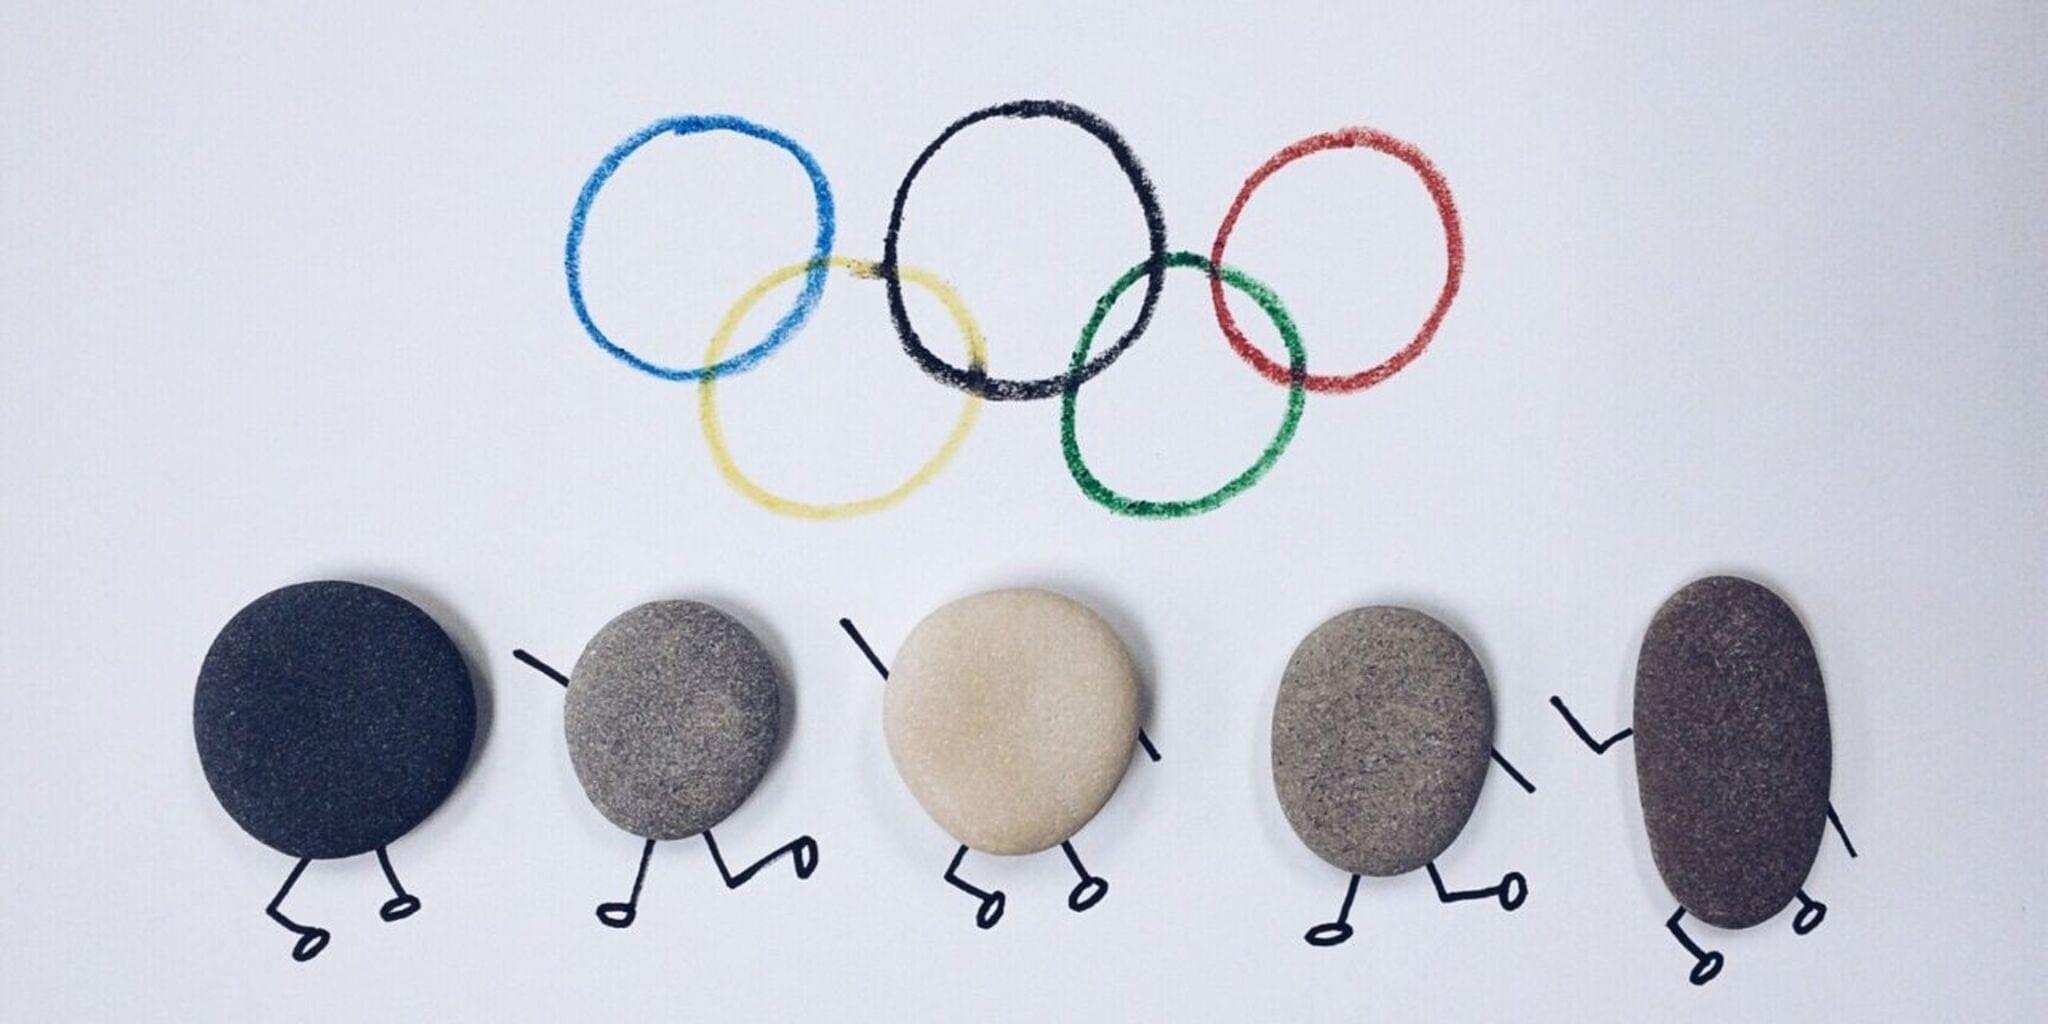
Draw the Olympic Logo - International Olympic Day
Draw the Olympic rings using colored pencils, measure and space each ring accurately, learn about colors and international unity, and display your poster.

Drawing Apps
Step-by-step guide to draw the Olympic Logo - International Olympic Day
The Olympic Games | The Olympics for Kids | Jack Hartmann
Step 1
Gather all materials and place them on a flat table so everything is easy to reach.
Step 2
Turn your paper to landscape (wider than tall) and smooth it flat on the table.
Step 3
Use the ruler and pencil to draw a light horizontal top guide line 6 cm down from the top edge of the paper.
Step 4
Along that top guide line use the ruler to mark three center points that are 6 cm apart from each other.
Step 5
Draw a second light horizontal guide line 3 cm below the top guide line.
Step 6
On the lower guide line mark two center points that sit halfway between the three top center marks so they line up between them.
Step 7
Set your compass to a radius of 2.5 cm or place your 5 cm round object on a center mark and trace five circles using the five center marks.
Step 8
Color the top row rings left to right blue black red and color the bottom row rings left to right yellow green using the matching colored pencils.
Step 9
Use the black marker to carefully outline each colored ring and leave tiny gaps at overlaps so the rings look interlaced.
Step 10
Gently erase any remaining pencil guide lines so only the colored rings and marker outlines remain.
Step 11
Write a short sentence near the bottom that says what the rings mean to you (for example: "The rings show countries joining together") and add a title at the top like "Olympic Rings."
Step 12
Tape your finished poster to a wall or door where everyone can see it.
Step 13
Share a photo of your finished Olympic rings poster on DIY.org.
Help!?
I don't have a compass or a 5 cm round object—what can I use instead?
Use a similarly sized round item like a mug rim, jar lid, cookie cutter, or bottle cap to trace each circle as described in the step 'Set your compass to a radius of 2.5 cm or place your 5 cm round object on a center mark and trace five circles.'
My rings don't look evenly spaced or the overlaps don't match—how can I fix that?
Double-check the ruler marks so the three top center points are 6 cm apart and the lower two are halfway between them, redraw light pencil guides if needed, then outline with the black marker leaving tiny gaps at overlaps and erase the guide lines only after the marker is dry.
How can I adapt the activity for younger or older kids?
For younger children simplify by pre-tracing circles with a cookie cutter and using crayons or markers instead of colored pencils, and for older kids encourage precise measuring with the compass set to 2.5 cm and adding neat lettering and a more detailed sentence about what the rings mean.
How can we extend or personalize the poster after finishing the rings?
Add a painted background, draw small country flags or symbols inside or around the rings, write a longer paragraph under the short sentence about what the rings mean, then laminate or frame and tape the finished poster to a wall before sharing a photo on DIY.org.
Watch videos on how to draw the Olympic Logo - International Olympic Day
Learn About The Olympics With Ozzie | Educational Video For Kids About The Summer Games & Olympians
4 Videos
Learn About The Olympics With Ozzie | Educational Video For Kids About The Summer Games & Olympians
What Do The Olympic Rings Mean? | The Olympics |Fun Facts For Kids |What the Olympic rings Represent
What are The OLYMPICS? - Olympic Facts for Kids🥇🥈🥉
Olympic Games Pictograms | Design Focus
Facts about the Olympic rings
🎨 The Olympic rings were designed in 1913 by Pierre de Coubertin to represent the five inhabited continents coming together.
🖍️ The five ring colors (blue, yellow, black, green, red) plus the white background were chosen because every nation's flag had at least one of those colors.
🔗 The rings are interlaced on purpose — the overlapping circles symbolize athletes from different continents meeting in friendship.
🧭 The official color layout is two rows: top row blue–black–red, bottom row yellow–green (left to right).
📅 International Olympic Day is celebrated on June 23, marking the founding of the International Olympic Committee in 1894.
How do I help my child draw the Olympic rings accurately?
What materials do I need to draw the Olympic logo poster?
What ages is this activity suitable for?
What are the benefits and fun variations of drawing the Olympic rings?
