Your favorite YA novel
Create a miniature diorama of a favorite scene from a YA novel using a shoebox, craft materials, and labels to explore setting, characters, and plot.


Step-by-step guide to create a miniature diorama of a favorite scene from a YA novel
Step 1
Pick your favorite YA novel and choose one scene you want to recreate.
Step 2
Gather all Materials Needed into your workspace.
Step 3
Set the shoebox on its side so the open part faces you.
Step 4
Make a quick pencil sketch of the scene layout showing where characters and props will go.
Step 5
Cut pieces of construction paper to fit the back and bottom of the shoebox.
Step 6
Glue or tape the construction paper pieces inside the shoebox to make the background.
Step 7
Use colouring materials to draw background details that match the scene.
Step 8
Cut character shapes from construction paper.
Step 9
Colour each paper character to look like the characters from the book.
Step 10
Build small props and setting details using small craft items and extra paper.
Step 11
Attach characters and props inside the shoebox using tape or folded paper tabs.
Step 12
Write labels with each character name and a one-sentence plot note on sticky notes.
Step 13
Place the labels inside the diorama near the characters or important props.
Step 14
Decorate the outside of the shoebox and write the book title and scene name on the front.
Step 15
Share your finished diorama on DIY.org.
Help!?
What can we use instead of a shoebox or construction paper if we can't find them?
If you don't have a shoebox, use a cereal or shipping box set on its side as the instructions say to set the shoebox, and if you don't have construction paper, use magazine pages, wrapping paper, or plain printer paper colored with crayons or markers to cover the back and bottom.
My paper characters keep falling over — how can I fix that?
If characters fall after Step 10, reinforce them by attaching folded paper tabs to the bottom or backs and securing those tabs to the shoebox with strong tape or glue so they stay upright.
How can we change the activity for younger or older kids?
For younger kids, parents can pre-cut character shapes and handle scissors and stronger glue while kids color characters and place sticky-note labels, and for older kids, encourage more detailed props and layered backgrounds from Steps 4–6 and longer scene notes instead of a one-sentence plot note.
How can we make the diorama more impressive or personal?
Personalize and enhance the diorama by taping battery-powered LED lights to the inside top of the shoebox to highlight the scene, using fabric scraps and small craft items from Step 7 for textured props, and decorating the outside with a creative blurb before sharing on DIY.org.
Watch videos on how to create a miniature diorama of a favorite scene from a YA novel
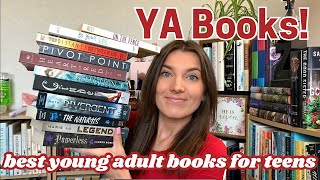
our favorite ya books 📚📖 young adult book recommendations ✨
3 Videos

our favorite ya books 📚📖 young adult book recommendations ✨

10 Classic Children's Books Every Adult Should Read!
my best young adult book recommendations⭐
Facts about book-based crafts and literary analysis for kids
🪄 The Harry Potter franchise has sold more than 500 million books worldwide — one of the bestselling series ever.
🏹 The Hunger Games trilogy inspired blockbuster films that together earned nearly $3 billion at the worldwide box office.
📦 Dioramas date back to the 19th century and were popularized in museums and early classrooms to recreate scenes.
📚 Young adult literature became recognized as its own publishing category in the mid-20th century and later exploded in popularity with YA fantasy and dystopia.
🧩 Shoebox dioramas are a classic school project because shoeboxes are sturdy, portable, and the perfect size for tiny scenes.
How do you make a shoebox diorama of a favorite YA novel scene?
What materials do I need for a YA novel shoebox diorama?
What ages is this shoebox diorama activity suitable for?
What are the benefits of making a YA novel diorama?
