Build an epic Minecraft rail system
Design and build an epic Minecraft rail system connecting bases and landmarks, plan routes, place powered rails, switches, and test safe minecart travel.

Step-by-step guide to Build an epic Minecraft rail system
How to make the best Automatic Railway in Minecraft
Step 1
Pick two bases or landmarks you want to connect and decide which is the start and which is the end.
Step 2
Place tall pillar markers or signs along a rough line between your start and end to mark your route.
Step 3
Sketch the exact path by laying temporary building blocks along the markers.
Step 4
Clear obstacles along the sketched path by breaking trees and blocks that would block the track.
Step 5
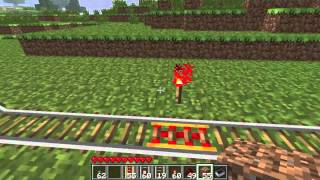
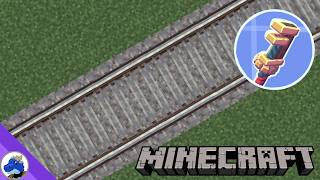
Lay regular rails along flat sections of your sketched path to make the base track.
Step 6
Place powered rails on every uphill block and about every 38 blocks on long flat stretches to keep the cart moving.
Step 7
Power each powered rail by placing redstone torches near them or connecting them with redstone dust and a lever or button.
Step 8
Lay branching rails where you want the track to split into different routes.
Step 9
Place a lever beside each junction and flip it to set which branch a minecart will take.
Step 10
Add detector rails and buttons at station stops so carts will slow or stop automatically when they arrive.
Step 11
Light the whole route with torches so mobs cannot spawn on or near the track.
Step 12
Test the whole system by pushing a minecart from the start and watching the entire trip for slow spots or wrong turns.
Step 13
Fix any slow or stuck areas by adding more powered rails or powering nearby powered rails.
Step 14
Put signs at stations and landmarks so players know where each stop goes.
Step 15
Share your finished epic rail system on DIY.org
Help!?
What can I use if I don't have enough powered rails or redstone torches?
If powered rails or redstone torches are scarce, use extra regular rails and concentrate powered rails only on uphill blocks while powering them with redstone dust tied to a single lever as explained in the 'Place powered rails' and 'Power each powered rail' steps.
My minecart keeps stopping on flat stretches—what should I check?
Check that you placed powered rails about every 38 blocks on long flat stretches and that each powered rail is actually powered by nearby redstone torches or connected redstone dust per the instructions.
How can I adapt this activity for younger or older kids?
For younger kids, shorten the route and have an adult help with 'Clear obstacles' and placing powered rails, while older kids can design complex 'Lay branching rails' routes, add detector rails and redstone circuits, and create station signs.
How can we extend or personalize our epic rail system after the basic track is done?
Extend and personalize the system by building themed stations with signs, using detector rails and buttons for automatic stops, lighting routes with torches to prevent mobs, and adding lever-controlled junctions before sharing on DIY.org.
Watch videos on how to Build an epic Minecraft rail system
Minecraft Fastest Rail System | How to build a Fast Rail System \\ Check Description
4 Videos
Minecraft Fastest Rail System | How to build a Fast Rail System \\ Check Description
Rails: Everything You Need to Know (1.21.8 & Down) | Minecraft Redstone Engineering Tutorial
Minecraft: How to make a railway system
How to make a basic train (Understanding Create's Train Basics) - Minecraft: Create Mod
Facts about Minecraft rail systems and redstone mechanics
🚂 Powered rails boost minecart speed when they're powered and act like brakes when they're not—great for long hauls!
⚡ Redstone in Minecraft works like electricity and can automate switches, timed boosters, and station doors.
🔀 Rail junctions (turnouts) let carts choose different routes—use levers or redstone to control which way they go.
🌍 Minecraft worlds are huge—Java Edition maps reach roughly 30 million blocks from the center, so your rails can travel far!
🧪 Special rails like detector rails, activator rails, and hopper-carts let you build smart stations for loading, unloading, and timing.
How do I design and build an epic Minecraft rail system connecting bases and landmarks?
What materials and Minecraft items do I need to build a rail system?
What ages is this Minecraft rail system project suitable for?
What safety tips and creative variations should I use when building a Minecraft rail network?
