Have fun with Clay!
Shape and decorate small clay animals and figures using air-dry clay, simple tools, and paint, learning texture, proportion, and creativity through hands-on sculpting.


Step-by-step guide to shape and decorate small clay animals and figures
Step 1
Spread wax paper or a placemat on the table to make a clean workspace.
Step 2
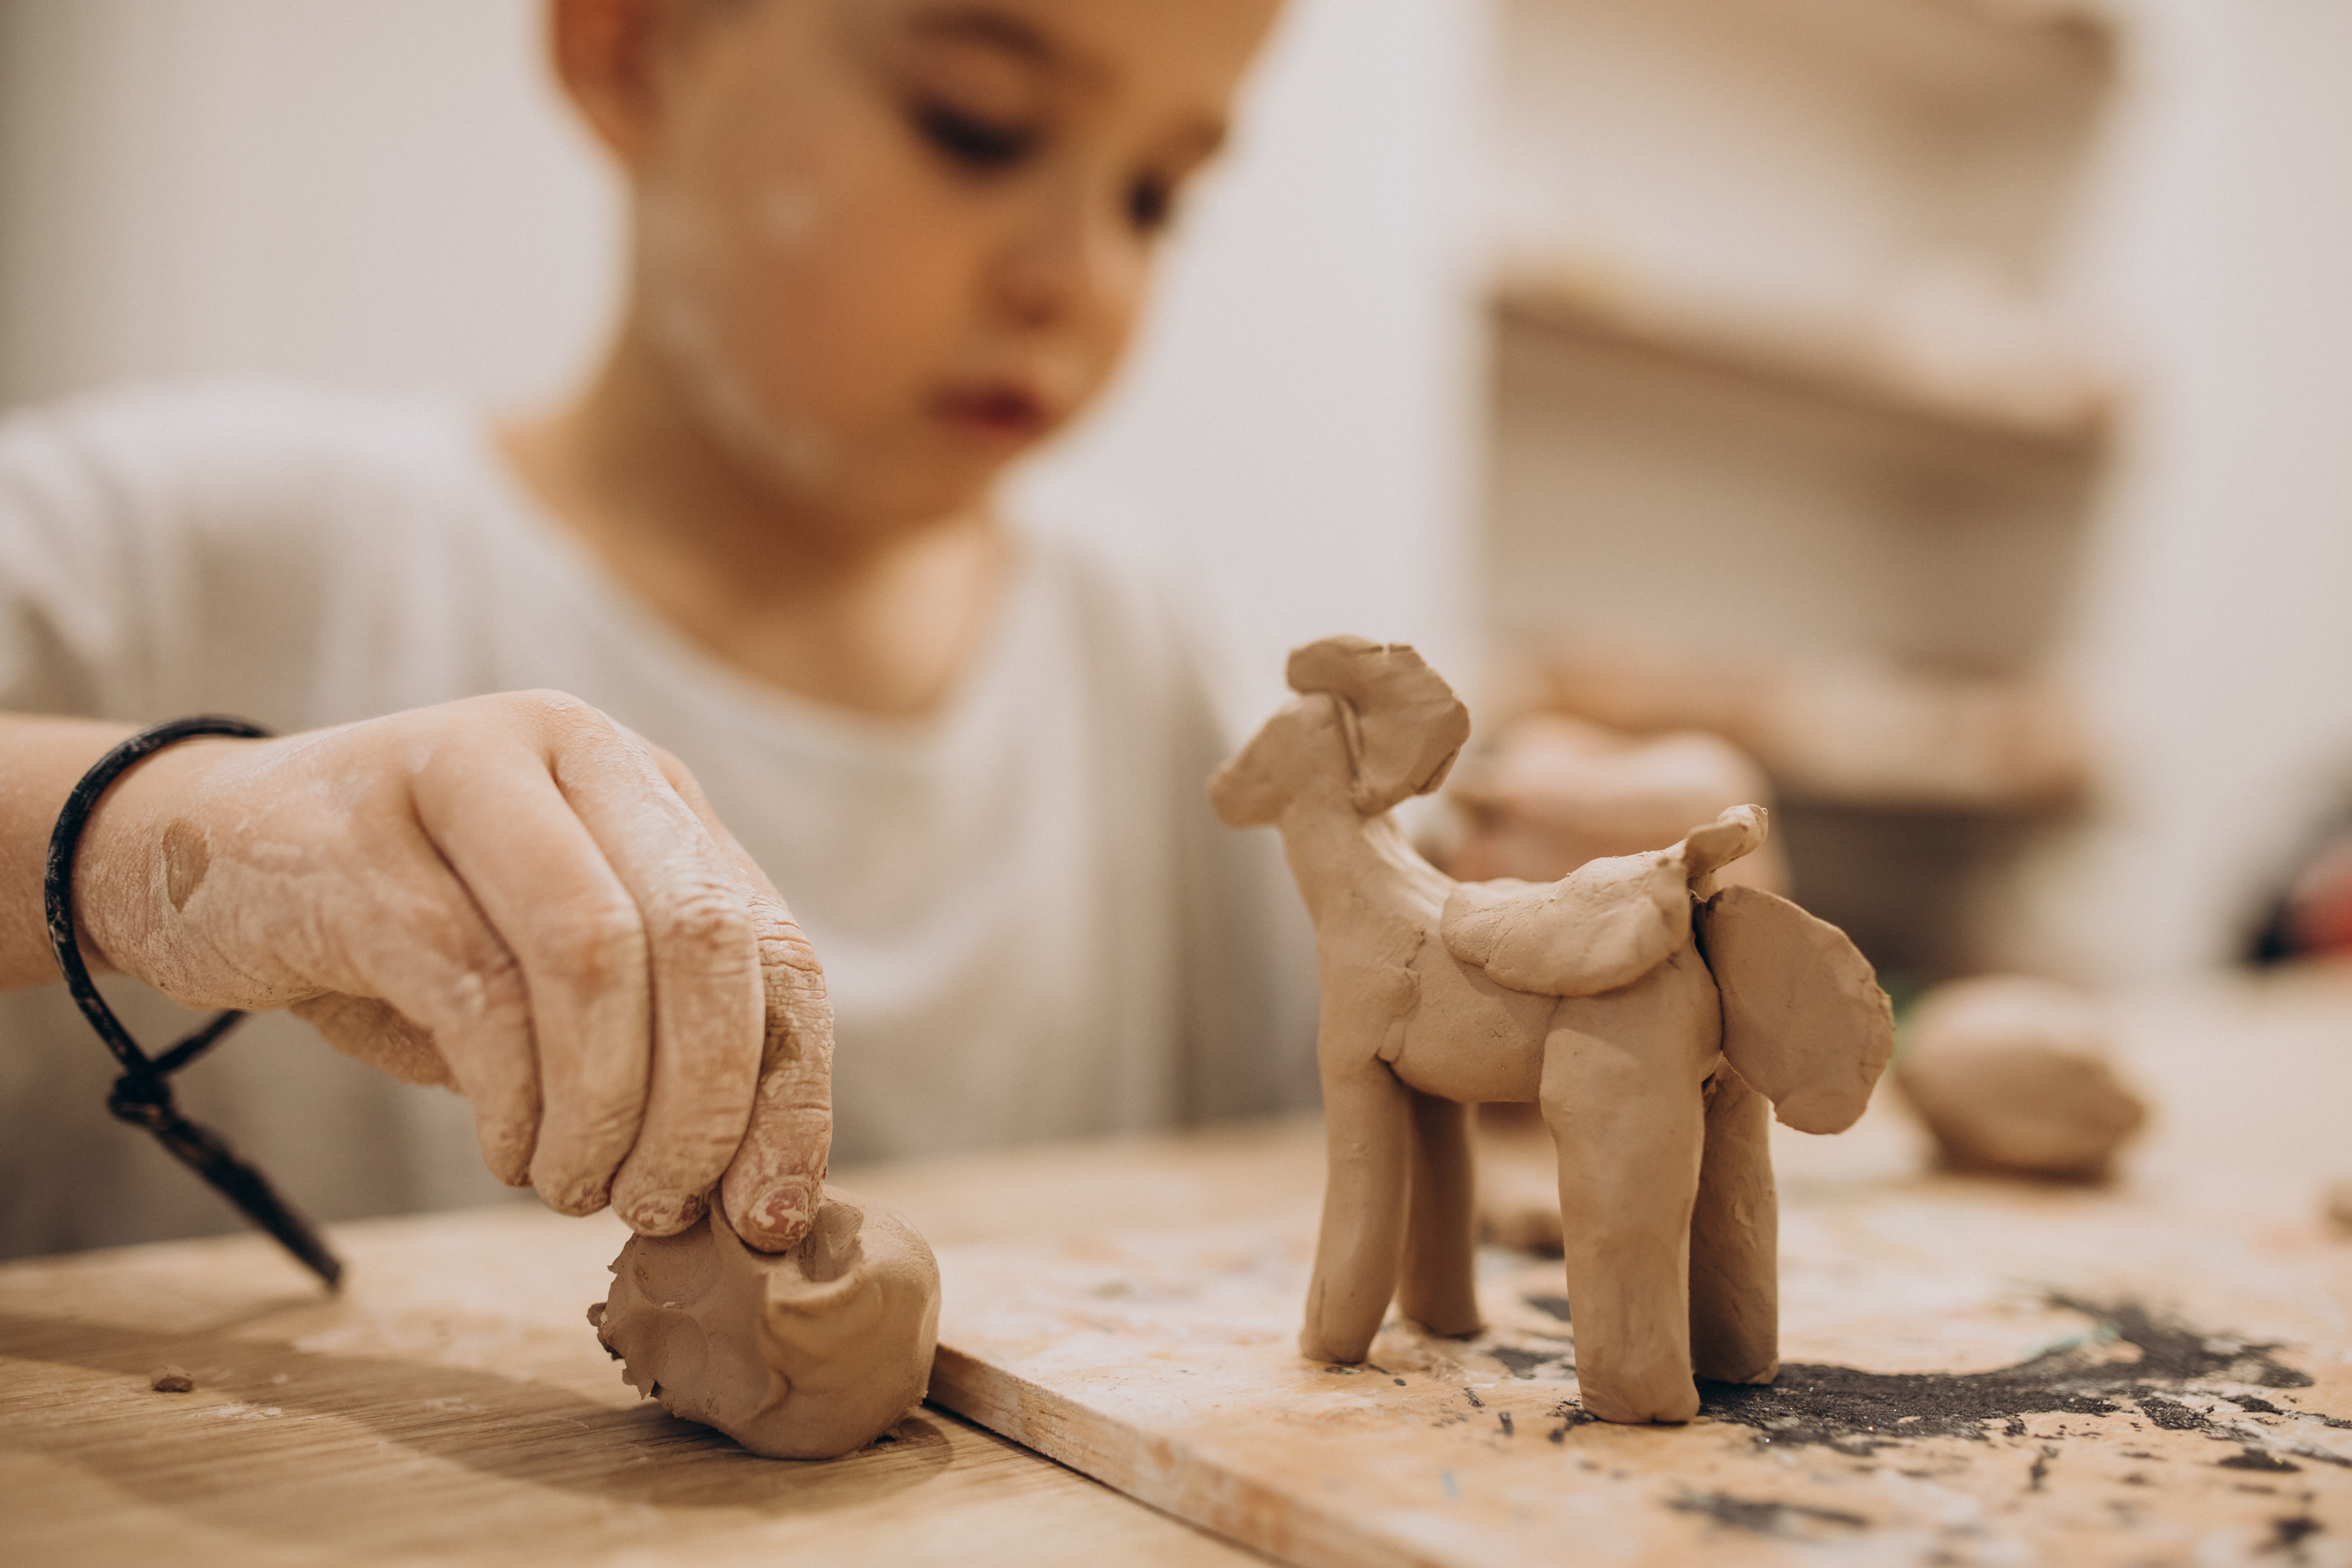
Take a small chunk of air-dry clay and knead it until it feels soft and easy to shape.
Step 3
Decide which animal or figure you want to make and roll one clay ball for the body.
Step 4
Roll a smaller clay ball for the head.
Step 5
Gently press the head ball onto the body to attach it.
Step 6
Roll thin sausage shapes from clay to make legs and a tail.
Step 7
Press each leg and the tail onto the body so they stick firmly.
Step 8
Use a toothpick to mark where the eyes and nostrils will go.
Step 9
Use the toothpick to add surface textures like fur lines scales or feathers.
Step 10
Press googly eyes or small beads into the eye spots if you want extra sparkle.
Step 11
Dip a fingertip in the bowl of water and smooth any rough joins or fingerprints.
Step 12
Leave your clay animal in a safe spot to air-dry for about 24 hours or until completely hard.
Step 13
Paint your animal with base colors using a paintbrush.
Step 14
Paint small details like stripes dots or a shiny eye and let the paint dry.
Step 15
Share your finished creation on DIY.org
Help!?
What can I use instead of air-dry clay or googly eyes if I can't find them?
If you can't find air-dry clay, substitute oven-bake (polymer) clay baked per package directions or homemade salt dough, and swap googly eyes or small beads for buttons, sequins, or painted dots while using parchment paper or a placemat instead of wax paper.
My clay head keeps falling off the body—how do I fix it?
Score both the head and body where they meet, add a tiny dab of water as glue, press the head firmly onto the body and (for extra support) insert a short toothpick or wooden skewer halfway through before smoothing the join with a fingertip dipped in the bowl of water.
How can I adapt this activity for different ages, like a 3-year-old versus a 10-year-old?
For a 3-year-old, pre-knead the clay and have them roll and press large body and head balls and stick on big buttons for eyes while skipping toothpick textures, whereas a 10-year-old can make thinner sausage legs, add detailed toothpick textures or foil armatures before drying, and paint fine stripes and a shiny eye.
How can we extend or personalize our clay animal after it dries?
Once the clay animal is completely hard, paint base colors and small details with a fine brush, glue on extra decorations like glitter or a fabric collar, seal the paint with clear varnish, mount it on a painted cardboard base to make a scene, and then share the finished creation on DIY.org.
Watch videos on how to shape and decorate small clay animals and figures
Shape, Create, and Play 🖌️ | Easy Clay Crafts for Kids!
4 Videos
Shape, Create, and Play 🖌️ | Easy Clay Crafts for Kids!
Creative Clay Flower Craft Ideas for Kids | Step by Step Tutorial
Air Dry Clay Star 🌟 | Creative Clay Art for Kids | Easy DIY Tutorial
How to Make a Pinch Pot Clay Tutorial for Kids
Facts about clay sculpting for kids
🐾 Air-dry clay doesn't need a kiln — it hardens as water evaporates, often taking 24–72 hours depending on thickness.
🎨 You can paint air-dry clay with acrylics once it's fully dry; a clear varnish helps seal and protect your colors.
⚖️ Artists use simple proportion rules to make animals believable — many four-legged animals' bodies are about 3–4 head-lengths long.
🧠 Squishing and shaping clay boosts fine motor skills, hand-eye coordination, and sensory development in kids.
🕳️ Thick lumps of clay can crack as they dry, so making small, hollow, or evenly thin parts helps figures dry without breaking.
How do I make small clay animals with my child?
What materials do I need to shape and decorate air-dry clay animals?
What ages is clay sculpting suitable for?
What are the benefits of clay play and safety tips for kids?
