Become a DIY Influencer!
Create short DIY tutorial videos showing simple crafts, learn basic filming and editing techniques, and practice safe sharing to inspire friends and family.


Step-by-step guide to become a DIY influencer
👉 15 Easy Crafts for Kids! Fun & Creative DIYs | Smart Start with Miss Daisy 🎨✨
Step 1
Pick one simple craft you can teach in a short video like a paper bookmark a tiny card or a simple bracelet.
Step 2
Gather only the craft materials you will need from the Materials Needed list.
Step 3
Plan three short parts for your video: a quick intro a how-to sequence and a final reveal.
Step 4
Write a one or two sentence intro and one short sentence for each how-to step as your script.
Step 5
Set up a tidy workspace with the plain cloth background and good light so viewers can see your hands clearly.
Step 6
Practice making the craft once while timing yourself to keep the demo about 30 to 60 seconds.
Step 7
Record the video keeping the camera steady and showing each step slowly and clearly.
Step 8
Re-record any part that is too blurry too fast or that you stumble over.
Step 9
Edit the clips to trim extra footage add short titles for each step and speed up any repetitive parts.
Step 10
Remove or blur any personal details in the video such as full name address or school from the shots.
Step 11
Write a short title and friendly description that do not include your real name or location.
Step 12
Show the finished video to an adult and ask for their approval and safety check.
Step 13
Share your finished tutorial on DIY.org.
Help!?
If I don't have the exact craft materials on the Materials Needed list (like beads or a plain cloth background), what can I substitute?
You can substitute beads with painted pasta or rolled paper beads, use yarn or ribbon instead of string for a bracelet, and replace the plain cloth background by taping a large sheet of plain white poster board to a wall when you set up your tidy workspace.
My recording came out blurry or too shaky—how can I fix that during recording or in editing?
Prop your phone on a stack of books or a tripod and add a desk lamp for clearer footage while recording, then follow the instructions to re-record any blurry parts or trim and stabilize clips during editing.
How can I adapt the activity for younger kids or older kids?
For younger kids, pick the simplest craft, have an adult help with scissors and recording while the child practices one timed 30–60 second run, and for older kids, have them write a concise three-part script, self-edit clips, and add step titles in the edit.
What are simple ways to extend or personalize the tutorial beyond the basic instructions?
Personalize the video by decorating the plain background with a small banner, adding a short voiceover or music and step titles during editing, showing one or two variations of the finished craft in the final reveal, and then write a friendly anonymous description before sharing on DIY.org.
Watch videos on how to become a DIY influencer
10 Creative and Easy Kids Craft | Fun Crafts for Kids | Handmeyd Treasures
4 Videos
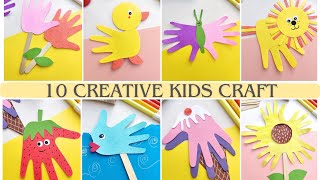
10 Creative and Easy Kids Craft | Fun Crafts for Kids | Handmeyd Treasures
Mind-Blowing DIY Crafts Your Kids Will Actually Love
Fun and Easy DIY Craft Ideas for Kids | Recycled Crafts and Indoor Games

Build & Grow Your CRAFT YouTube Channel: Essential Tips & Tricks for Beginners (Earnings included!)
Facts about DIY video creation for kids
🎥 The very first YouTube video, “Me at the zoo,” was uploaded in April 2005 by co-founder Jawed Karim.
📺 Around 500 hours of video are uploaded to YouTube every minute — more than any single person could watch in a lifetime!
✂️ The DIY (do it yourself) spirit predates the internet — people have been sharing homemade tips and tricks for centuries.
🔒 Most social platforms ask users to be at least 13 years old, so always check rules and ask a grown-up before posting.
🎬 YouTube Shorts (short vertical videos) launched in 2020 and helped short DIY tutorials spread and go viral quickly.
How do I help my child make a short DIY tutorial video?
What materials do I need to become a DIY influencer with my child?
What ages is the 'Become a DIY Influencer' activity suitable for?
What are the benefits and safety tips for kids making DIY tutorial videos?
