Drawing A Kid
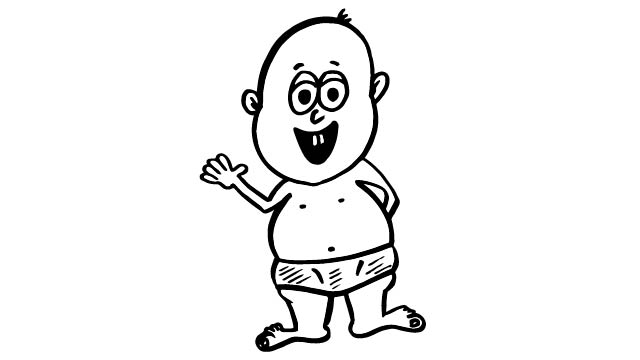
Draw a child character step by step using basic shapes, learn proportions, facial expressions, hairstyles, and clothing, then color and share your finished illustration.

Drawing Apps
Step-by-step guide to drawing a kid
Step 1
Gather your materials and place the paper and pencil in front of you.
Step 2
Lightly draw a medium circle near the top third of the page for the head.
Step 3
Draw a vertical center line down from the head and then draw an oval for the torso centered on that line to make a simple body guideline.
Step 4
Draw two straight lines from the sides of the torso for the arms and two straight lines from the bottom of the torso for the legs.
Step 5
Draw small ovals at the ends of the arm and leg lines to mark the hands and feet.
Step 6
Draw light face guideline lines: a horizontal eye line across the middle of the head and a line halfway between the eye line and chin for the nose.
Step 7
Draw two eyes on the eye line using circles or ovals and add pupils.
Step 8
Draw a small nose on the nose guideline and a mouth below it that shows the expression you choose.
Step 9
Add eyebrows above the eyes and draw ears on the sides of the head aligned with the eye and nose lines.
Step 10
Sketch a hairstyle using simple shapes that match your character’s personality.
Step 11
Draw clothing shapes over the torso like a shirt and pants or a dress and add one or two simple details such as buttons or a collar.
Step 12
Trace your final drawing lines neatly with the black marker and let the ink dry.
Step 13
Carefully erase the remaining pencil guidelines so only your clean drawing remains.
Step 14
Color your character using your coloring materials and add any extra patterns or shading you like.
Step 15
Share your finished illustration on DIY.org.
Help!?
What can I use if I don't have the black marker called for in the tracing step?
For step 12, substitute a dark blue or black gel pen, a fine-tip felt pen, a waterproof fineliner, or simply press lightly with a sharp graphite pencil and go over it again later to mimic the black marker finish.
My marker smudged or the pencil marks won't erase after tracing — how do I fix that?
To prevent bleeding and ensure clean erasing after step 12, place a scrap sheet under the page, use heavier paper or a fineliner, let the ink dry completely, then gently erase the remaining pencil guidelines in step 13 with a soft eraser.
How can I change the activity for younger or older kids?
For younger children simplify steps 2–5 into big shapes and use chunky crayons on thicker paper while older kids can add clothing details from step 11, experiment with shading in step 14, and use finer tools when tracing in step 12.
How can we make the finished drawing more interesting or personalized?
Extend step 14 by adding a background scene, props, mixed-media textures (stickers or fabric), custom patterns on clothing, or photograph and post the result to DIY.org in step 15 to share your unique character.
Watch videos on how to draw a kid
How to ACTUALLY Start Drawing? (for beginners)
4 Videos

How to ACTUALLY Start Drawing? (for beginners)
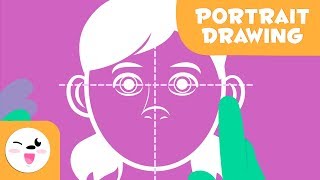
Learn how to draw portraits - How to draw a face step-by-step - Easy tutorial for kids
How to Draw One-Point Perspective - Easy Art Lesson for Kids
Fun and Simple Drawing for Kids||Learn to Draw animals||Step-by-Step.
Facts about character drawing for kids
🎯 Artists often start with simple shapes (circles, ovals, rectangles) to build a whole character quickly.
✏️ Cartoon kids are usually drawn shorter in 'head counts' — about 4–6 heads tall — to look childlike and cute.
😊 A tiny eyebrow lift or a small mouth curve can completely change a character's emotion — tiny tweaks, big feelings!
🎨 Swapping color palettes changes mood fast: warm tones feel energetic, cool tones feel calm and gentle.
🖼️ Many popular character styles exaggerate features (like big eyes or round cheeks) to make expressions clearer and more lovable.
How do you draw a child character step by step?
What materials do I need to draw a child character?
What ages is this activity suitable for?
What are the benefits and variations of drawing kid characters?
