Click a Happy Photo
Take cheerful photos using a camera or phone, arrange simple props and poses, practice framing, lighting, and friendly direction to capture happy expressions.


Step-by-step guide to take happy photos
Photo Creator Instant Camera
Step 1
Find a bright spot near a window or a lamp to use for your photos.
Step 2
Spread a plain sheet or blanket on a wall or the floor to make a clean background.
Step 3
Use tape or clothespins to secure the background so it stays smooth.
Step 4
Gather a few small props like a hat a scarf or a stuffed toy.
Step 5
Choose one or two props you want to use for your first photos.
Step 6
Place a chair or stool in front of the background for the person who will be photographed.
Step 7
Ask your helper or model to sit on the chair.
Step 8
Move the model about three big steps away from the background.
Step 9
Ask the model to try three different happy expressions such as a big smile a playful laugh and a surprised grin.
Step 10
Hold your device horizontally so your photos look wide and friendly.
Step 11
Adjust the light by moving the model or the lamp until the face is evenly lit with no strong shadows.
Step 12
Take at least six photos while trying different angles like high eye-level and low.
Step 13
Pick your favorite photo from the ones you took.
Step 14
Share your finished happy photo on DIY.org
Help!?
I don't have a plain sheet or clothespins—what can I use instead to make a smooth background?
Use a plain wall or a large piece of poster board or bedsheet taped with painter's tape, and replace clothespins with binder clips or regular tape to keep the background smooth.
My photos have strong shadows or the face isn't evenly lit—what should I try from the 'Adjust the light' step?
Move the model closer to the window, add a second lamp as a fill light opposite the main light, or hold a white poster board under the face as a reflector until the face is evenly lit with no strong shadows.
How can I adapt this activity for younger toddlers or older kids using the seating and expression steps?
For toddlers, photograph them seated on the floor or in a parent's lap with one soft prop and only one or two quick smiles, while older kids can sit on the chair three big steps from the background and try all three expressions and multiple angles.
How can we enhance or personalize the photo after we 'Pick your favorite photo' and before we 'Share on DIY.org'?
Create a theme with coordinated props, edit the chosen photo with simple filters or stickers, print and decorate a homemade frame, and then share your favorite on DIY.org.
Watch videos on how to take happy photos
How to Take BETTER Pictures With The Canon PowerShot ELPH 360 HS??? (TIPS and WALKTHROUGH)
3 Videos

How to Take BETTER Pictures With The Canon PowerShot ELPH 360 HS??? (TIPS and WALKTHROUGH)
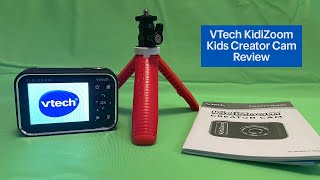
VTech KidiZoom Creator Cam for Kids Review

masterbee Kid Camera Instant Print Photo Birthday Gifts for Girls and Boys Review
Facts about photography for kids
📸 Around 90% of the photos taken today are captured on smartphones, making mobile photography the most common way to snap pictures.
😊 A genuine smile (called a Duchenne smile) lights up the eyes as well as the mouth — that eye sparkle makes photos feel happier.
🎨 The rule of thirds places your subject off-center (on imaginary gridlines) to create more balanced and interesting photos.
💡 Soft natural light from a window often produces the friendliest, most even lighting for cheerful portraits with minimal gear.
🎭 Making a quick game, song, or silly face usually helps kids relax and gives you the most natural, joyful expressions to capture.
How do I do the 'Click a Happy Photo' activity with my child?
What materials do I need for 'Click a Happy Photo'?
What ages is 'Click a Happy Photo' suitable for?
What are the benefits of doing 'Click a Happy Photo' with kids?
