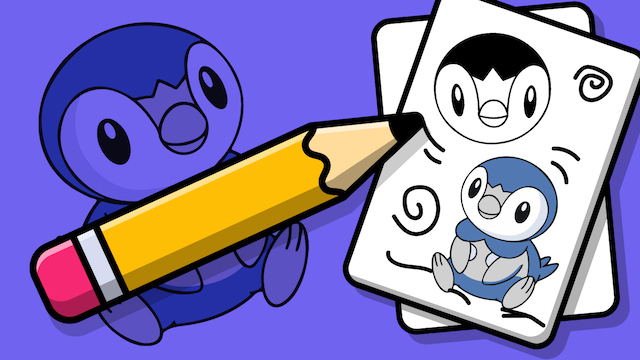
Draw a Pokemon - Piplup
Draw Piplup, the penguin Pokémon, by sketching basic shapes, adding details and coloring. Practice proportions, shading, and imaginative details step by step.

Drawing Apps
Step-by-step guide to Draw a Pokemon - Piplup
Step 1
Place your paper on a flat surface and hold your pencil ready.
Step 2
Lightly draw a medium circle near the top of the paper for Piplup's head.
Step 3
Lightly draw a slightly larger oval that overlaps under the head circle for the body.
Step 4
Draw a rounded semicircle inside the lower part of the body oval to mark Piplup's white belly.
Step 5
Draw two short rounded flippers on each side of the body.
Step 6
Draw two small oval feet at the bottom of the body.
Step 7
Lightly draw a vertical line down the head and a horizontal line across it to help place the face.
Step 8
Draw two big round eyes on the horizontal guideline and add small inner circles for shiny highlights.
Step 9
Draw a small triangle-shaped beak centered between the eyes and a tiny curved line under it for a smile.
Step 10
Add Piplup's three-point crest at the top of the head.
Step 11
Draw the white mask shape around the eyes and two small rounded chest markings above the belly.
Step 12
Gently erase the extra pencil guidelines that are no longer part of your final drawing.
Step 13
Trace over the final pencil lines with a black pen or fineliner and let the ink dry.
Step 14
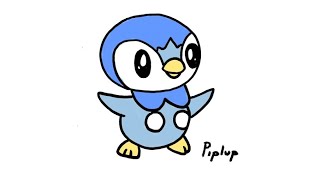
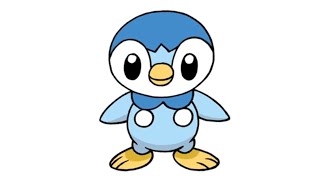
Color Piplup using blue for the body light-blue for the face white for the belly and orange for the beak and feet and add darker blue shading where the body curves.
Step 15
Share your finished Piplup drawing on DIY.org.
Help!?
What can I use instead of a black pen/fineliner or special coloring tools?
If you don't have a black pen/fineliner for the tracing step, use a thin-tip permanent marker or a sharpened dark colored pencil, and swap colored pencils for markers, crayons, or watercolors to color Piplup's blue, light-blue, white, and orange areas.
My Piplup's eyes or beak look crooked—how do I fix placement mistakes?
Realign the two big round eyes and the triangle-shaped beak using the light vertical and horizontal guidelines on the head before you erase them, and if ink smudges after tracing, wait for the ink to dry or place scrap paper under your hand while inking.
How can I adapt this drawing activity for different ages or skill levels?
For younger children simplify by drawing one merged circle/oval for head and body and pre-sketching the flippers and feet to color, while older kids can add darker blue shading where the body curves, refine the three-point crest, and ink fine details during the tracing step.
How can we personalize or enhance our finished Piplup drawing?
Extend the activity by adding a background like waves or ice, drawing a friend Pokémon, applying glitter or textured paint to the white belly, or increasing contrast with darker blue shading before sharing your finished Piplup on DIY.org.
Watch videos on how to Draw a Pokemon - Piplup
How to Draw Piplup Pokemon I Easy Drawing Step by Step
4 Videos
How to Draw Piplup Pokemon I Easy Drawing Step by Step
Draw Piplup in 2024 || EASY Pokemon Tutorial for Beginners
How To Draw PRINPLUP POKEMON #394 | Generation 4
How to draw a pokemon| Easy drawing for kids & beginners| Simple pokemon step by step drawing
Facts about character drawing for kids
🐧 Piplup is a Water-type Pokémon introduced in Generation IV and is one of the Sinnoh starter Pokémon.
🎨 Piplup's palette is mostly blue and white with yellow beak and feet — perfect for practicing color blocking and shading.
✏️ Many artists begin characters with 3–5 basic shapes (circles, ovals, triangles) to get proportions right before adding details.
🧸 Piplup's head and body are almost the same size — a proportion trick that creates a cute, chibi look.
🔼 Piplup evolves into Prinplup and then Empoleon, so you can practice designing different stages and imaginative variations.
How do I draw Piplup step by step?
What materials do I need to draw Piplup?
What ages is drawing Piplup suitable for?
What are the benefits of drawing Piplup and fun variations?
